
This page is intended as a general guide. Not all machines function the exact same way. Always follow machine or foot specific instructions when available.
Applique Foot
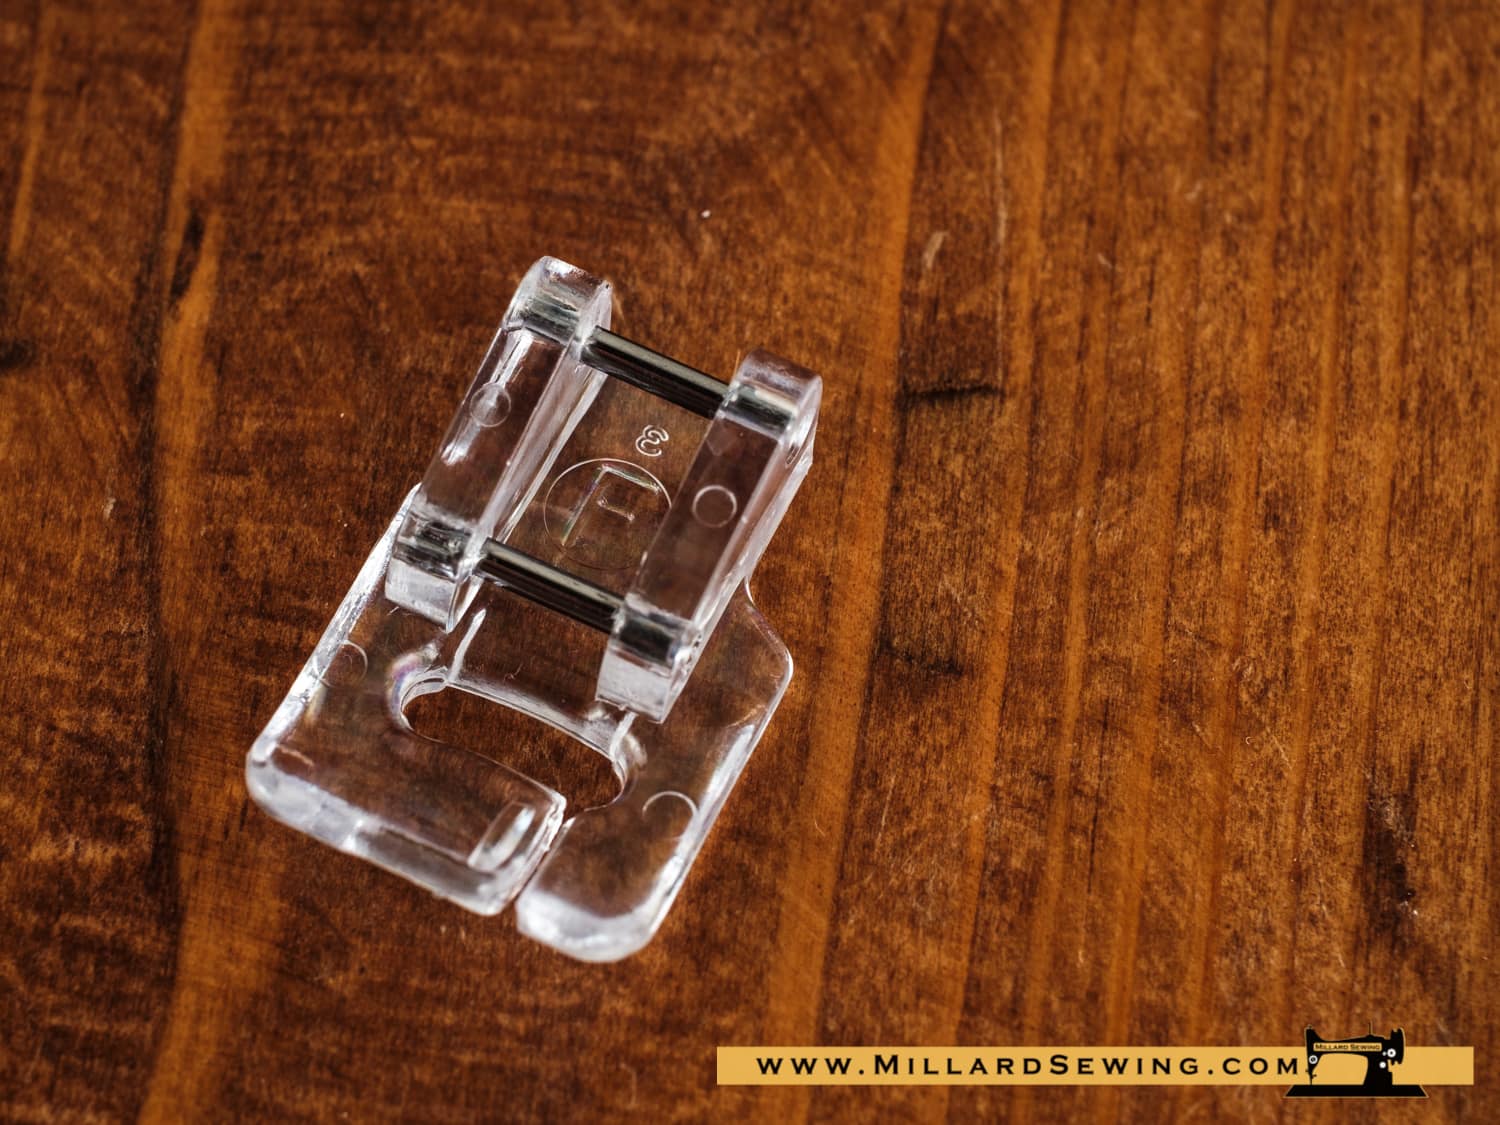
Description:
This presser foot is shorter than most other feet to facilitate handling of curves and corners when sewing applique pieces. Made of clear material for easier viewing as you sew.
Available in clear or metal based on application.
Machine Settings:
- Stitch : Applique stitch or Zigzag stitch
- Thread tension : “Auto” or 3 -5
- Stitch length :1 -2.5
- Stitch width : 2.5-5
Tutorial:
To turn corners, lower the needle at the outer edge of the applique and raise the presser foot. Pivot the fabric around the needle and lower the presser foot. Start sewing in the new direction.
Shop These Feet
Beading Foot
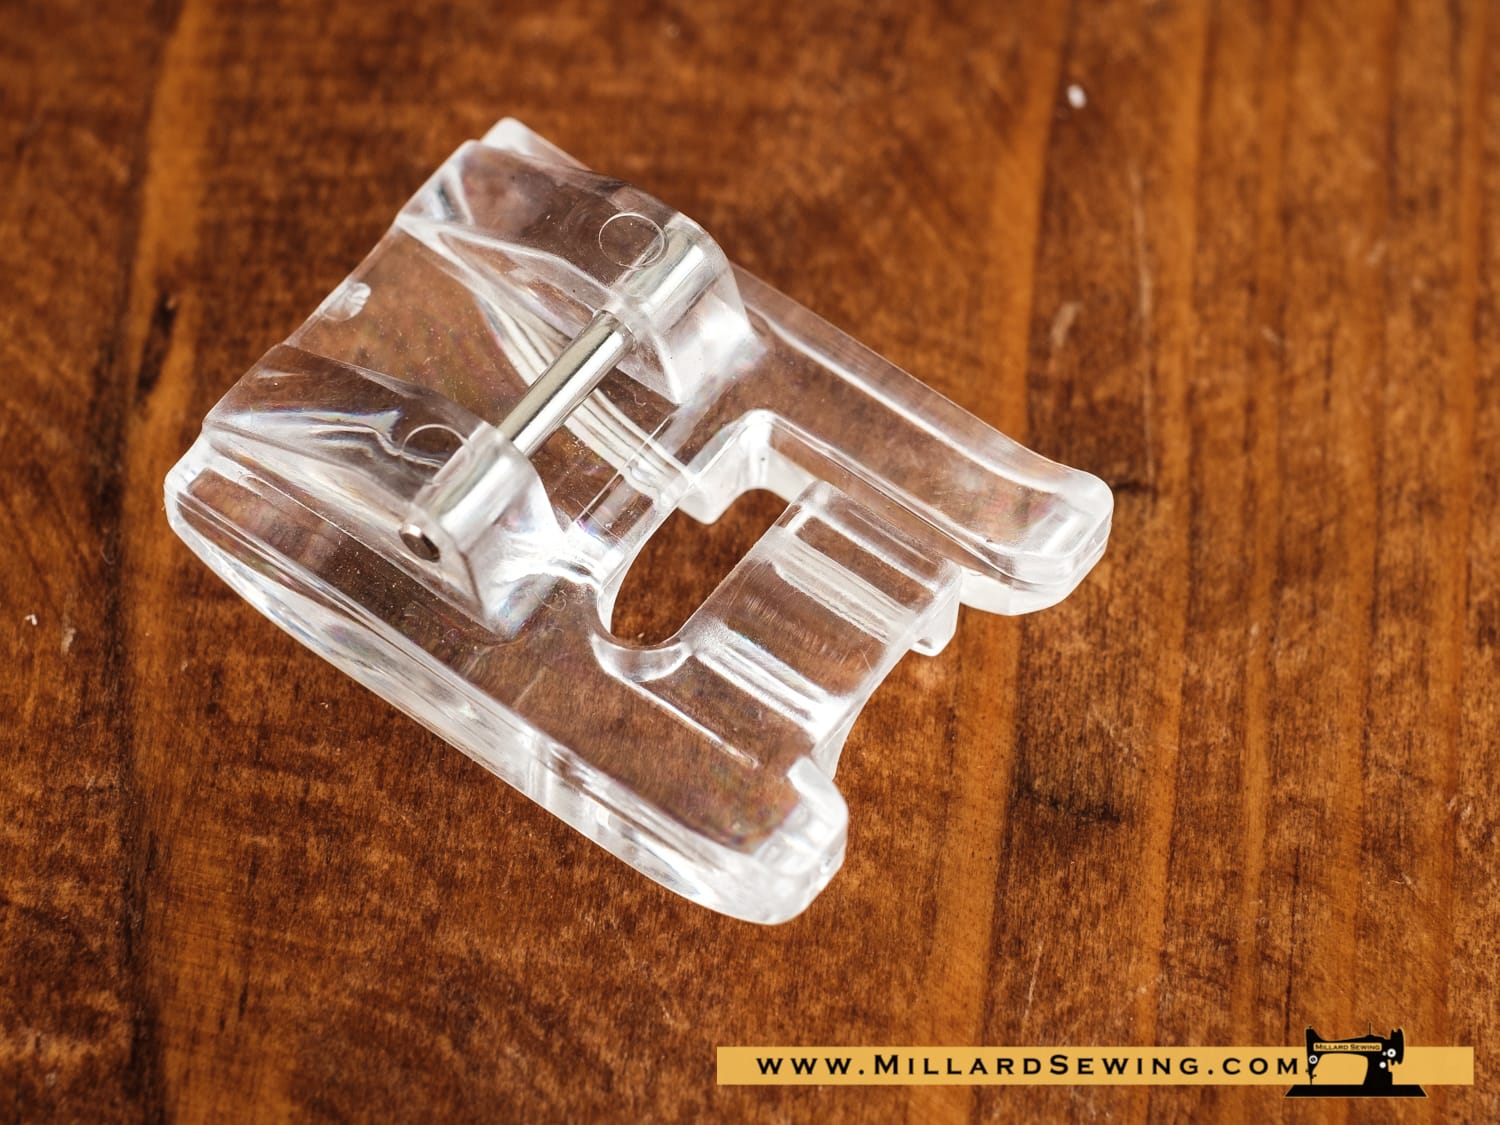
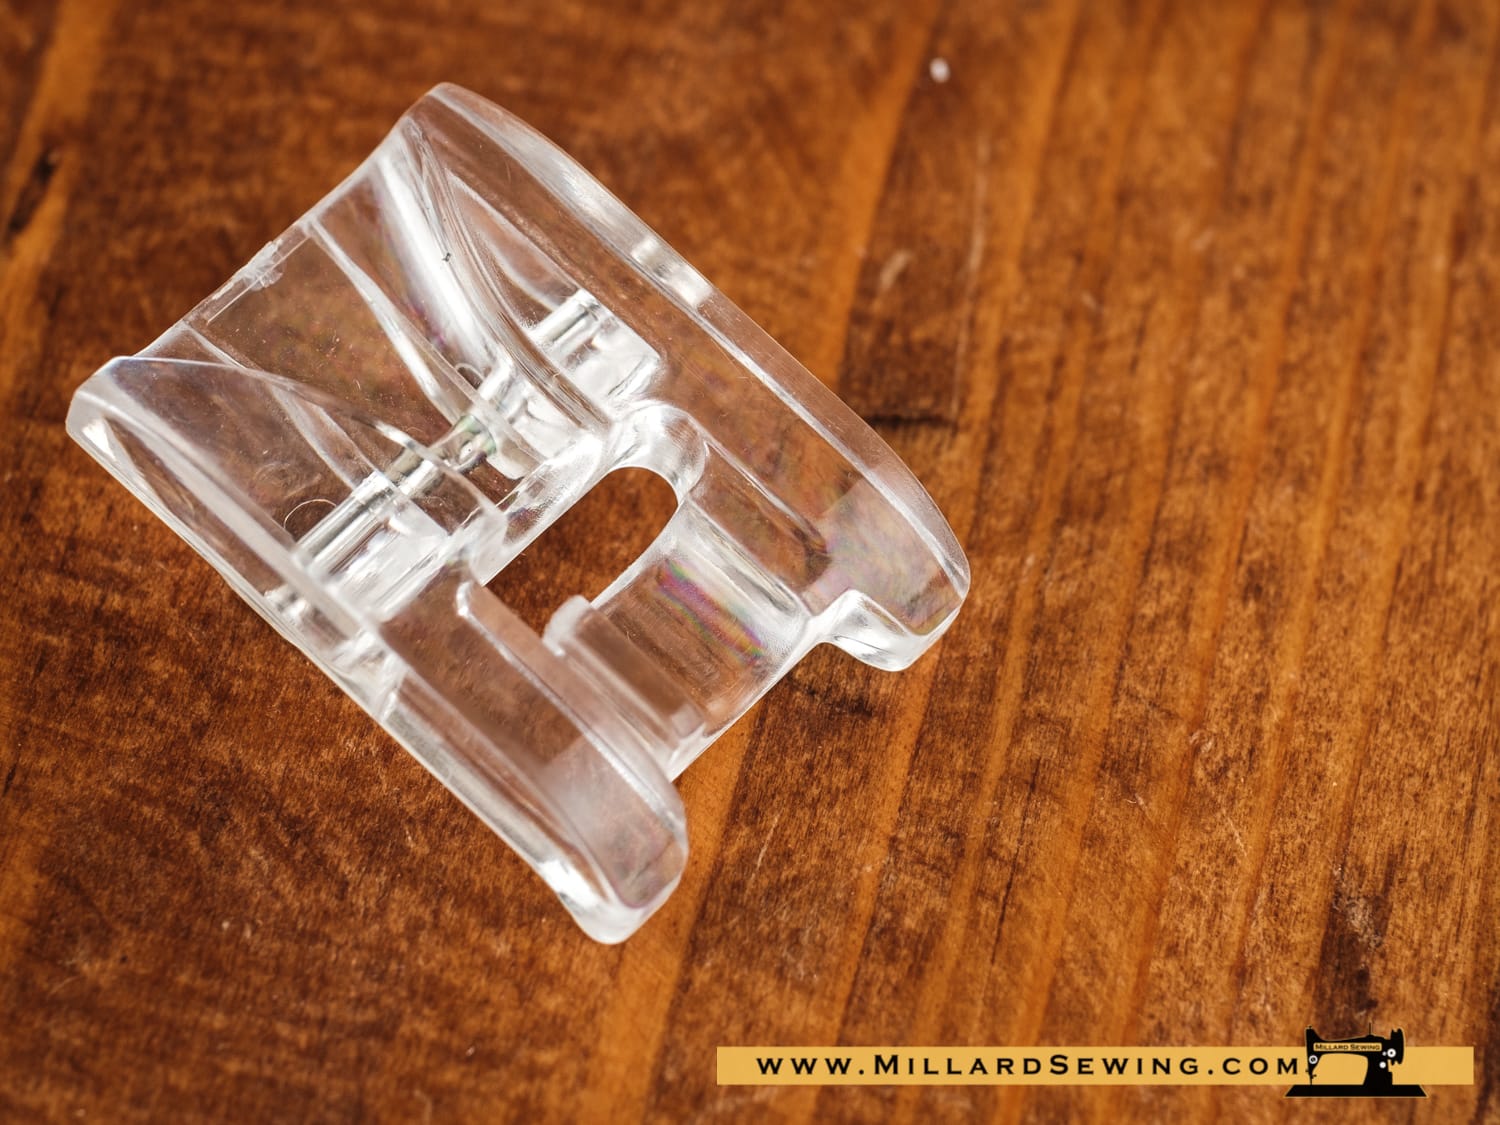
Description:
Sewing on strung beads and pearls has always been tedious, but the beading foot now goes some way to alleviating this task and adds pleasure to embellishing. The beading foot is popular for making bridal and evening wear.
Machine Settings:
- Stitch : Zigzag stitch
- Thread tension : “Auto” or 3 -5
- Stitch length : 1.5
- Stitch width : 2-3
Tutorial:
Draw an outline on the material where the strings of beads or pearls will be attached.
Shop These Feet
Bi-level Foot
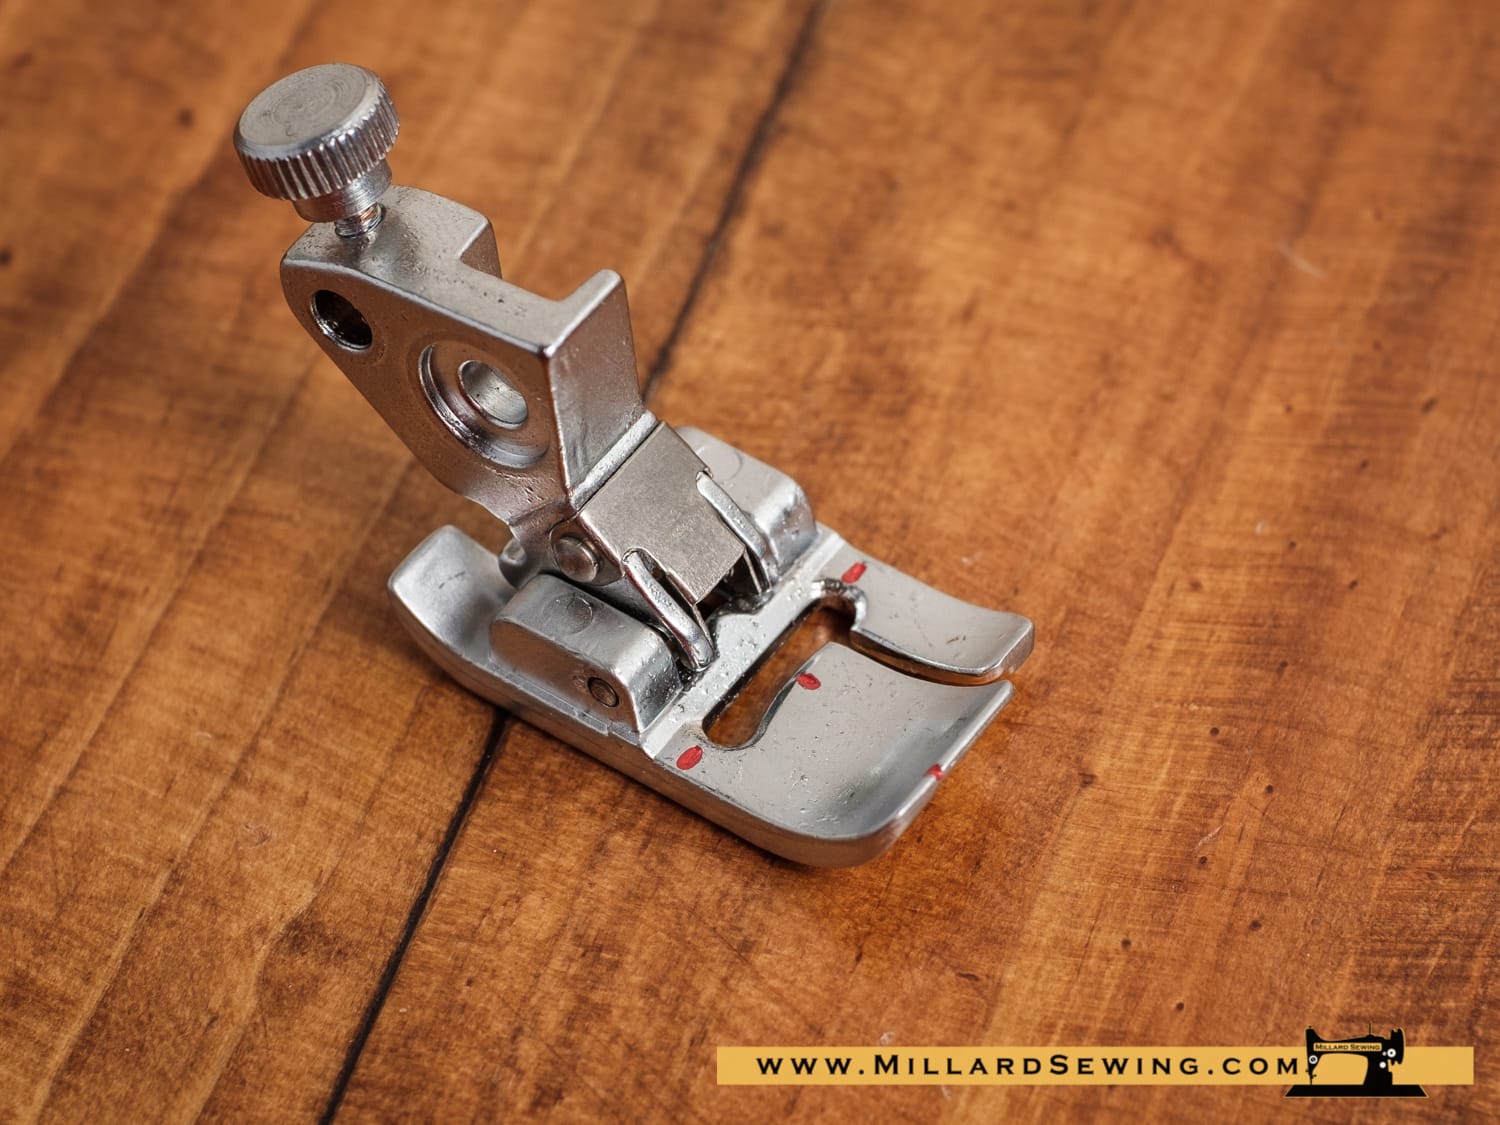
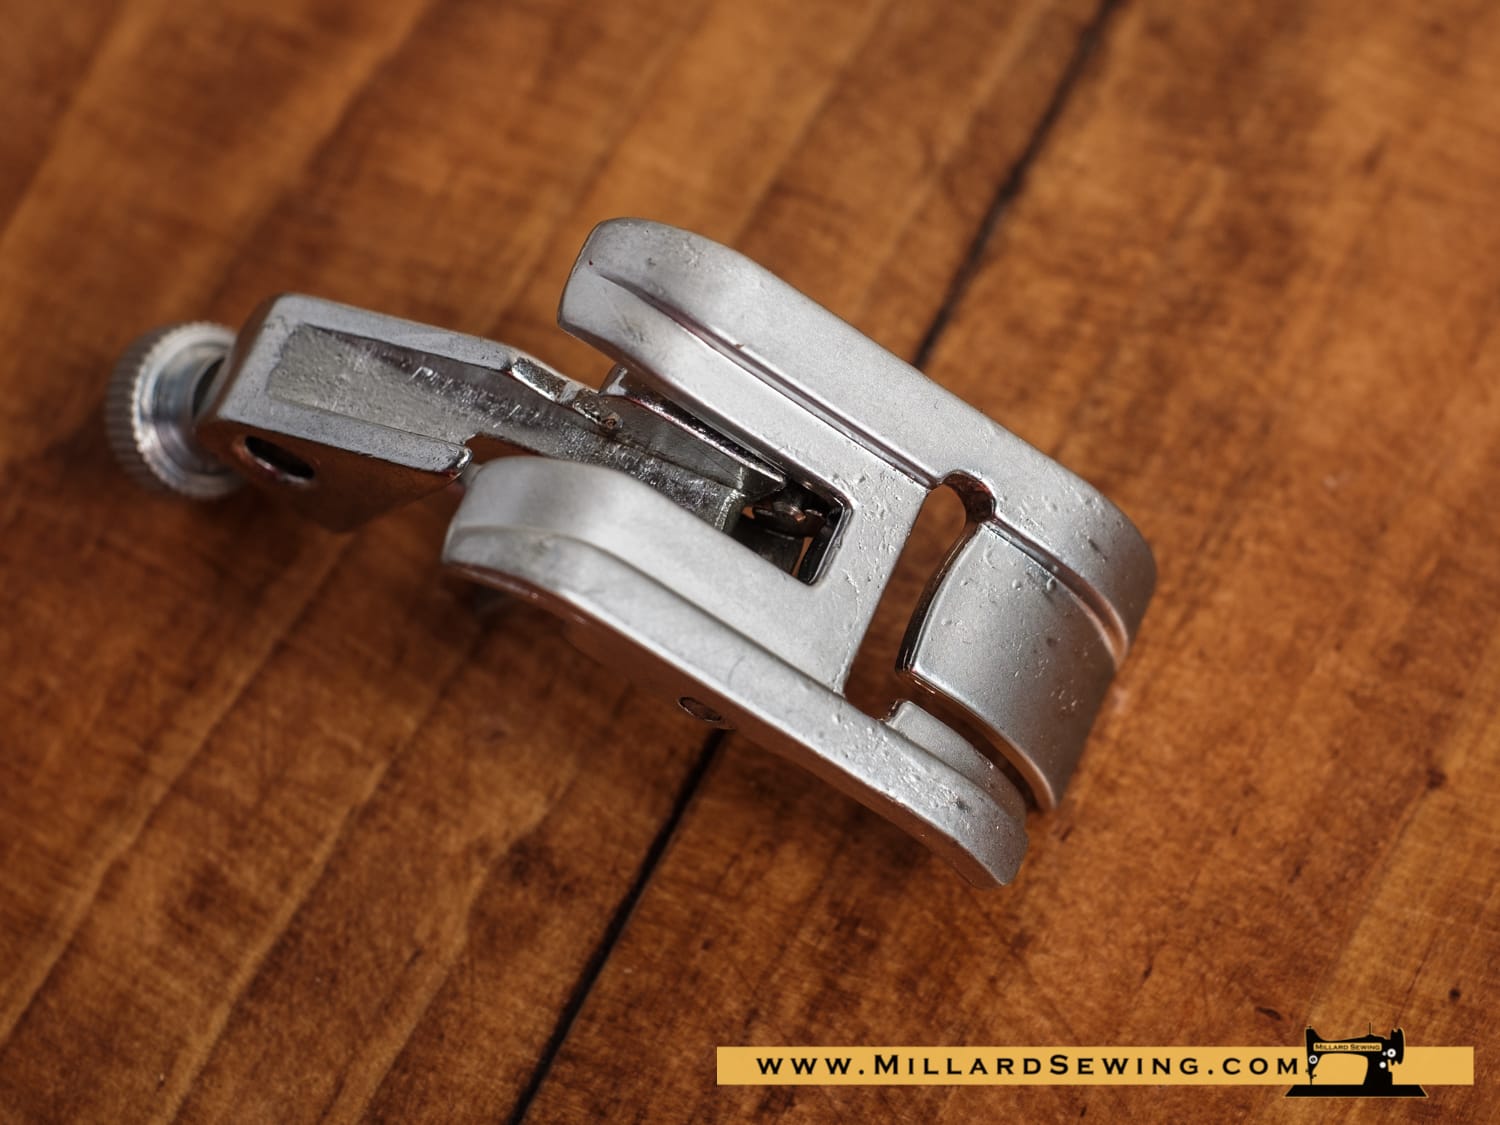
Description:
This foot guides your topstitching and edge stitching perfectly. Thick materials (like wool,
denim or tweed) are beautifully finished.
Machine Settings:
- Stitch : Straight Stitch
- Thread tension : “Auto”
- Stitch length : As desired
- Stitch width : Adjust the needle position to align with the guide line of 1.5, 5 or 8.5 mm from the edge of the fold.
Tutorial:
Fold the seam allowance to one side. Sew while aligning the guide with the edge of the fold.
Shop These Feet
Binder Foot
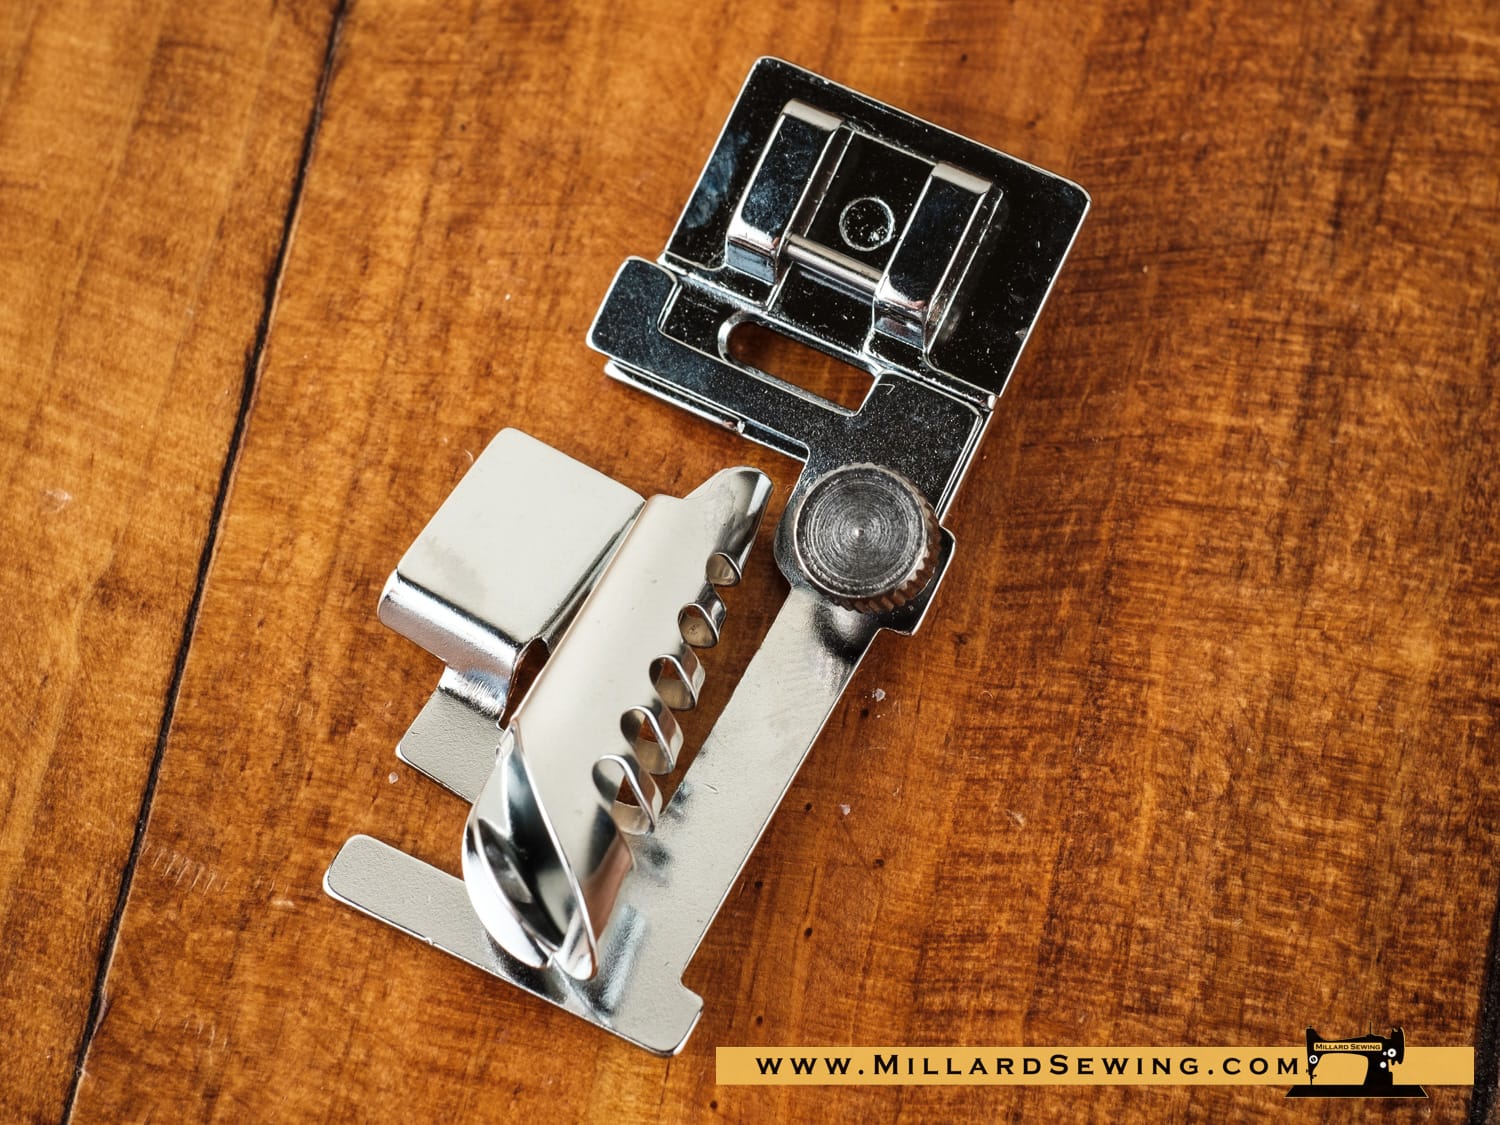
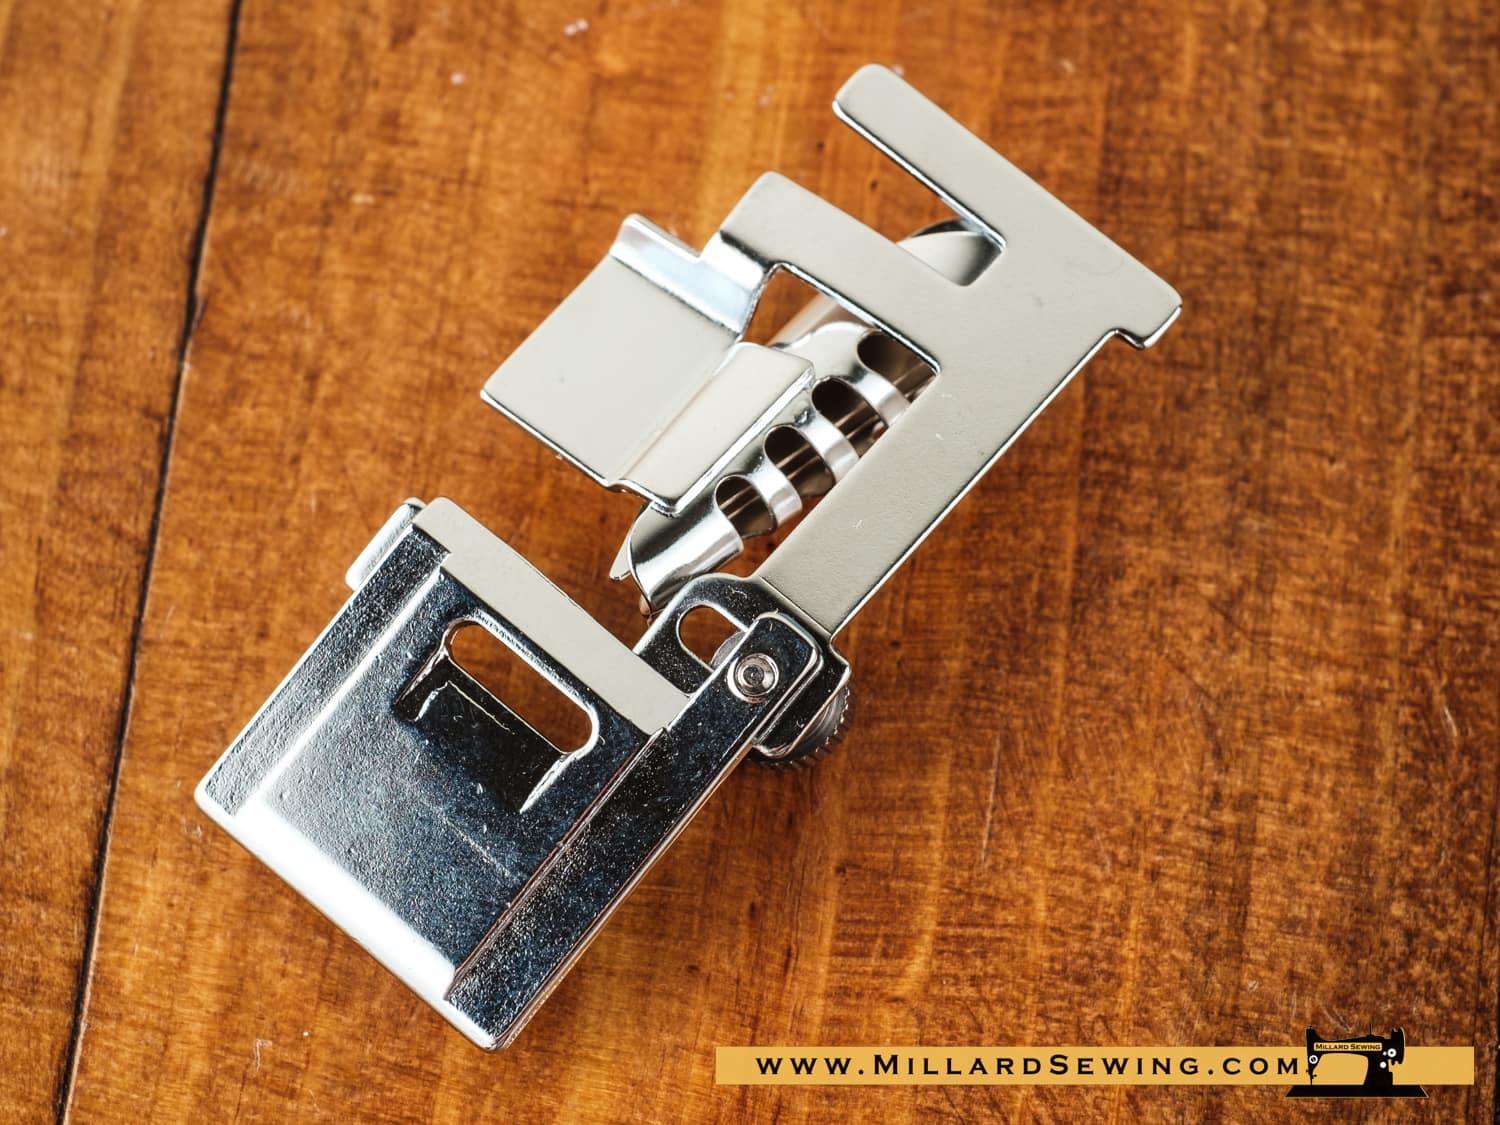
Description:
Ideal for easily finishing a creation by adding bias, this foot is also very useful for reversible garments, edge finishings or the creation of loops and ties. The spiral cone wraps the pre-pleated bias tape and the foot wraps it around the edge of the sewn fabric. Available in various binding sizes.
Machine Settings:
- Stitch : Straight Stitch
- Thread tension : 3-6
- Stitch length : 1-3
- Stitch width : Center Needle Position
Tutorial:
Cut the end of the binding tape diagonally and insert it into the funnel. Pull out the tape end and draw it toward the rear under the foot. *You may use a needle or stiletto to draw the tape through the funnel. Insert fabric. Sew slowly, guiding the edge of the cloth with your middle finger on the finger rest and, while guiding the binding tape through the conical tape guide correctly with your right hand.
Shop These Feet
Blind Hem Foot, Adjustable
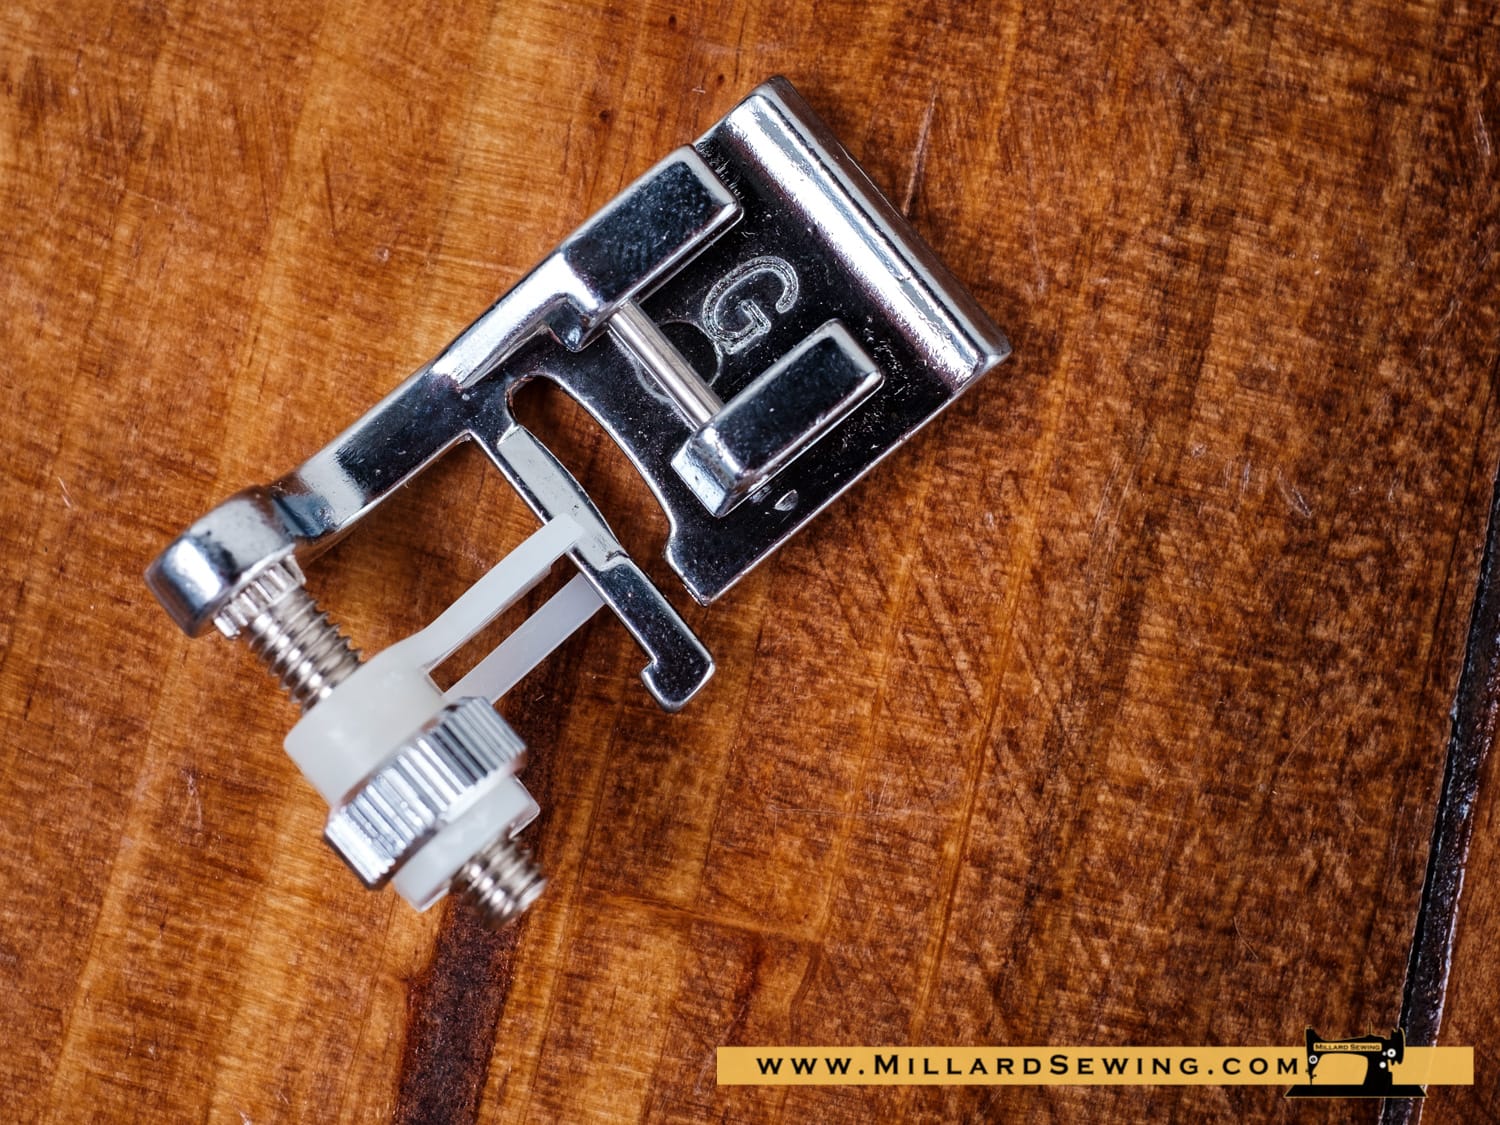
Description:
No matter the fabric weight, the adjustable guide on this foot helps you ensure that the needle catches only one or two fibers of the hem. Adjust the guide for precise topstitching, edgestitching or pintucking. The same use applies for the middle-fixed guide foot that allows you to catch only what is needed for a blind hem.
Adjustable wheel.
Machine Settings:
- Stitch : Blind hem stitch
- Thread tension : 1-4
- Stitch length : 2-4
- Stitch width : 5
Tutorial:
Turn the guide screw and move the sliding guide next to the folded edge. Sew, guiding the folded edge along the sliding guide. For a professional looking hem fold the fabric, reducing the lip to a scant 0.3 cm (1/8″). As you sew, the right hand stitch will fall off the fabric edge forming a chain stitch.
Shop These Feet
Blind Stitch Foot
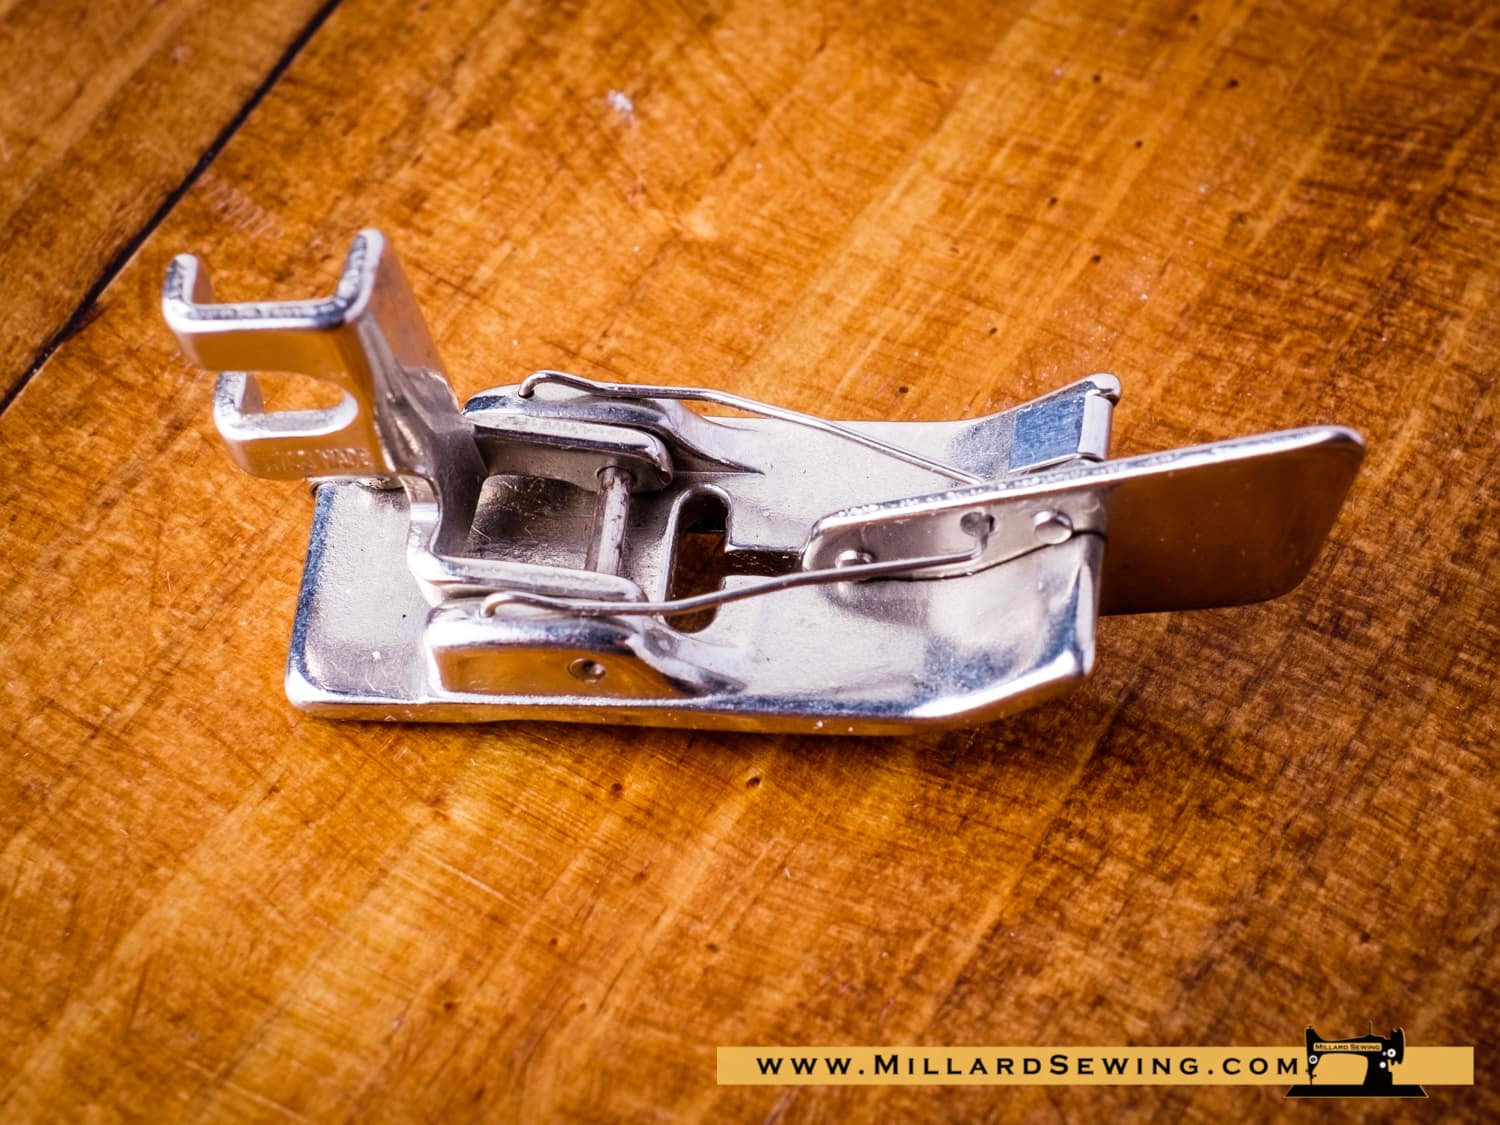
Description:
The adjustable guide on the foot ensures that any weight of fabric is trimmed, overlocked and invisibly hemmed in one quick step. Change the stitch and it becomes a wonderful guide for decorative pintucks, lacy fagoting or flatlocking as seen in ready-to-wear garments.
Machine Settings:
- Stitch length: 3 – 5
- Differential feed dial: 1.0
- Upper Knife: Activated
- Needle plate setting knob: S
Tutorial:
- Replace the foot with the blind stitch foot.
- Fold up the hem allowance and press. Fold
down the hem to the right side of the fabric - Position the fabric with the wrong side up so the folded
edge is to the left side of the cloth guide. - Turn the adjusting screw until the needle catches
only the very edge of the fold. - Sew the hem making sure the needle catches
the edge of the hem.
Shop These Feet
Button Sewing Foot
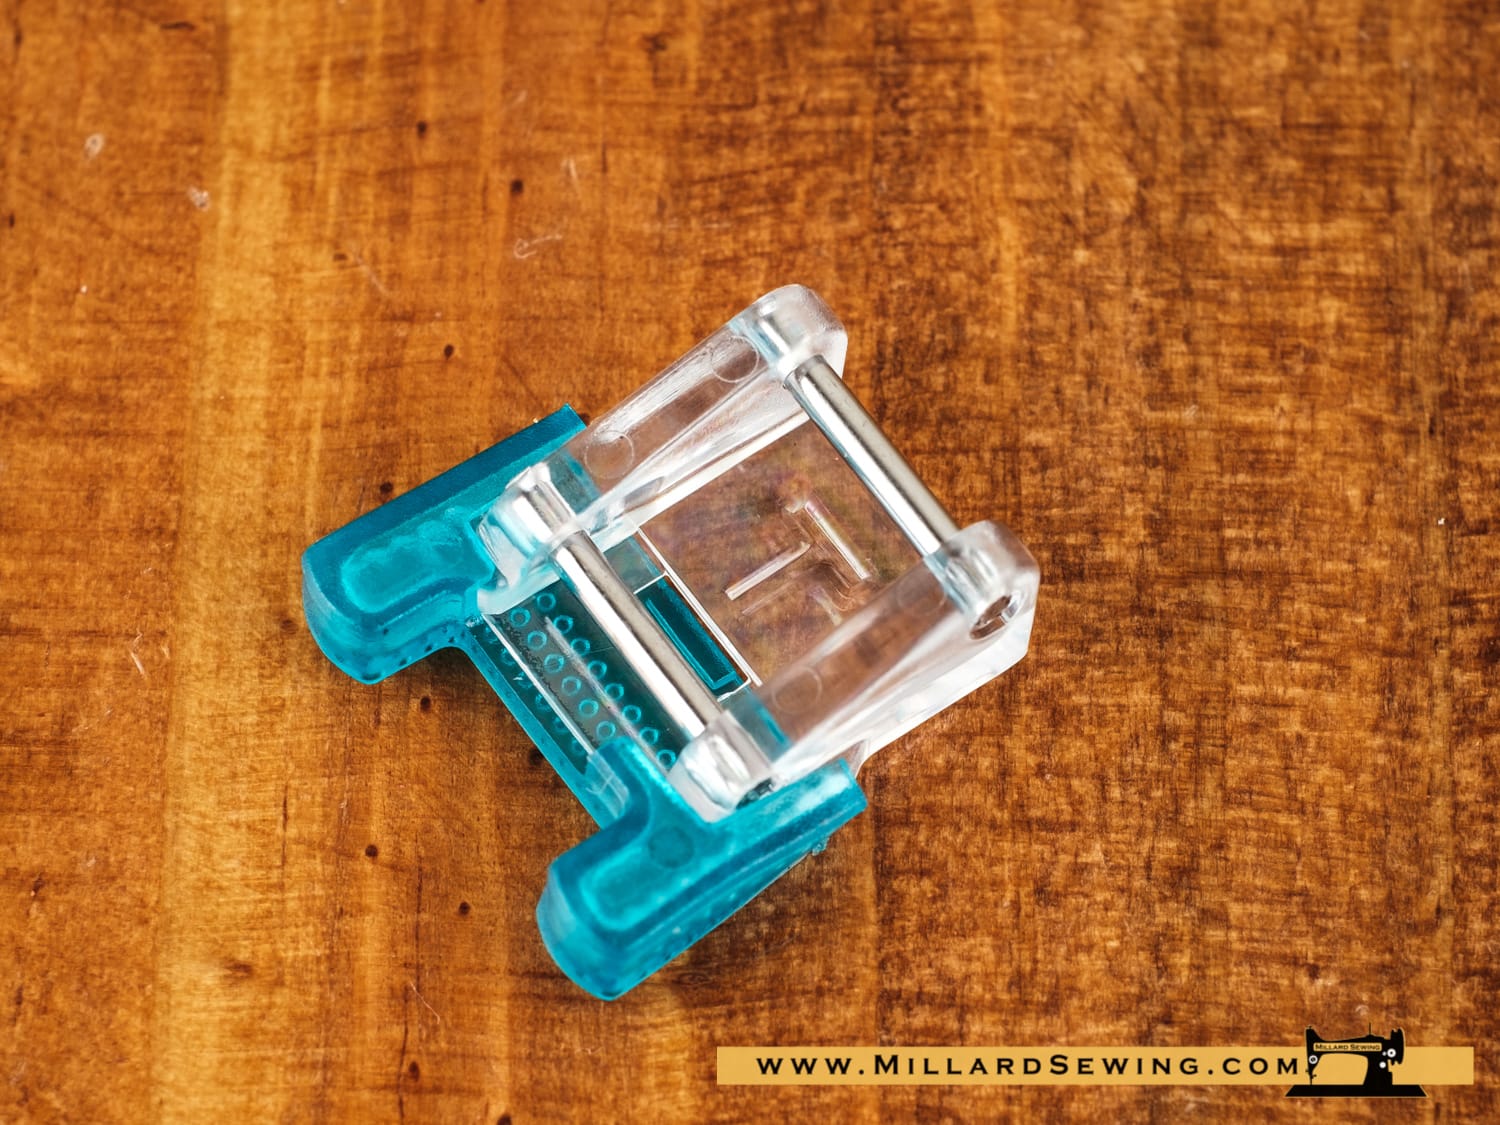
Description:
You can easily and quickly sew any buttons in one step. A thread shank can be created at the same time while attaching the button. Imagine all the possibilities of using buttons beyond their primary function!
Machine Settings:
- Stitch : Zigzag stitch
- Thread tension : 1-3
- Stitch length : 0
- Stitch width : Adjust as necessary
- Feed dog: Down or use a darning plate.
Tutorial:
Unthread the needle thread. Adjust the stitch width so that the needle enters both holes in the button. Place the button on the fabric and lower the needle by turning the handwheel so that the needle enters into the left hole in the button. Align the holes in the button with the foot and lower it to hold the button in place. Turn the handwheel to lower the needle into the right hole in the button. Adjust the stitch width if necessary. Rethread the machine and affix the button with 10 stitches. For multi-hole buttons: Move the needle drop to the next set of holes and repeat as necessary. Note : This style of foot intended for flat buttons only! For shank type buttons or odd shaped buttons please contact us for with any questions prior to purchase.
Shop These Feet
Buttonhole Foot (Four Step)
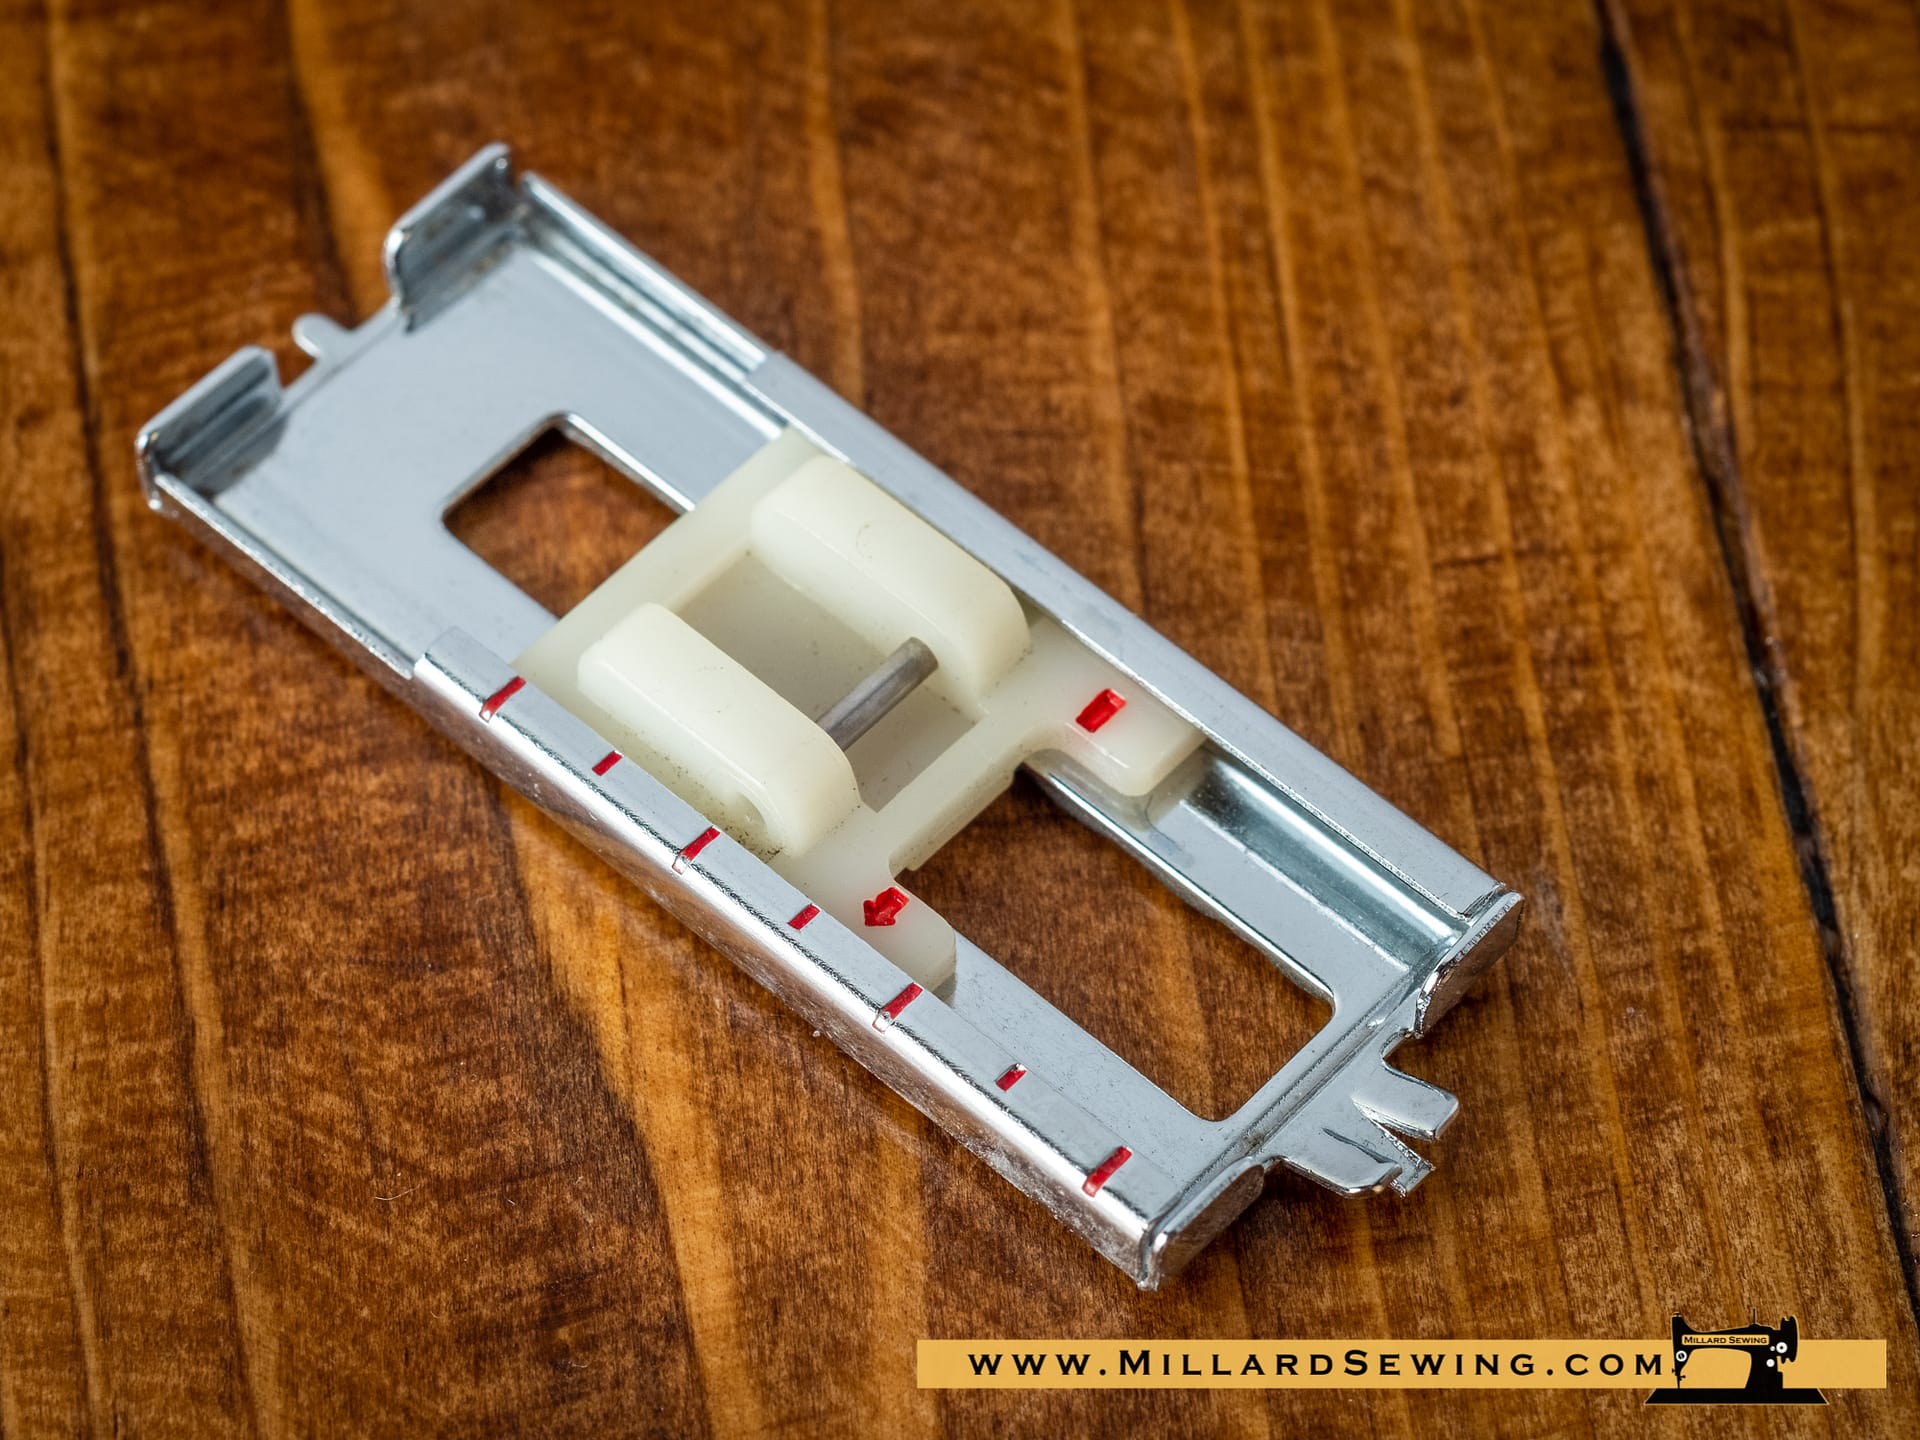
Description:
Used to create uniformly sized buttonholes with a sewing machine featuring a 4-step buttonhole system.
Machine Settings:
- Stitch: Buttonhole stitch
- Thread tension : 1 – 5
- Stitch length : 0.5 – 1
- Stitch width : 5
Tutorial:
- Carefully mark the buttonhole length on fabric.
- Place the fabric under the foot and follow the buttonhole instructions in your owner’s manual.
- Move the slider forward so that the top mark on the slider meets the start mark.
- Line up the markings on the foot with the top of the mark on the fabric.
Shop These Feet
Buttonhole Foot (One Step)
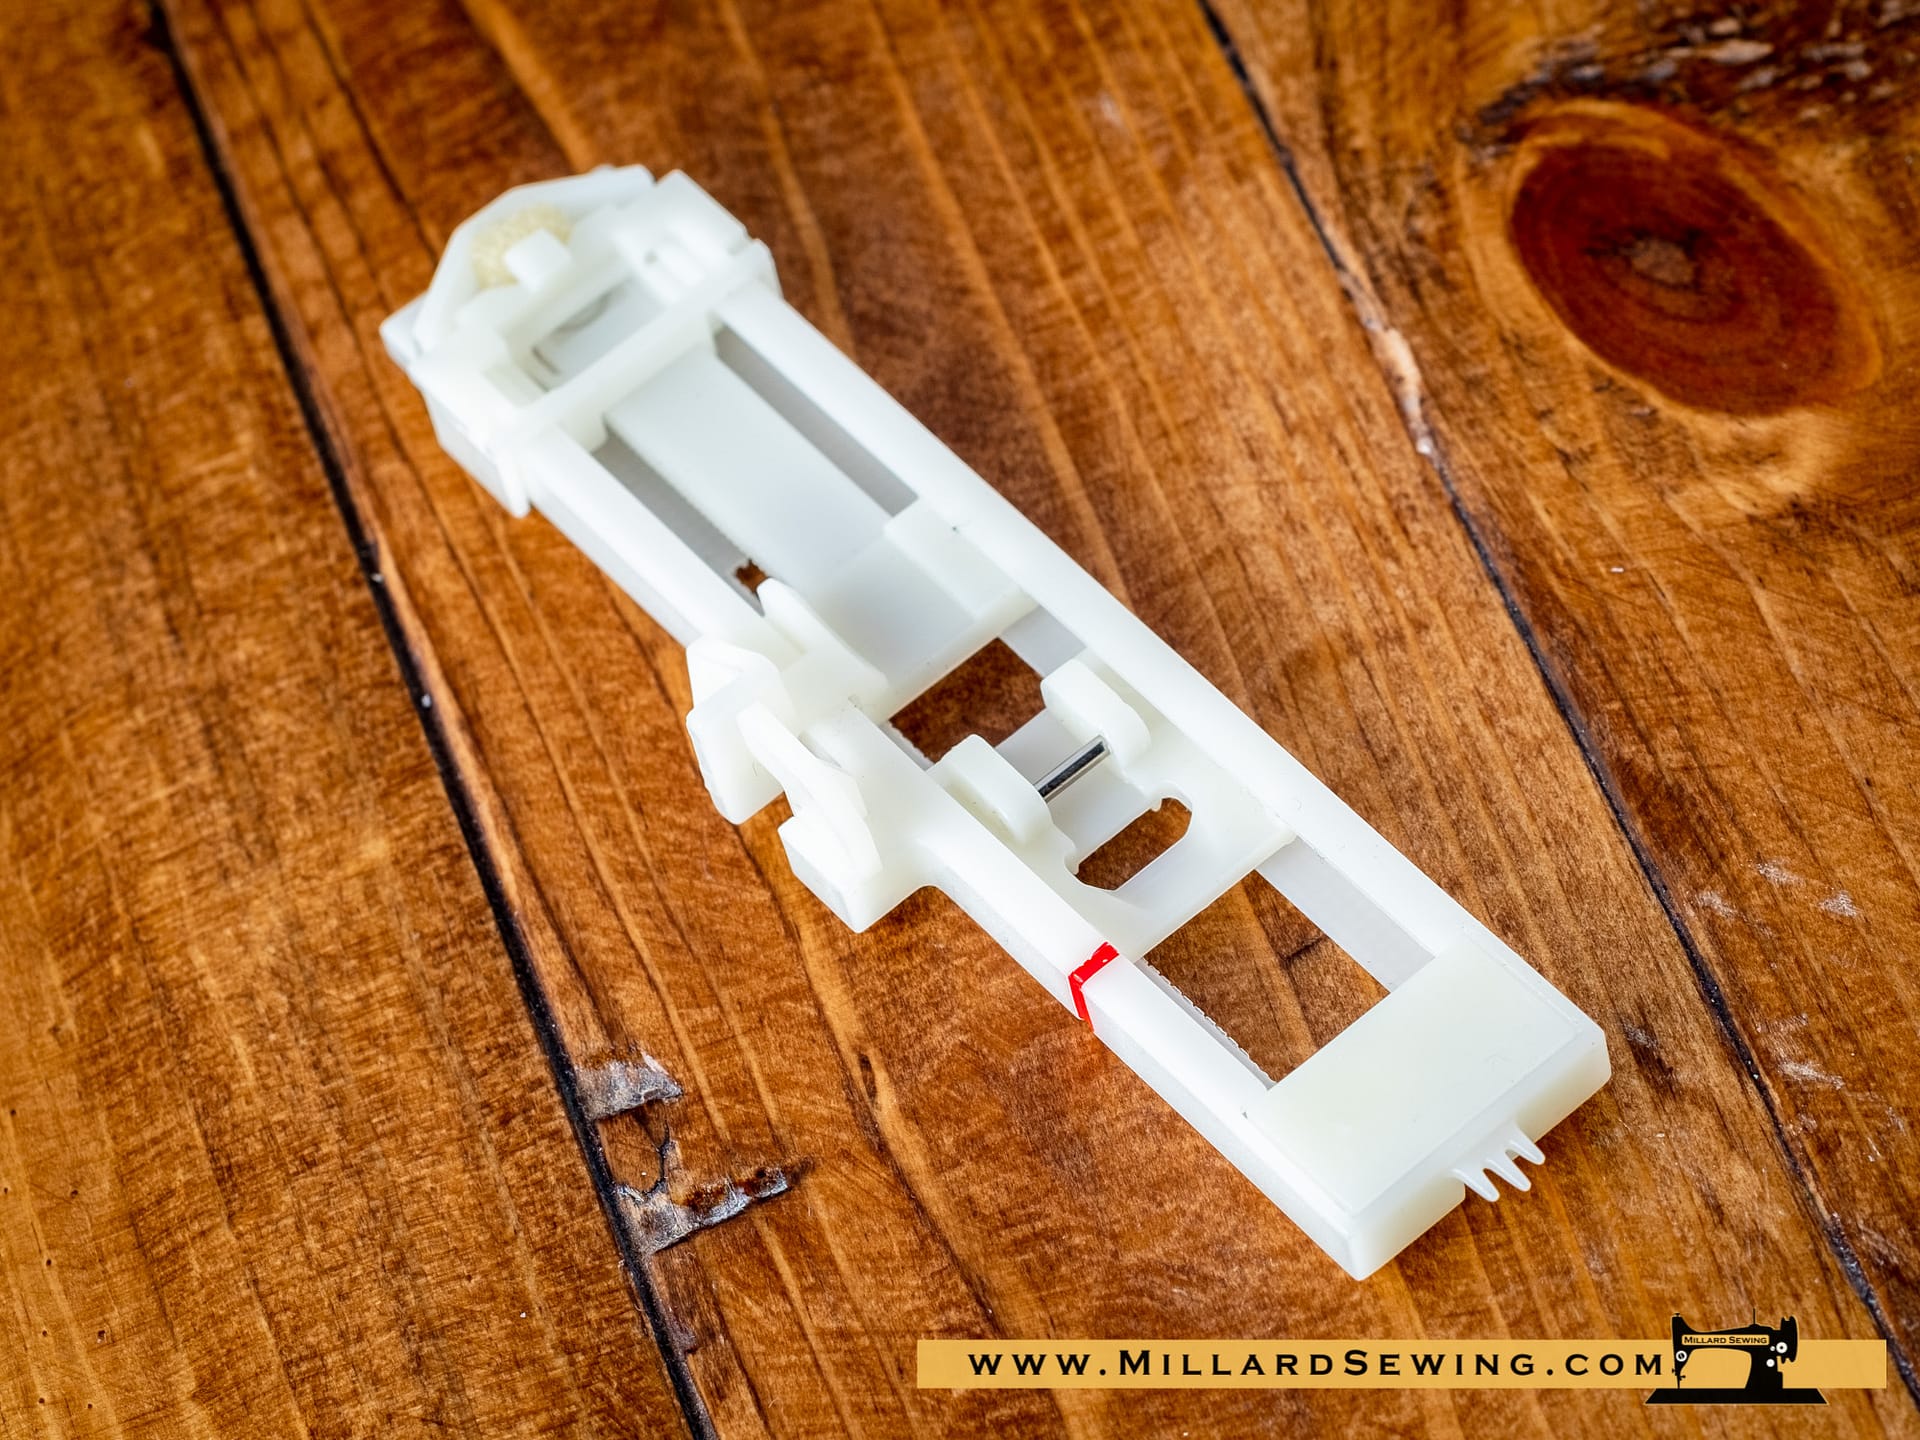
Description:
Place the button in the backspace of the foot to automatically determine the buttonhole size and your sewing machine will automatically sew the corresponding buttonhole thanks to the buttonhole sensor.
Machine Settings:
- Stitch: Buttonhole stitch
- Thread tension : 1 – 5
- Stitch length : 0.5 – 1
- Stitch width : 5
Tutorial:
- Slide the sizer to the end of the sliding buttonhole foot . Place the desired size of button between the sizer and the black piece to hold the button. Tighten the screw securely and remove the button.
- Make a test buttonhole on a sample fabric to make sure the result is as desired. Follow your machines instructions for completing the buttonhole.
Shop These Feet
Cording Foot
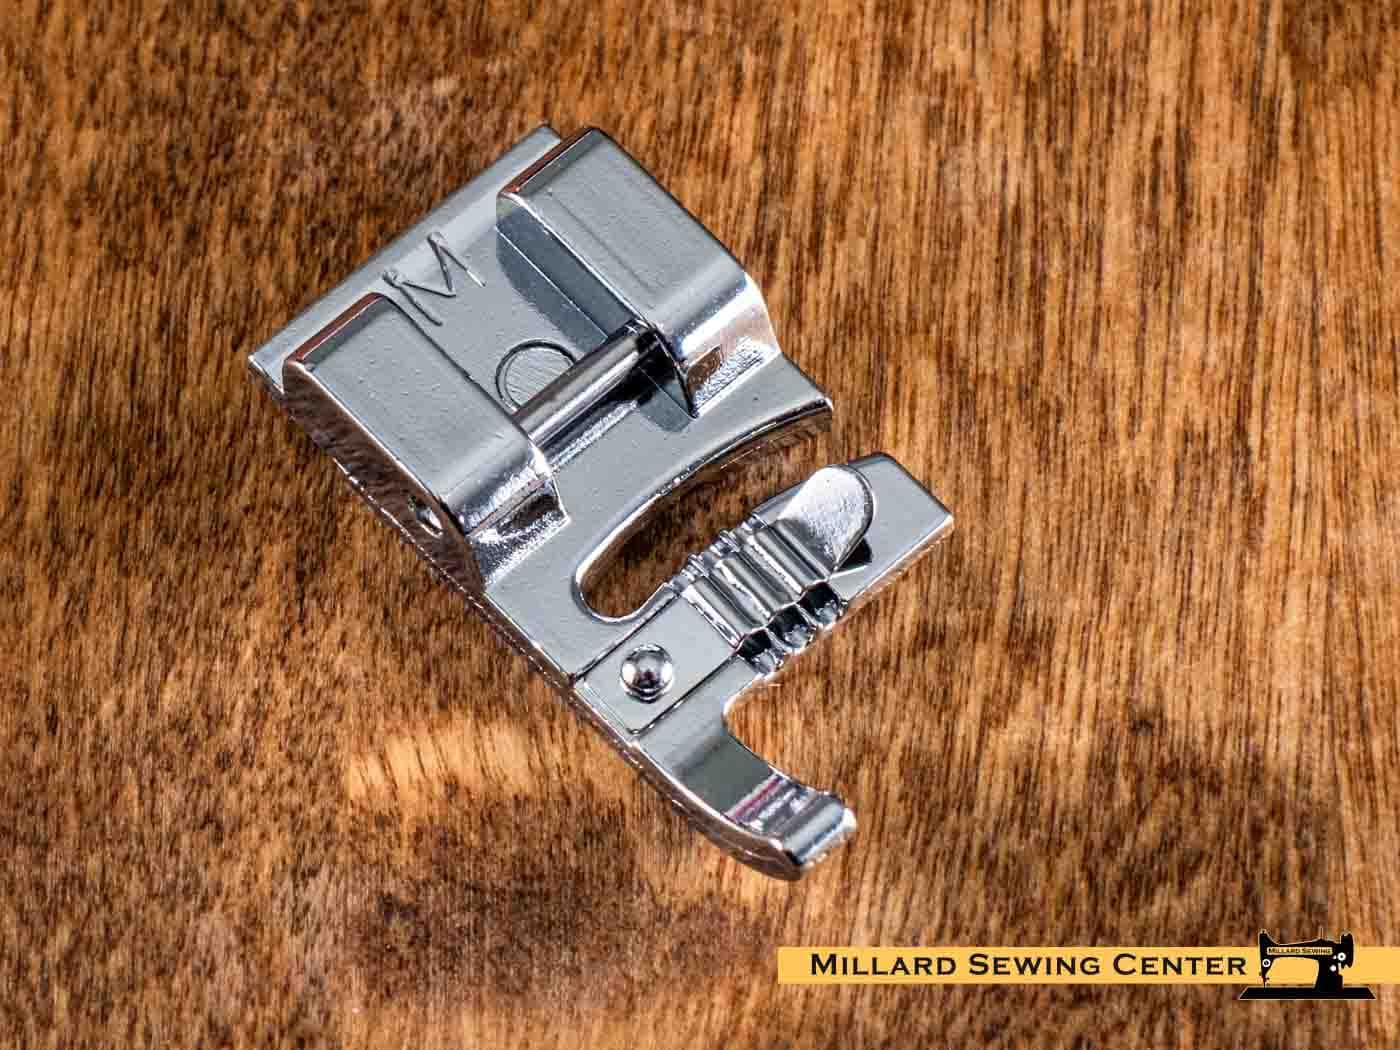
Description:
Used to guide decorative cord, yarn, or heavier thread while the machine stitches over or alongside it. If you want to create fantastic decorative effects on your sewing projects, cording is an excellent option. Using many strands will ensure the boldest impact. Using multiple cords in one color will create a thick solid line. If you use multiple colors, you can get subtle shades or dashing mottled effects for unique results
Machine Settings:
- Stitch patterns: Multiple zigzag stitch or Quilt
- stitches.
- Stitch width: 9
- Sewing speed: Low to middle
Tutorial:
Use the needle threader from the bottom of the
foot for threading the cords through the holes of
the foot.
- Attach the foot with cords inserted.
- Pull the cords approximately 1 inch (2 cm
behind the presser foot. - Pull the needle thread under and to the left
of the foot so as not to tangle the thread with
the cords. - Arrange the cords in the front of the foot so
as not to tangle the cords - Sew while guiding the fabric and cords so as not to tangle the front cords.
Shop These Feet
Darning Foot
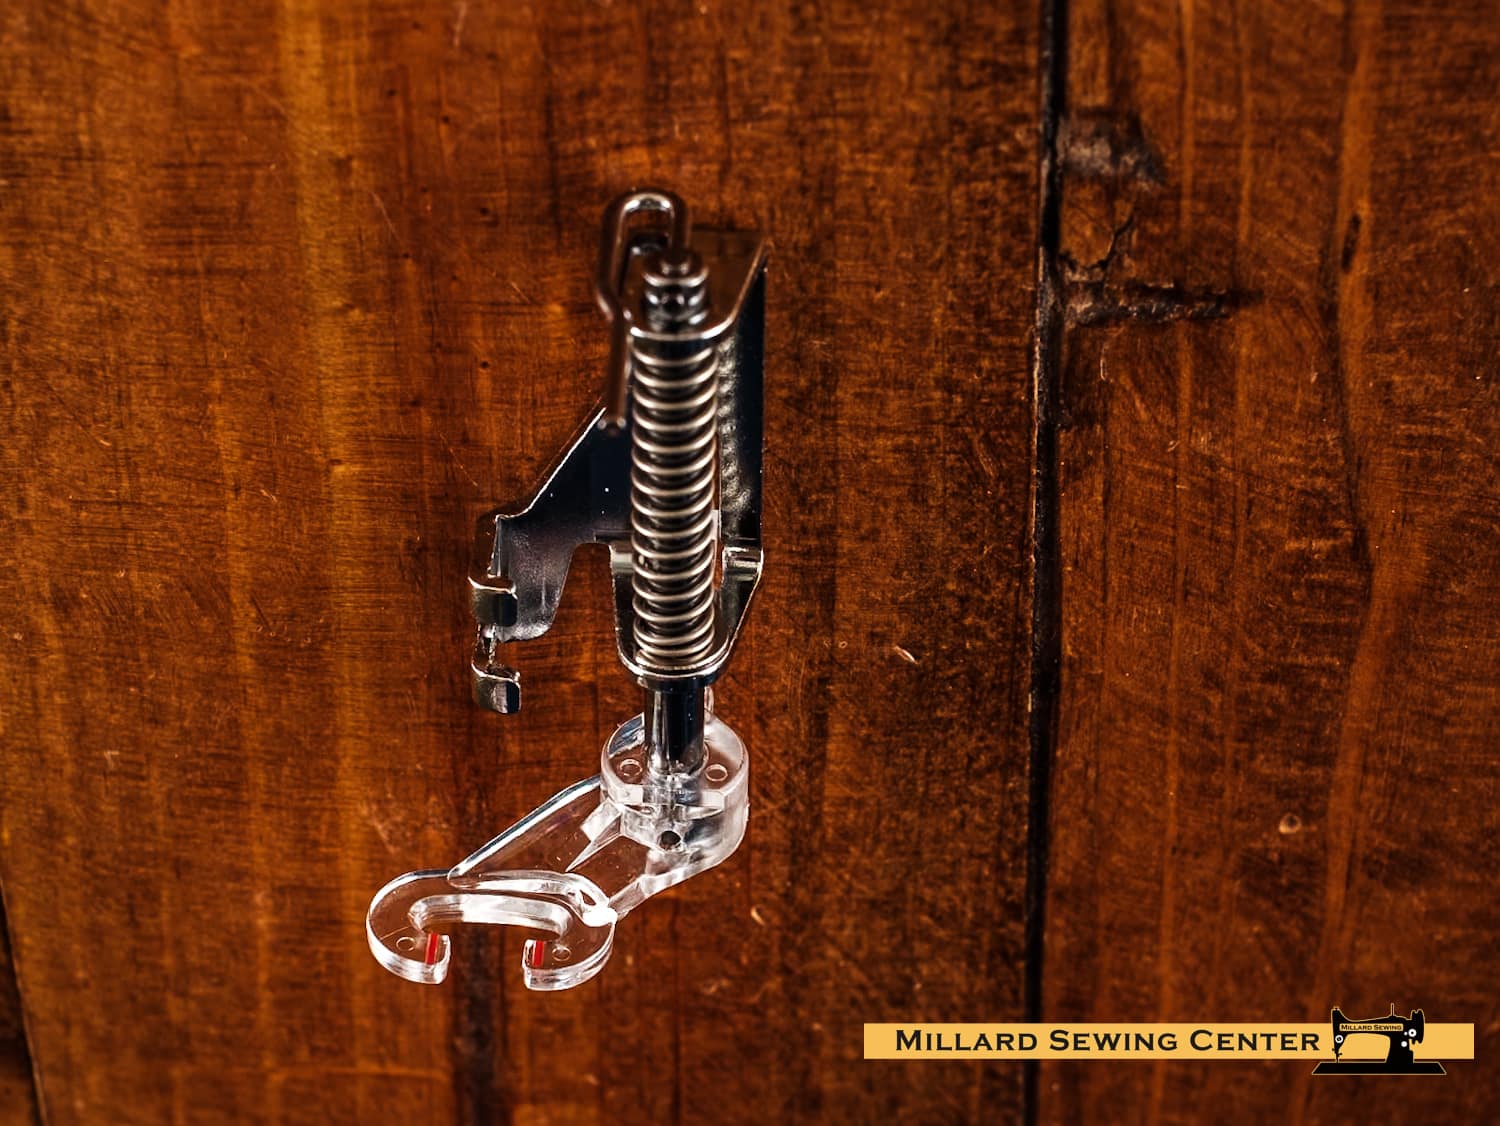
Description:
Skipped stitches are no longer a concern when sewing free motion embroidery, stippling, darning and monogramming. The spring-loaded foot moves up and down at the same time as the needle, therefore ensuring perfect control.
Machine Settings:
- Stitch : Zigzag stitch
- Thread tension : “Auto” or 3 – 5
- Stitch length : Any
- Stitch width : 0 – 7
- Feed dog: Down
Tutorial:
- Attach the darning foot to the presser bar with the lever over the needle clamp screw.
- Draw an outline for darning onto the fabric and place the fabric under the
needle. - Lower the presser foot lifter to engage the needle thread tension.
- At a medium speed, stitch along the marked outline with the desired zigzag width, guiding the fabric carefully by hand.
- After free hand embroidery is completed, raise the feed dog for normal sewing.
Shop These Feet
Ditch Foot
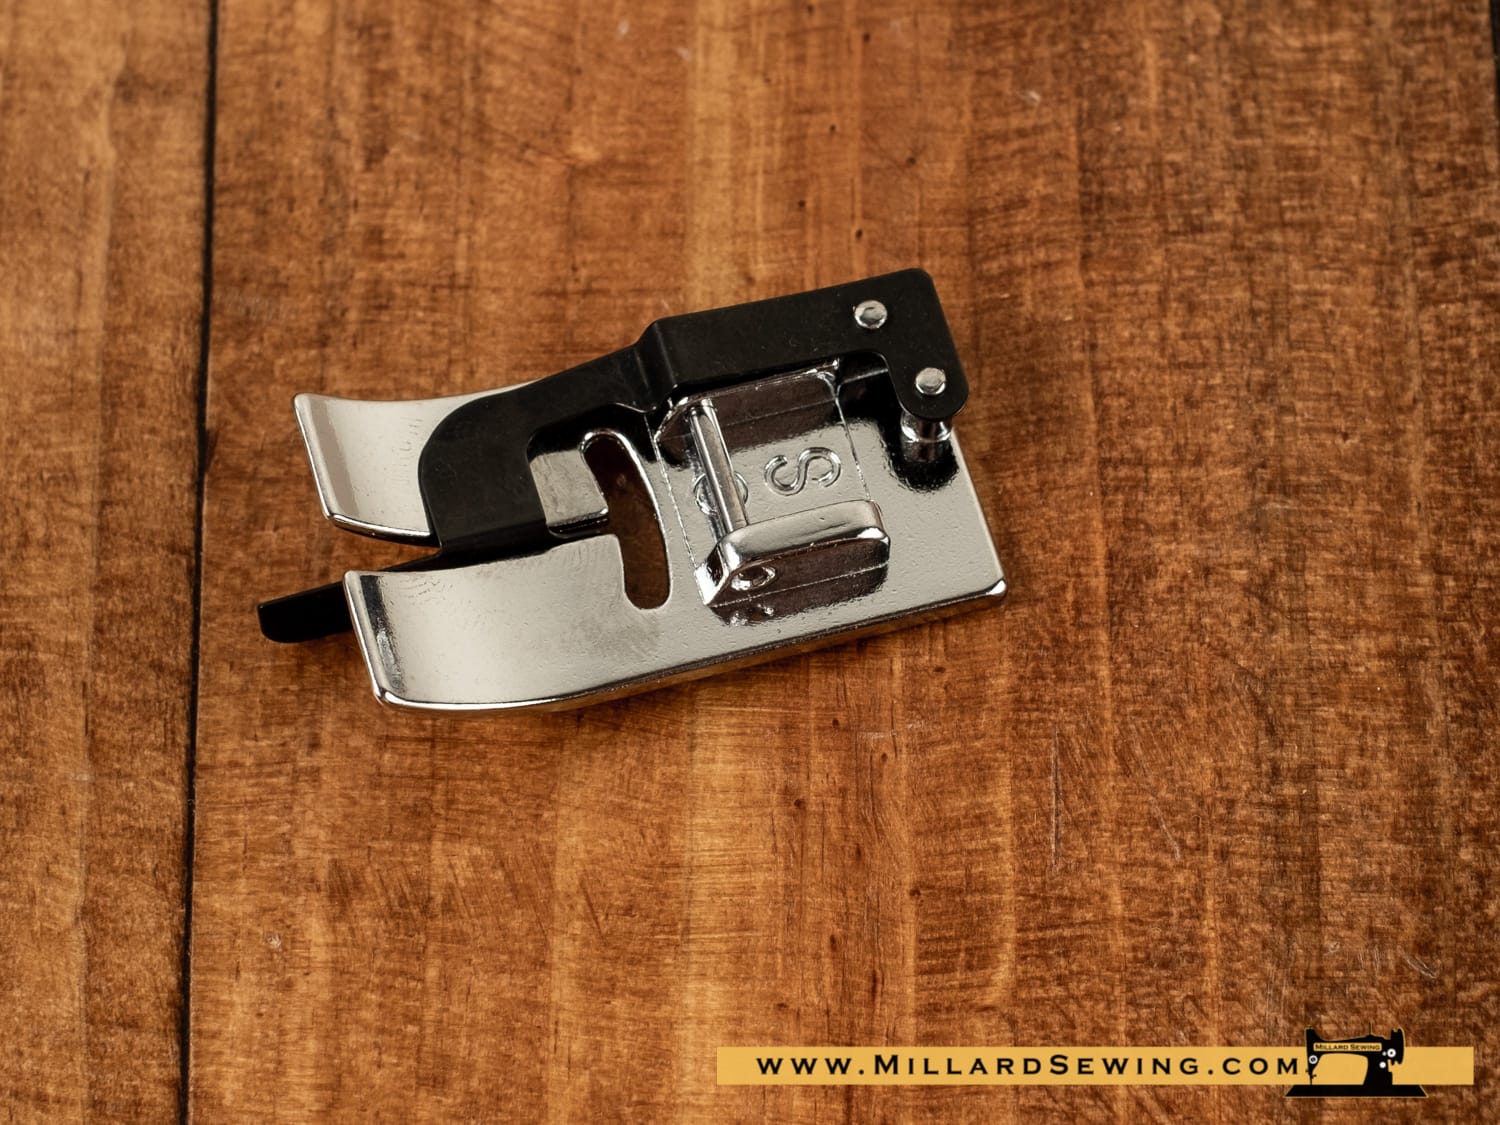
Description:
Sew in the “ditch” of a seam with this foot. The extended guide helps you stay in the seam while the machine stitches. It is perfect for quilt tops or garment construction on waistbands.
Machine Settings:
- Stitch : Straight Stitch
- Thread tension : 3-6
- Stitch length : 1-4
- Stitch width : 0
Tutorial:
Open the right side of fabrics after straight stitch sewing. 2. Straight stitch sewing: Set the presser foot guide a long the folded edge and sew straight stitch.
Shop These Feet
Edge Joining Foot
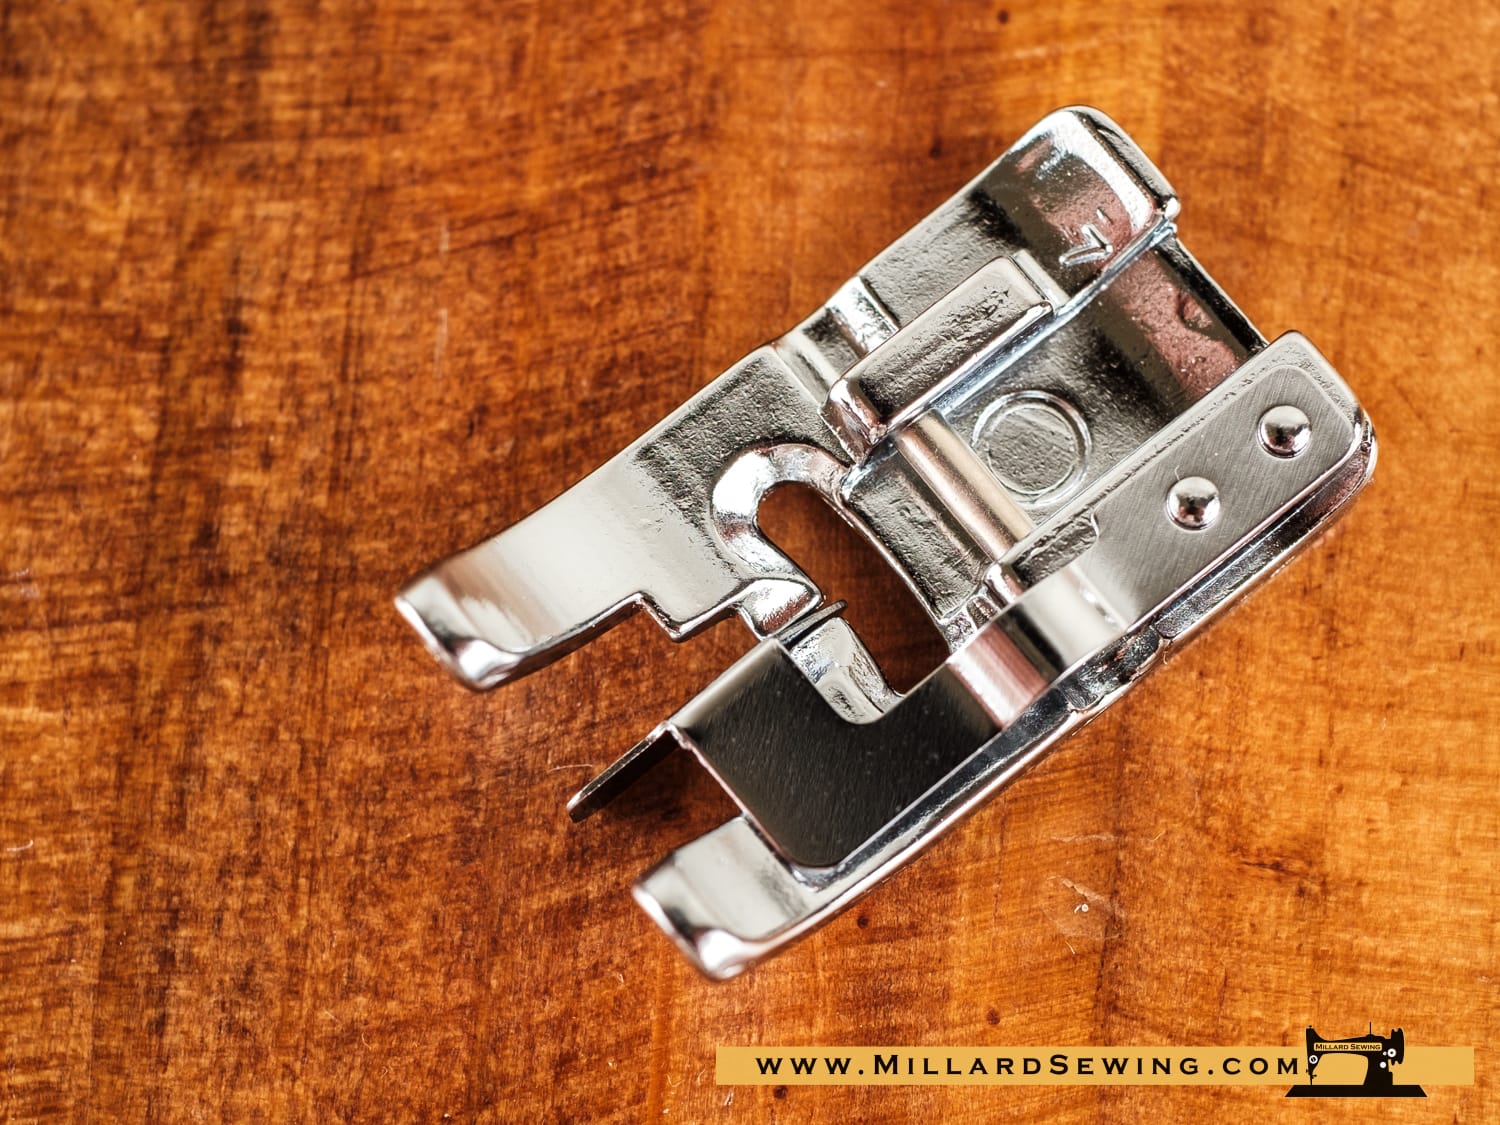
Description:
Guides topstitching. Guides trims that are sewn to an edge or when two trims are sewn together.
Machine Settings:
- Stitch : Zigzag or bridging stitch
- Stitch length : 2 – 4
- Stitch width : 4 – 7
Tutorial:
- Snap on the Edge Joining Foot.
- Place two pieces of fabric or trim, one on each side of the guide/flange of the foot.
- Sew. Keep fabric/trim against the flange/guide to join them.
Shop These Feet
Flower Stitch Foot
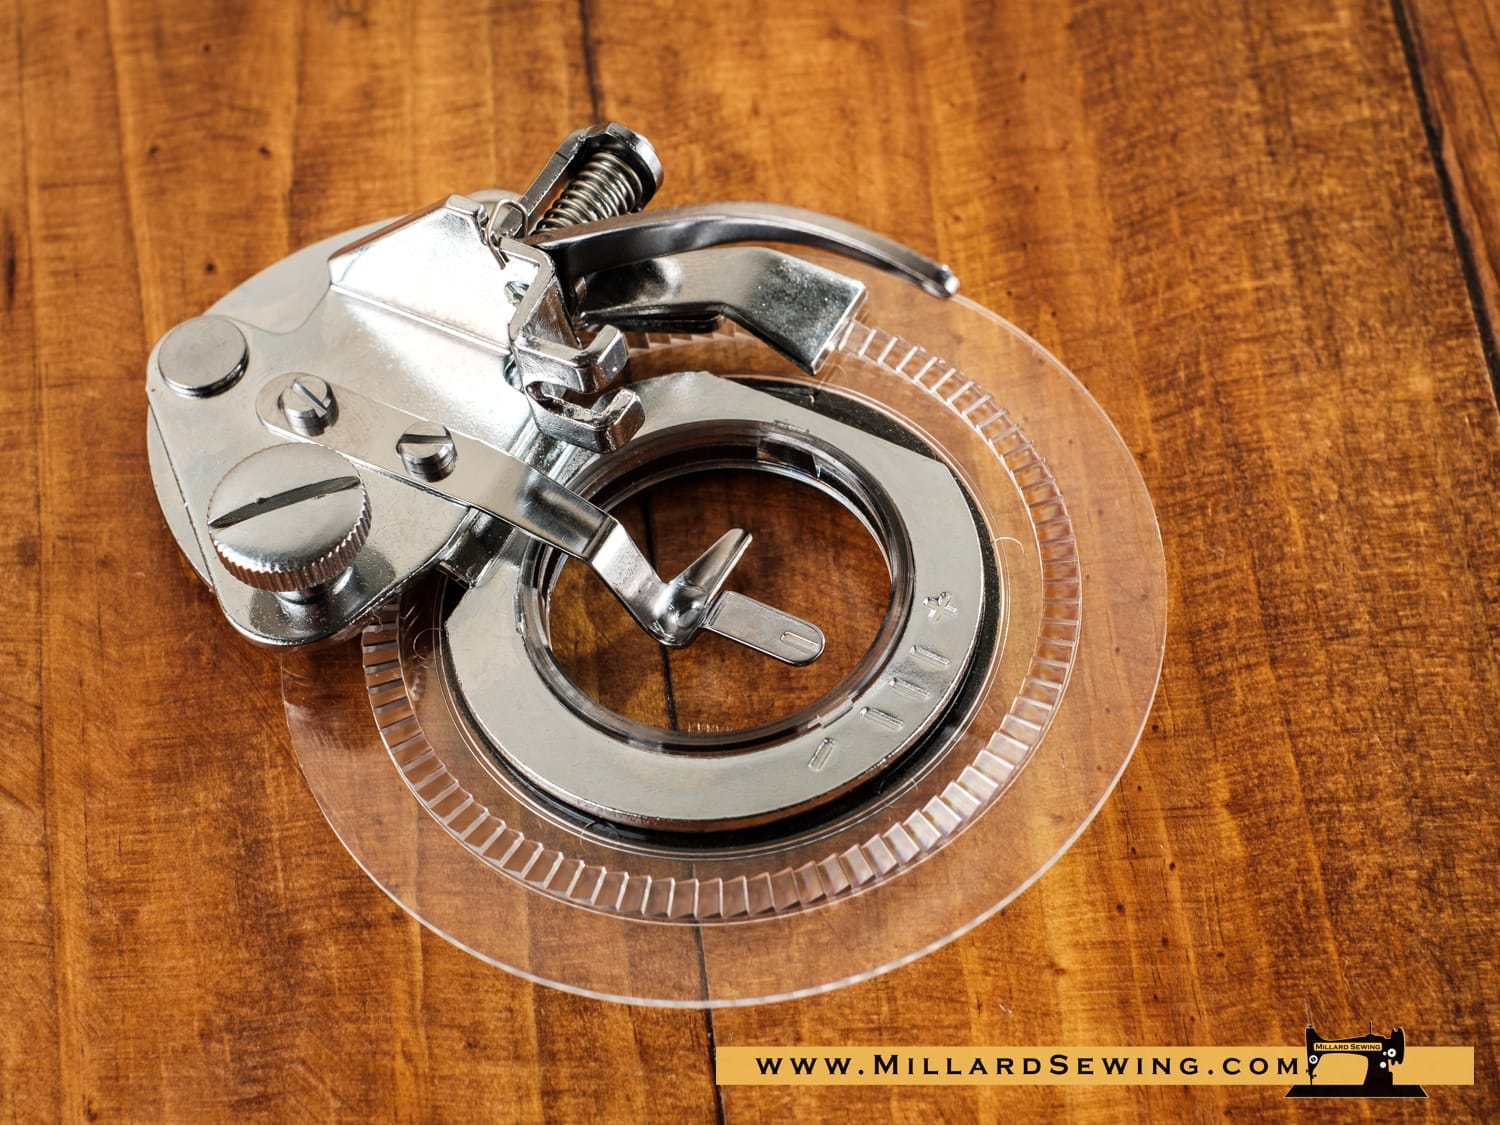
Description:
Use the flower stitcher foot to create floral or circular designs on your sewing projects: a good idea for using the different built-in decorative stitches of your sewing machine.
Machine Settings:
- Stitch width: Not more than 5
- Thread tension: 1 – 2
- Presser foot pressure adjusting lever: 3
- Feed dog: Dropped
- Sewing speed: Slow to medium
Tutorial:
- Before attaching the flower stitcher foot, select your stitch and settings accordingly.
- Raise the lever, attach the flower stitch attachment to the presser bar with the lever over the needle clamp. Secure the attachment.
- Move the disc to the desired position, tighten, and place fabric underneath in preparation to be stitched.
- Hold the needle thread while pressing the up down needle position button twice, and pull the needle thread to pick up the bobbin thread.
- Sew a few stitches to lock threads, then continue stitching at a slow to medium pace.
- After you finish sewing, raise the needle to its highest position and raise the presser foot lifter. Cut the threads, and pull the bobbin thread to bring the
needle thread to the wrong side of the fabric and knot the threads.
Shop These Feet
Free Motion Foot
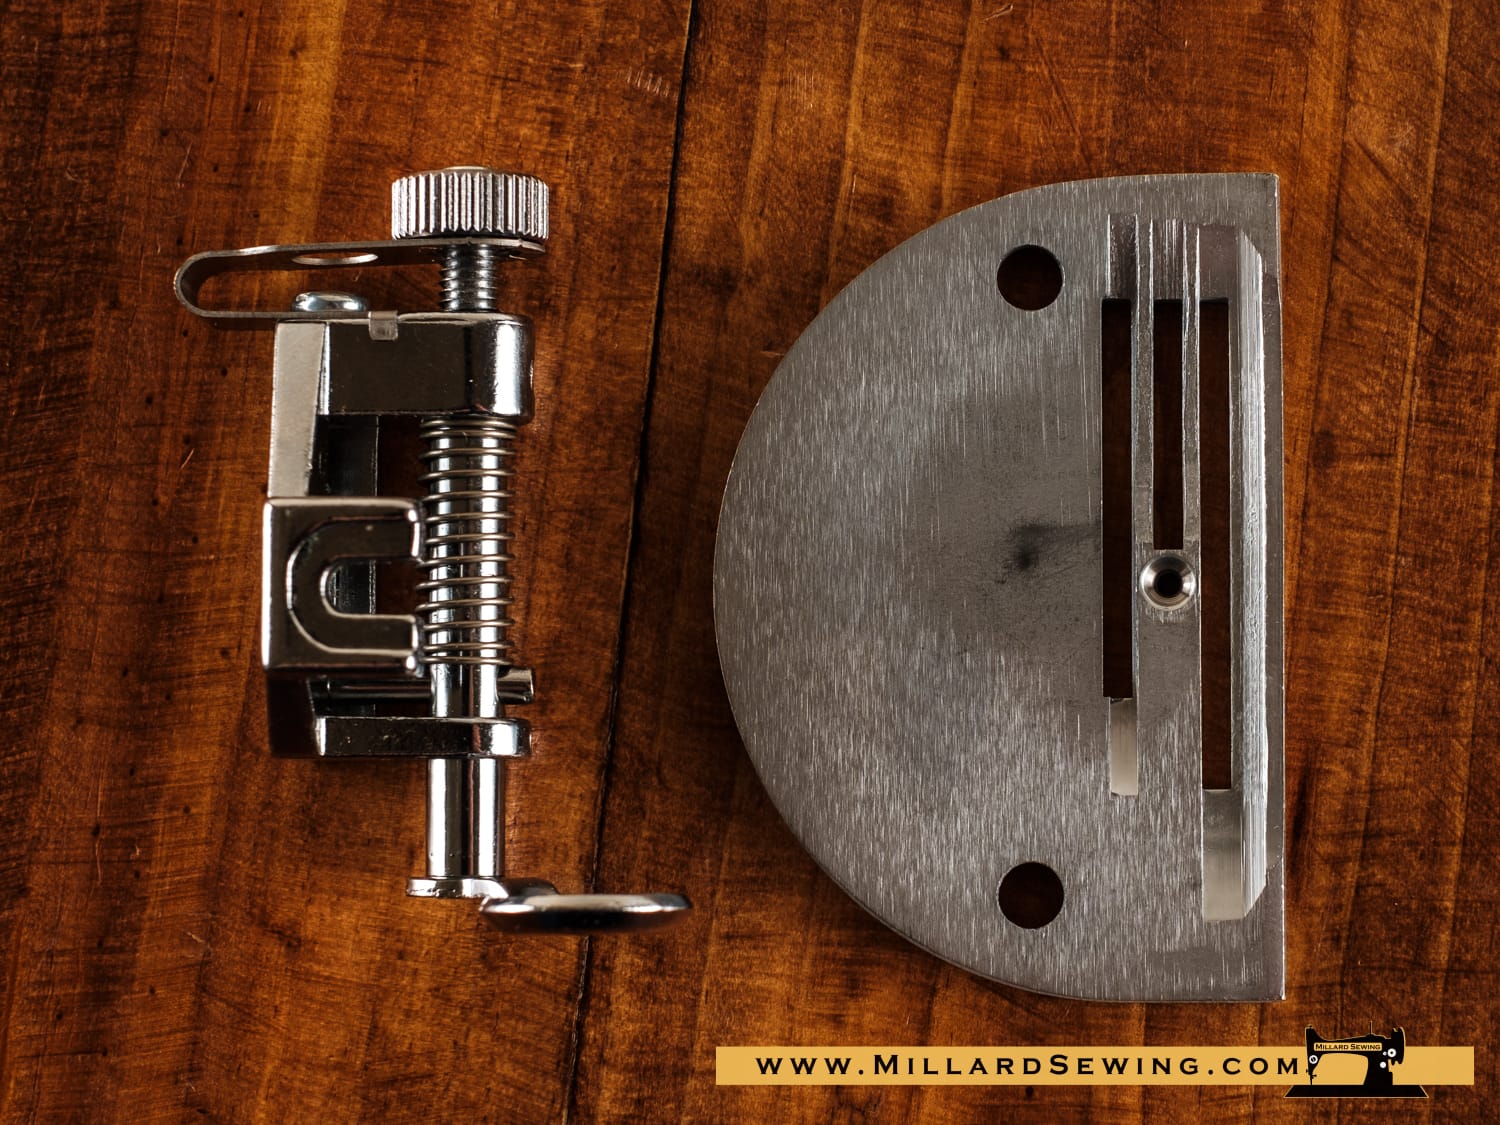
Description:
This adjustable quilting foot for free motion allows you to adjust the height of the foot in relation to your fabric and has been designed for quieter and very stable movement. The smaller head provides better visibility. It is used together with the special bobbin case.
Machine Settings:
- Stitch: Straight stitch (center needle position only)
- Thread tension : Auto or 2 – 5
- Feed dog: Lowered
Tutorial:
Remove the foot holder and attach the free motion quilting foot. Make sure that the needle enters the center of the hole in the foot.
Lower the foot. Adjust the height of the foot until the bottom of the foot barely touches top of quilt layers.
Sew at medium speed while guiding the quilt layers with your hands.
Shop These Feet
Fringe Foot
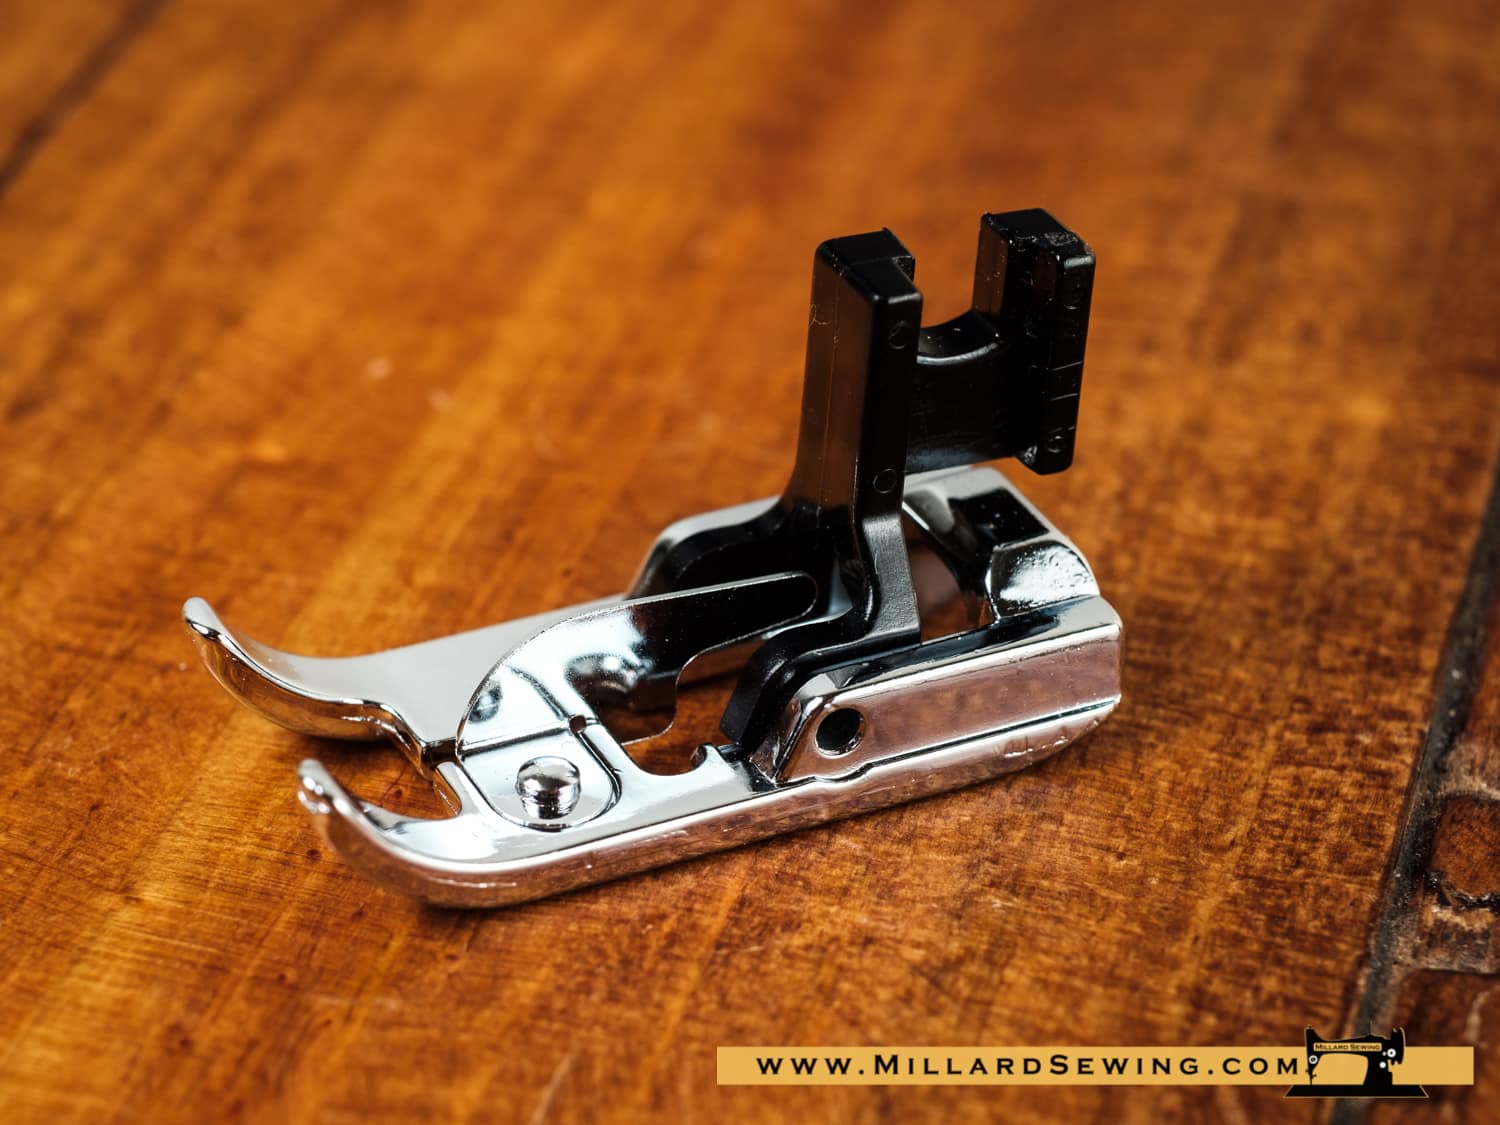
Description:
Both functional and decorative, this foot allows to create tailor tacks, fringe, hair, chenille effects or fagoting (bridging). The metal extension raises the thread off the fabric surface for a dynamic texture treatment.
Machine Settings:
- Stitch: Zigzag
- Stitch width 5.0 or wider
- Stitch length 3.0 or longer
- Thread tension – 2-4
Tutorial:
The metal extension in the middle of this foot raises the thread up off fabric surface – both functional as well as decorative. Create tailor tacks to transfer markings from pattern to fabric. Create fringe, hair, chenille effects, etc.
Shop These Feet
Gathering Foot
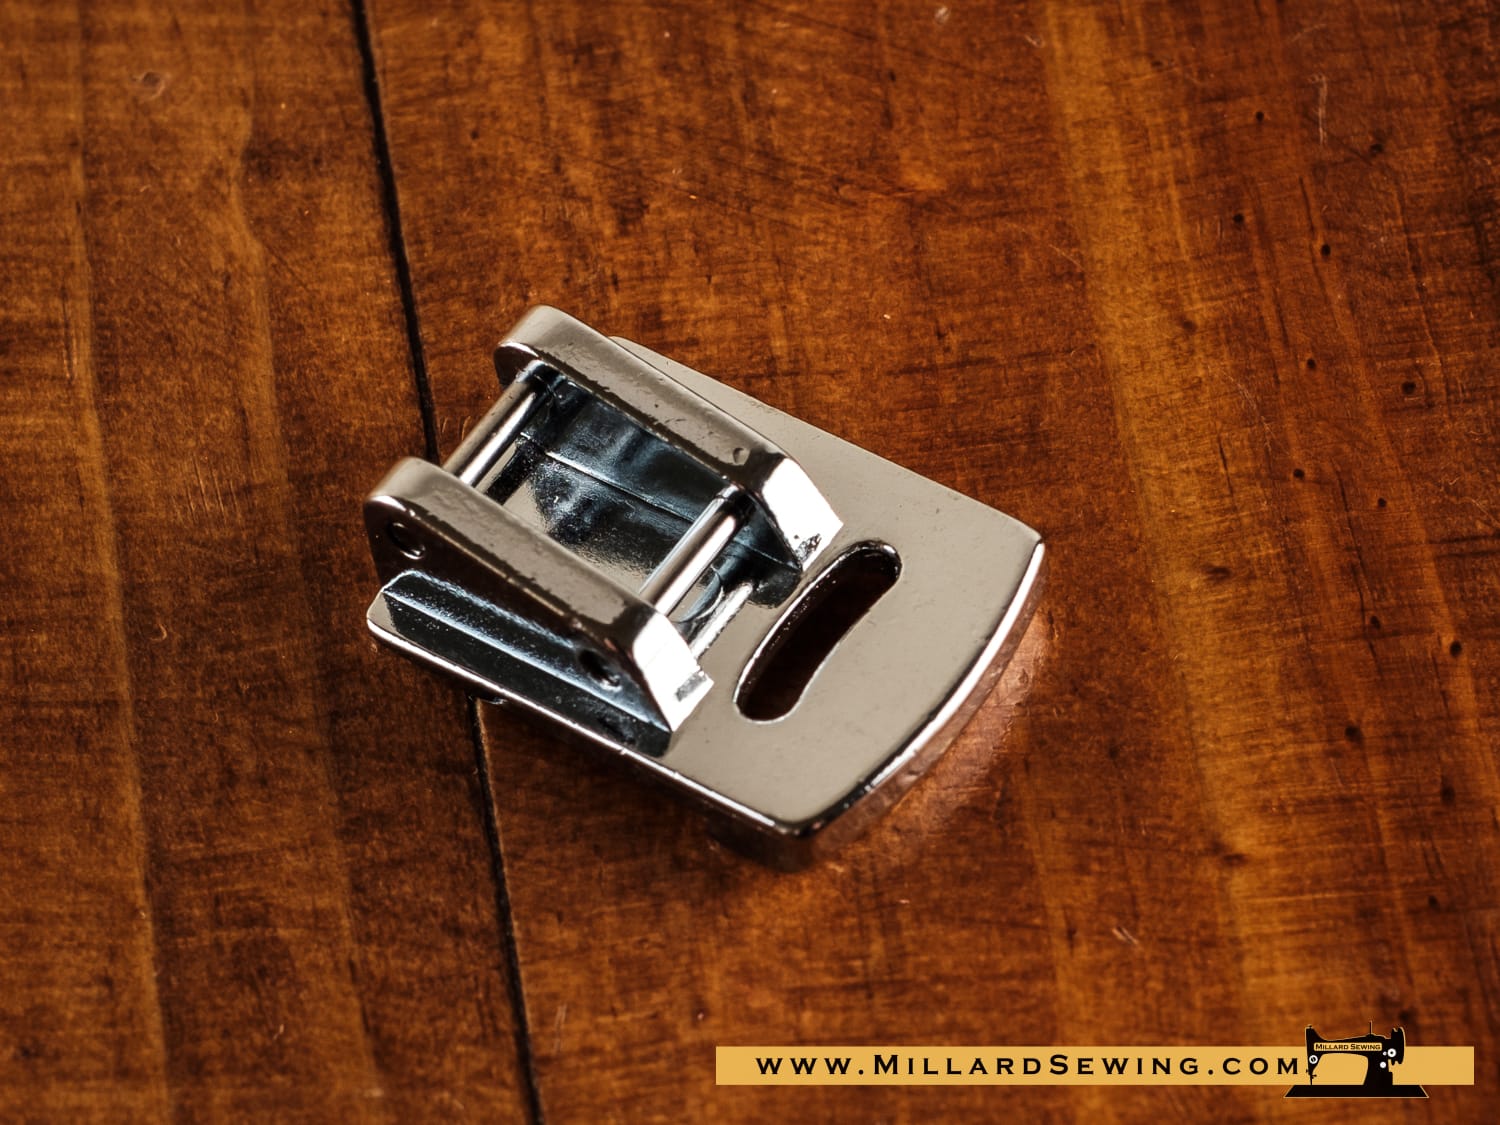
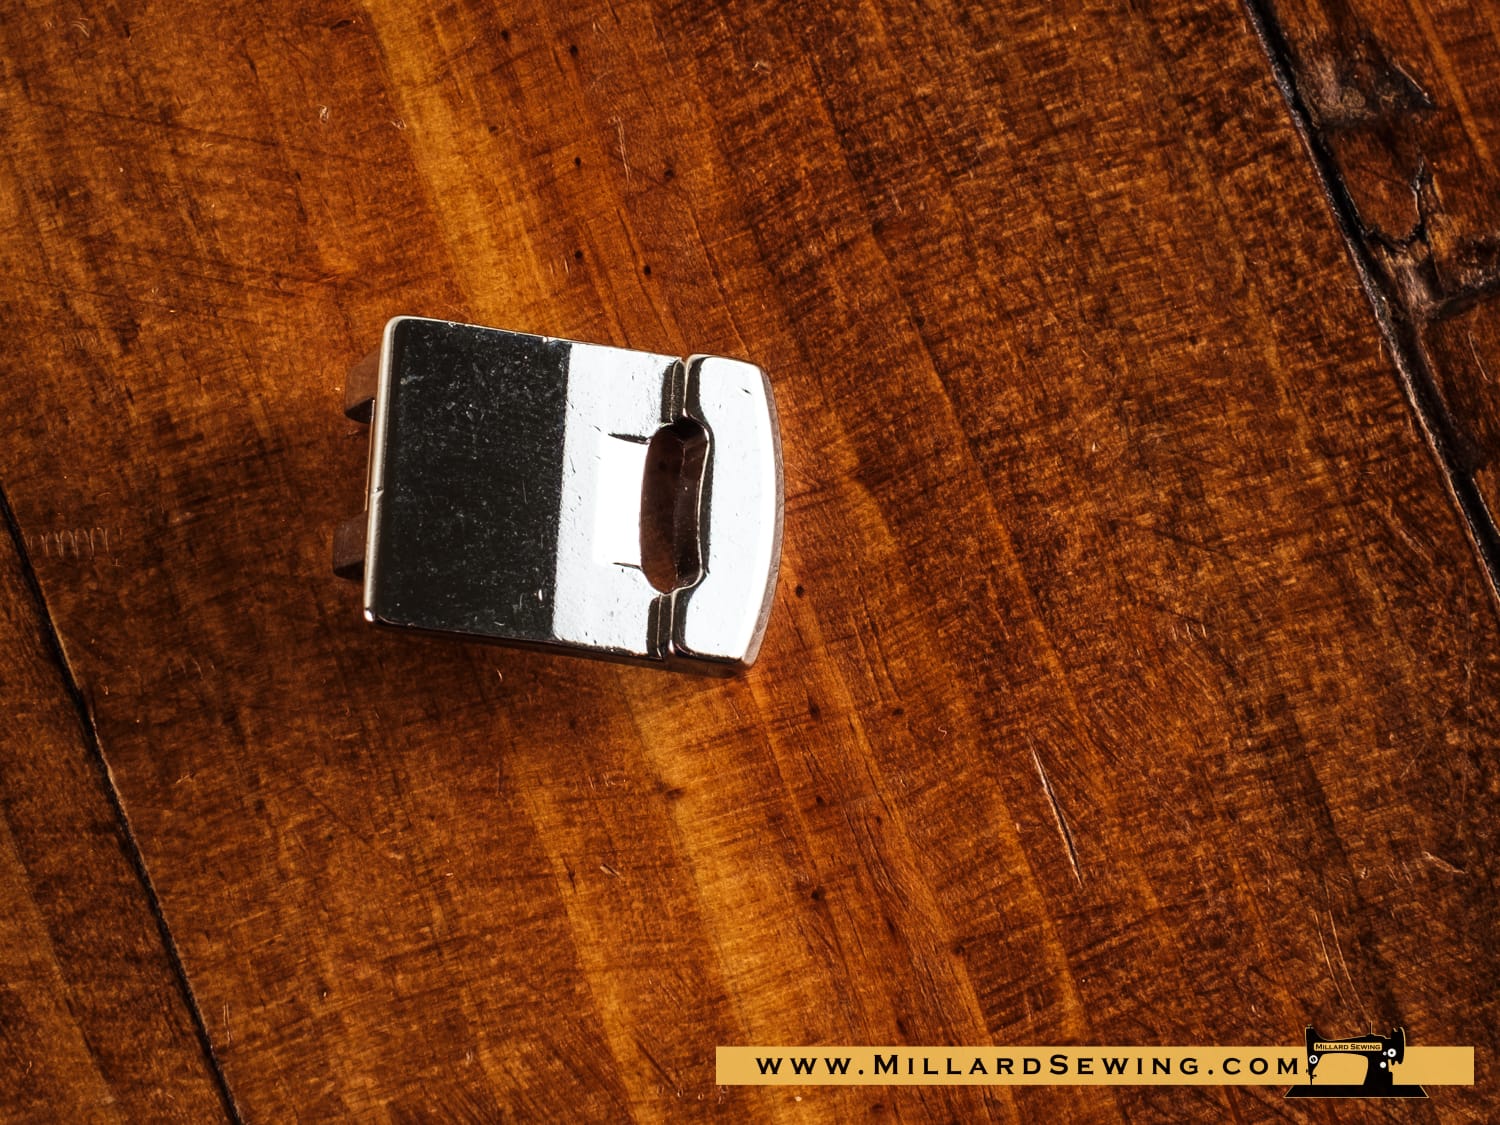
Description:
This foot is used to create soft gathers in lightweight fabrics. There is a hollow space on the underside of the foot so the fabric remains supple and a thick bar in front of the needle to form the gathers. You just need to sew your stitches straight and the foot does the rest!
Machine Settings:
- Stitch : Straight stitch (Center needle position)
- Thread tension : 3 – 6 (Slightly tighter than normal)
- Stitch length : 3+
- Stitch width : 0
Tutorial:
The size of the gathers is determined by the weight of the fabric, stitch length and needle thread tension. Sew on one layer of fabric while ensuring it is fed straight. Do not pull the fabric.
Shop These Feet
Multi Cord Foot
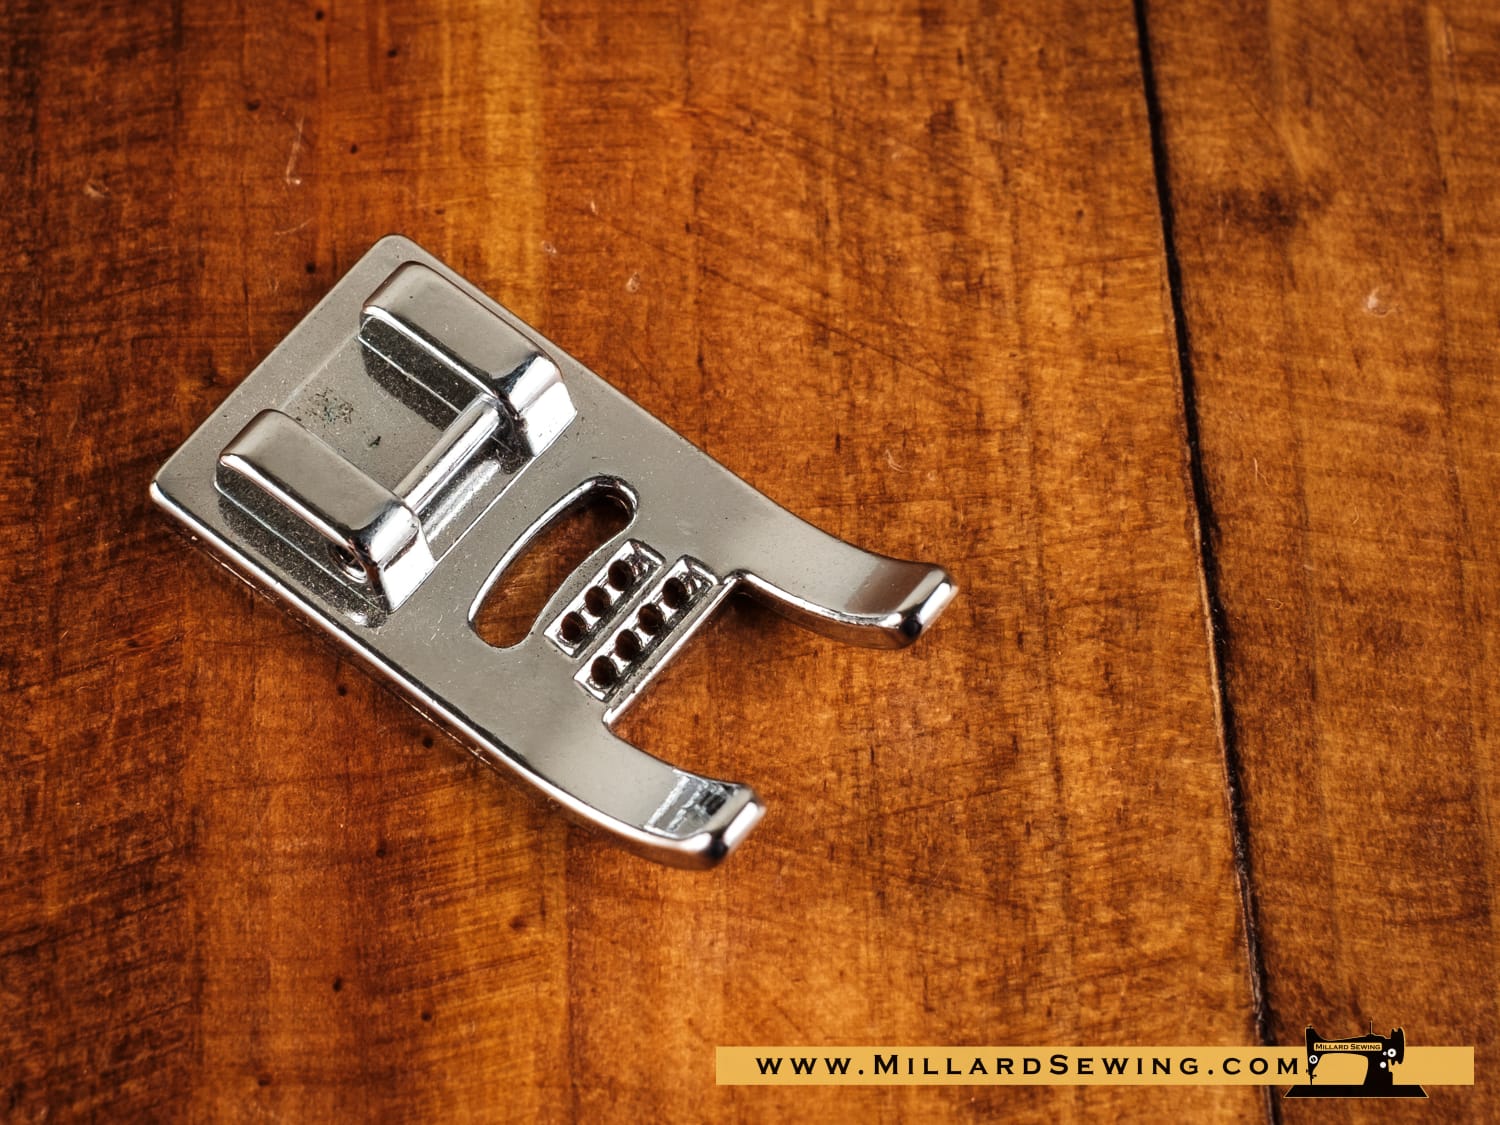
Description:
The multi-cord cording foot will hold up to 7 fine cords or threads. Because they are held in place by the foot, the cords are perfectly placed. A variety of utility or decorative stitches can be sewn over the cords to stitch them onto the fabric.
Machine Settings:
- Stitch : Zigzag stitch / Triple Zigzag stitch
- Thread tension : 3 – 6
- Stitch length : 1.5 – 4
- Stitch width : 1 – 7
Tutorial:
Grooves on this foot will hold one to three lengths of cord in place for cording.
Shop These Feet
Open Toe Foot
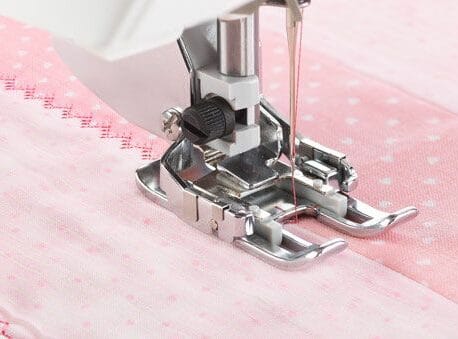
Description:
Because the open toe on this foot makes it easier to view stitching while in progress, it is perfect for sewing satin, decorative and applique stitches, as well as for quilting and monogramming.
Machine Settings:
- Stitch: Utility or decorative stitch
- Thread tension: 1 – 5
- Stitch length: 0.5 – Maximum
- Stitch width: 0 – Maximum
Tutorial:
The open toe allows for a better view of sewing in progress. This foot can be used for quilting, monogramming, applique and cutwork.
Shop These Feet
Overedge (Overlock/Overcast) Foot
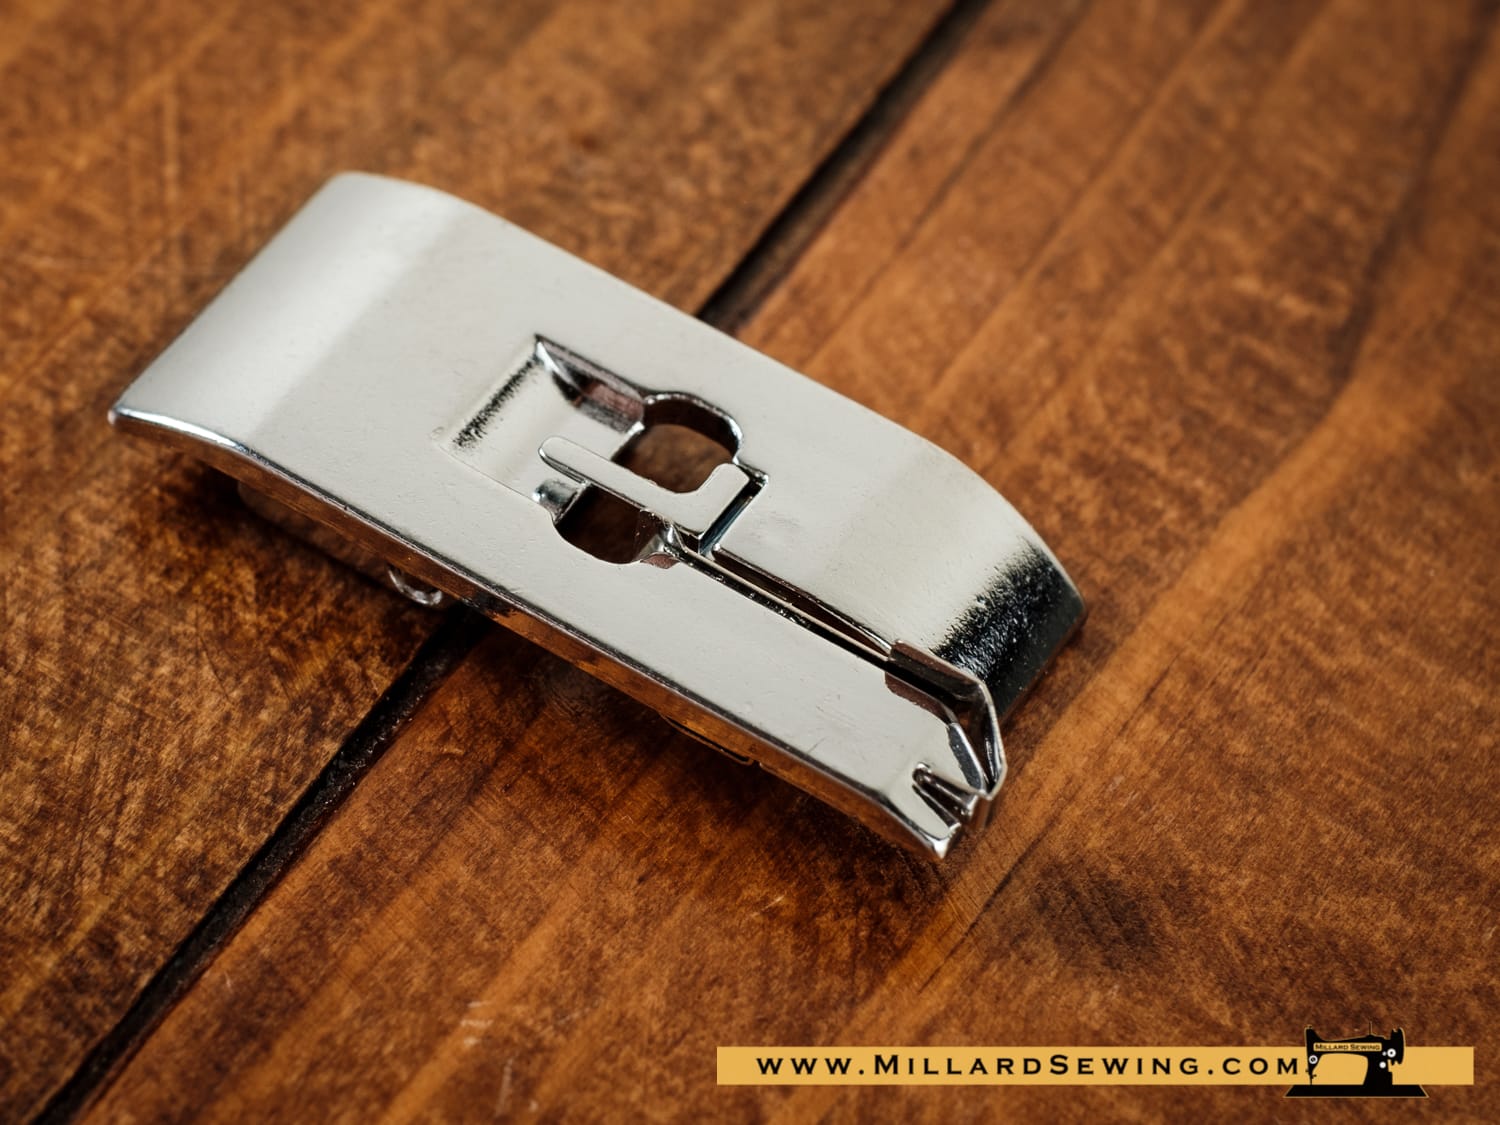
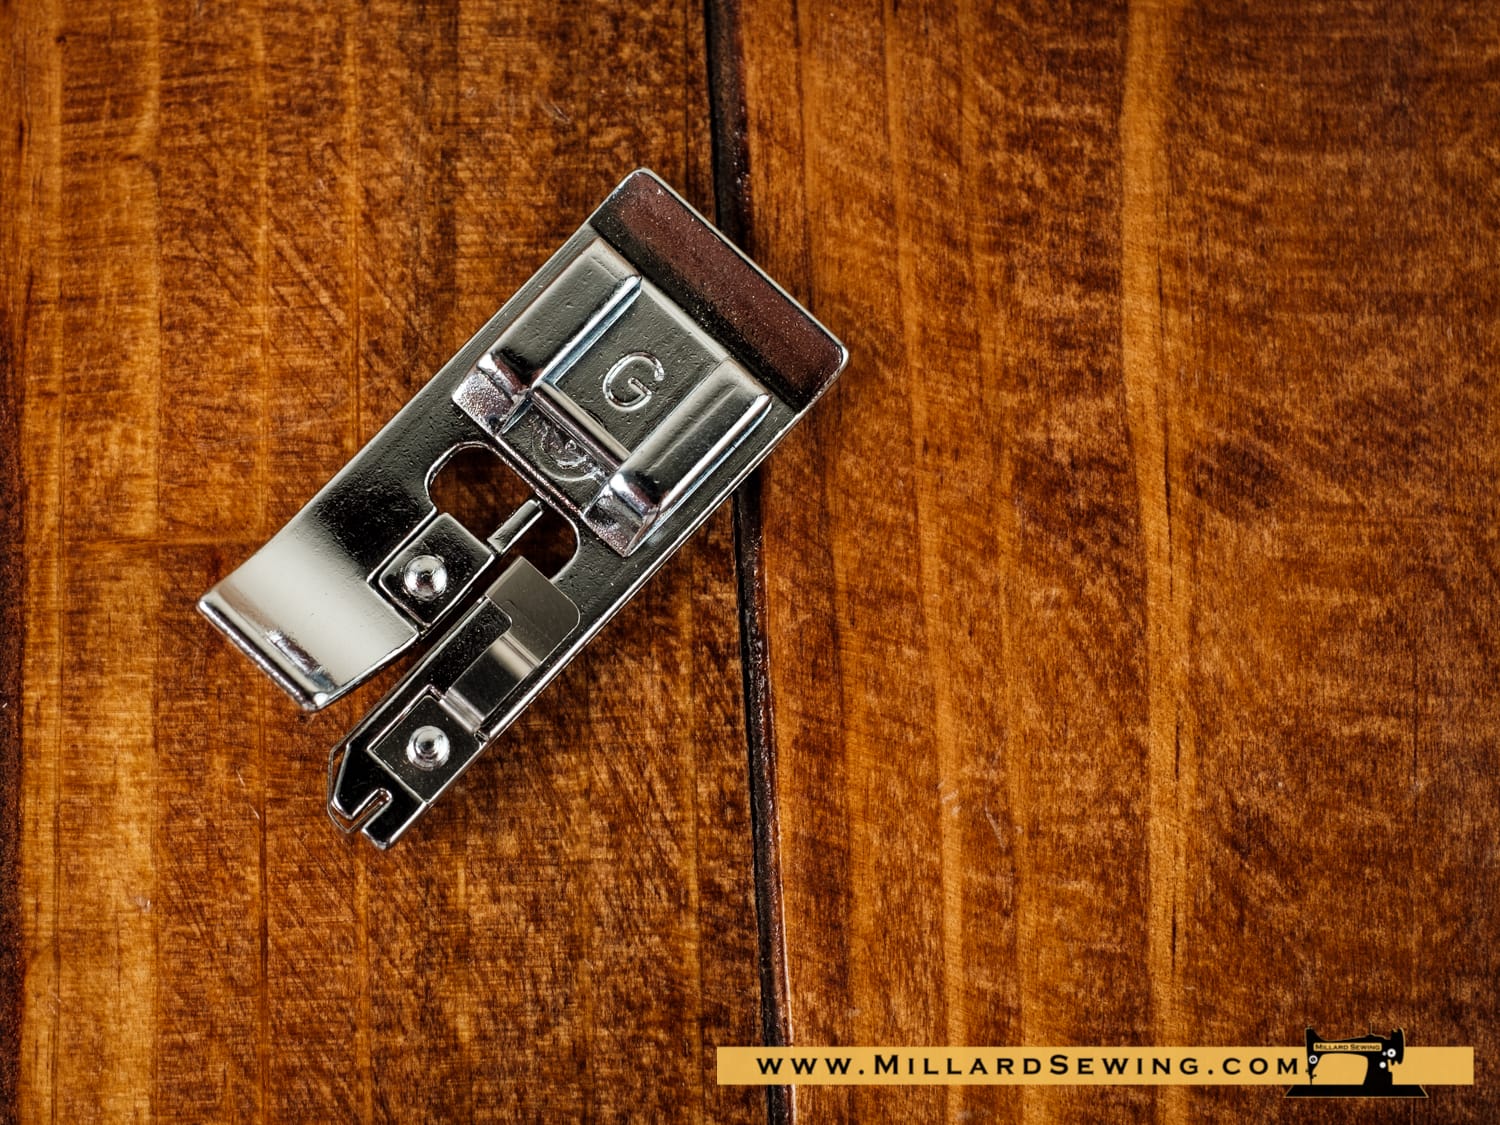
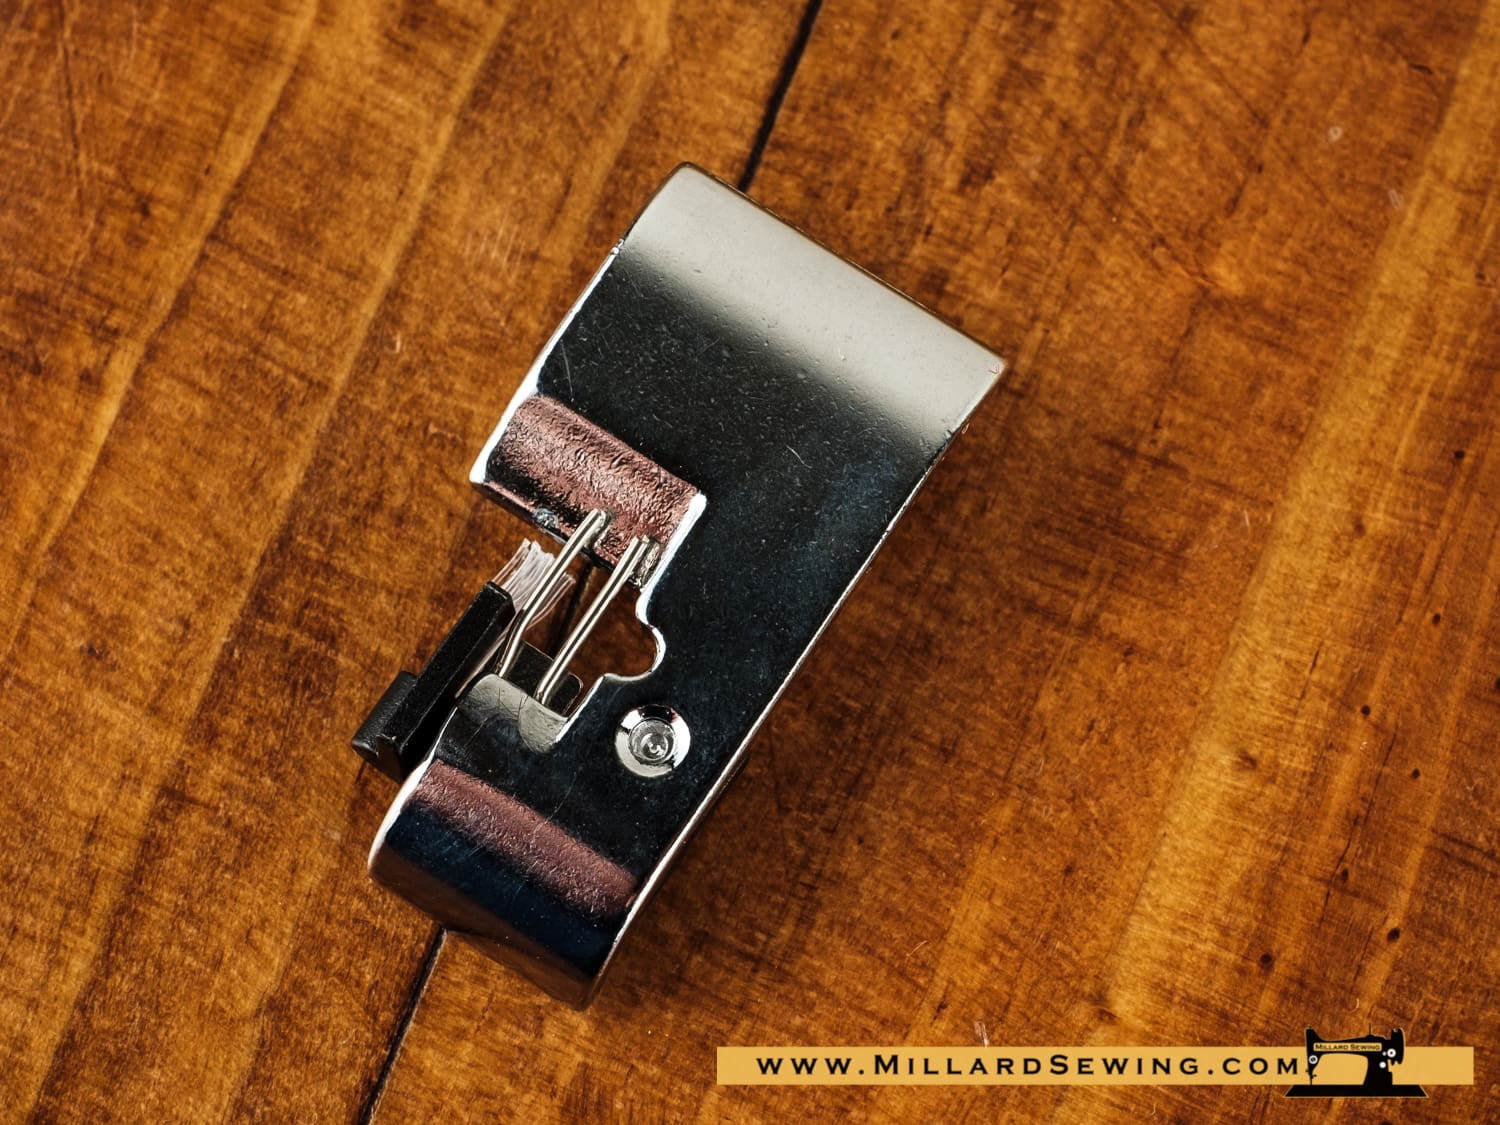
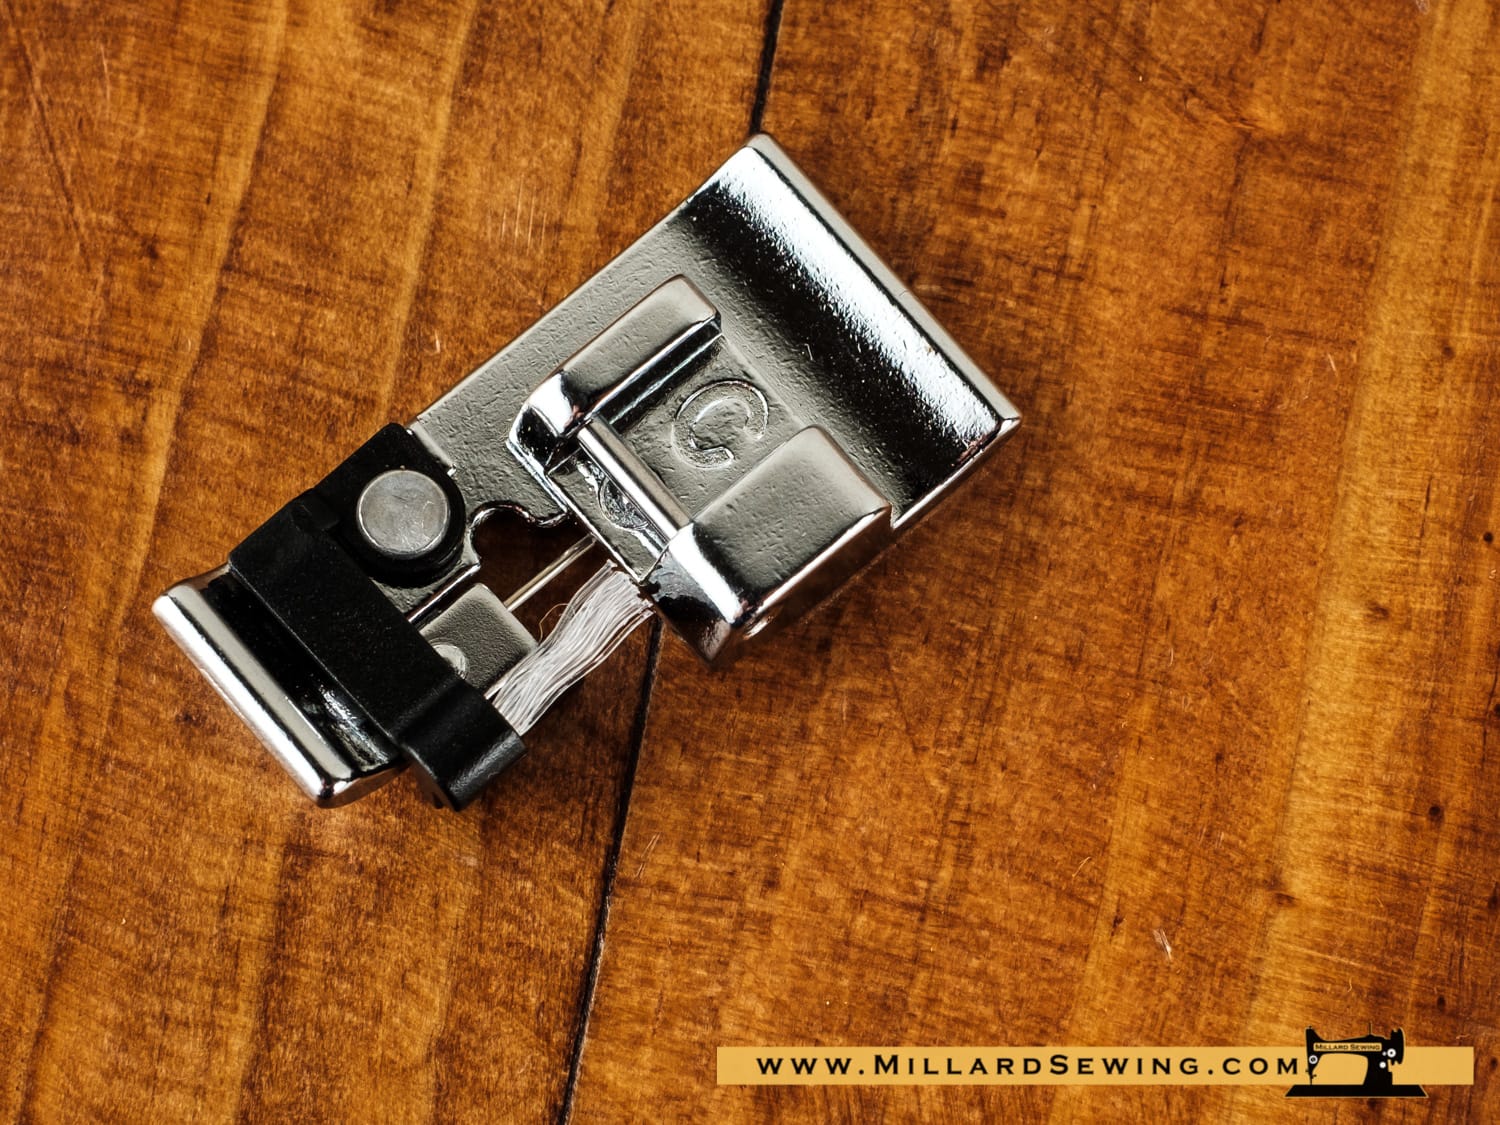
Description:
The seam edges will be perfect using the overedge foot for finishing off medium-to heavyweight fabrics. This accessory is recommended for working on woven fabrics such as tweed, gabardine and linen.
Machine Settings:
- Stitch : Overcast Type Stitch
- Thread tension : “Auto” or 3-5
- Stitch length : 2.5-5
- Stitch width : 4-6
- Foot Pressure: Medium-High
Tutorial:
This stitch can be used to simultaneously seam and overcast edges of fabrics. Use this stitch when you do not need to open seams flat. Place the fabric edge next to the guide of the foot and then sew.
Shop These Feet
Pintuck Foot
Description:
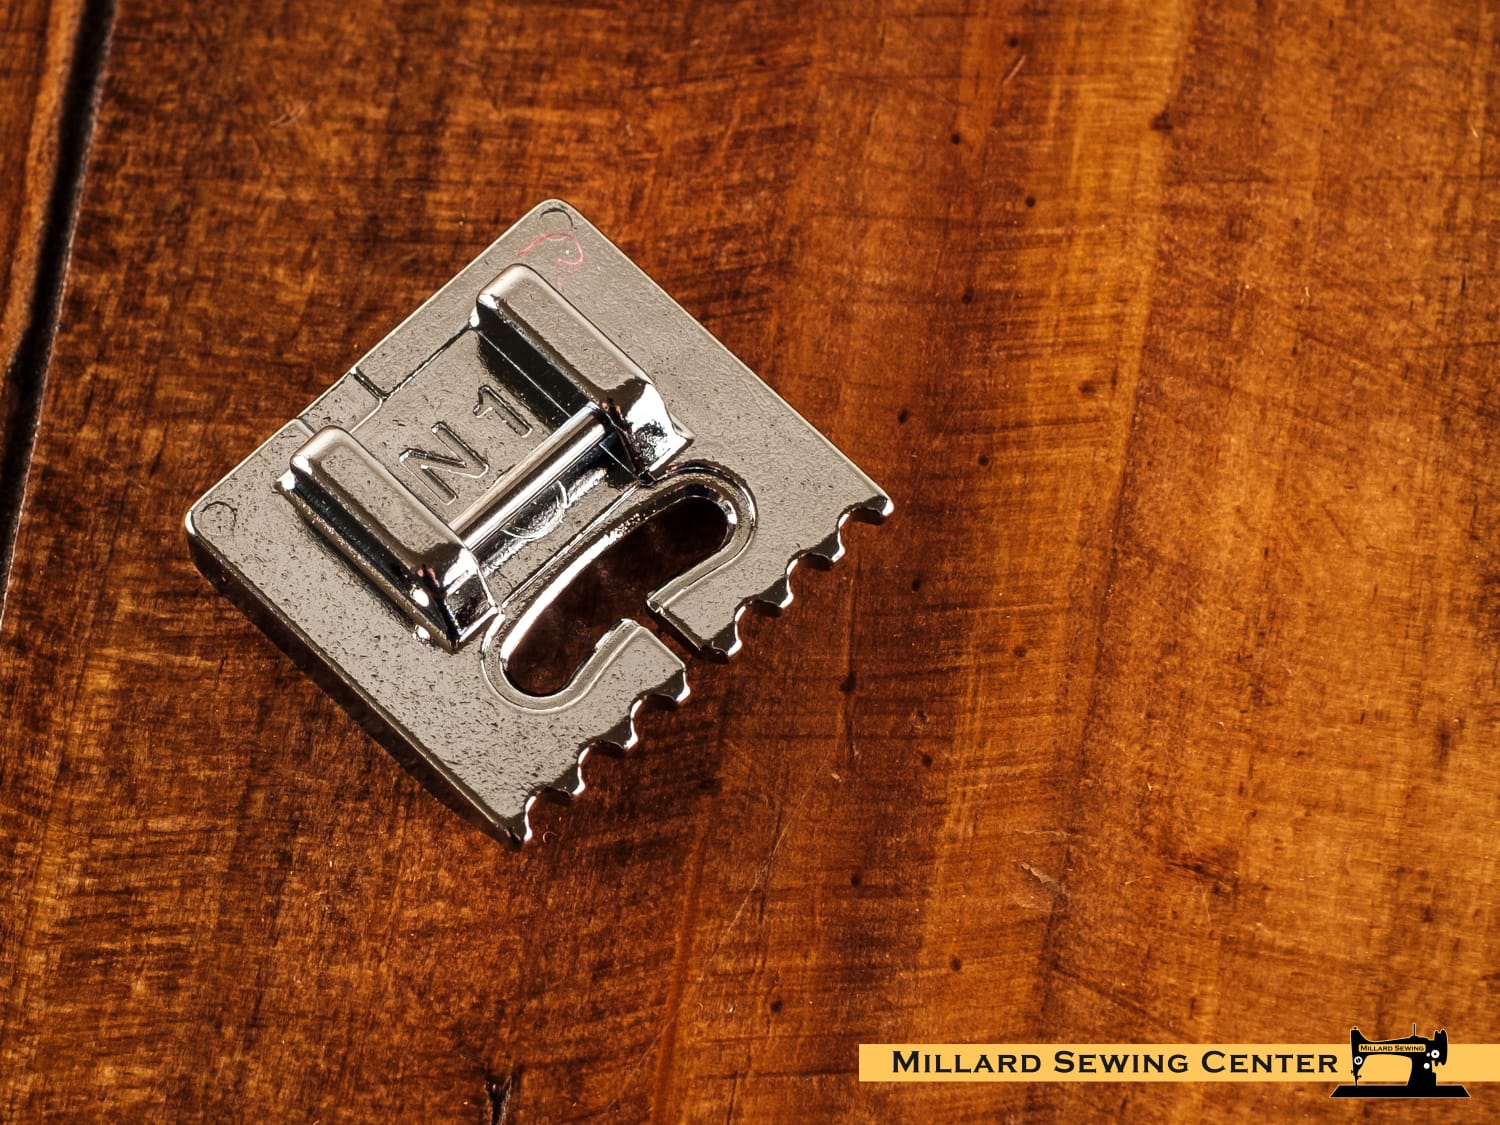
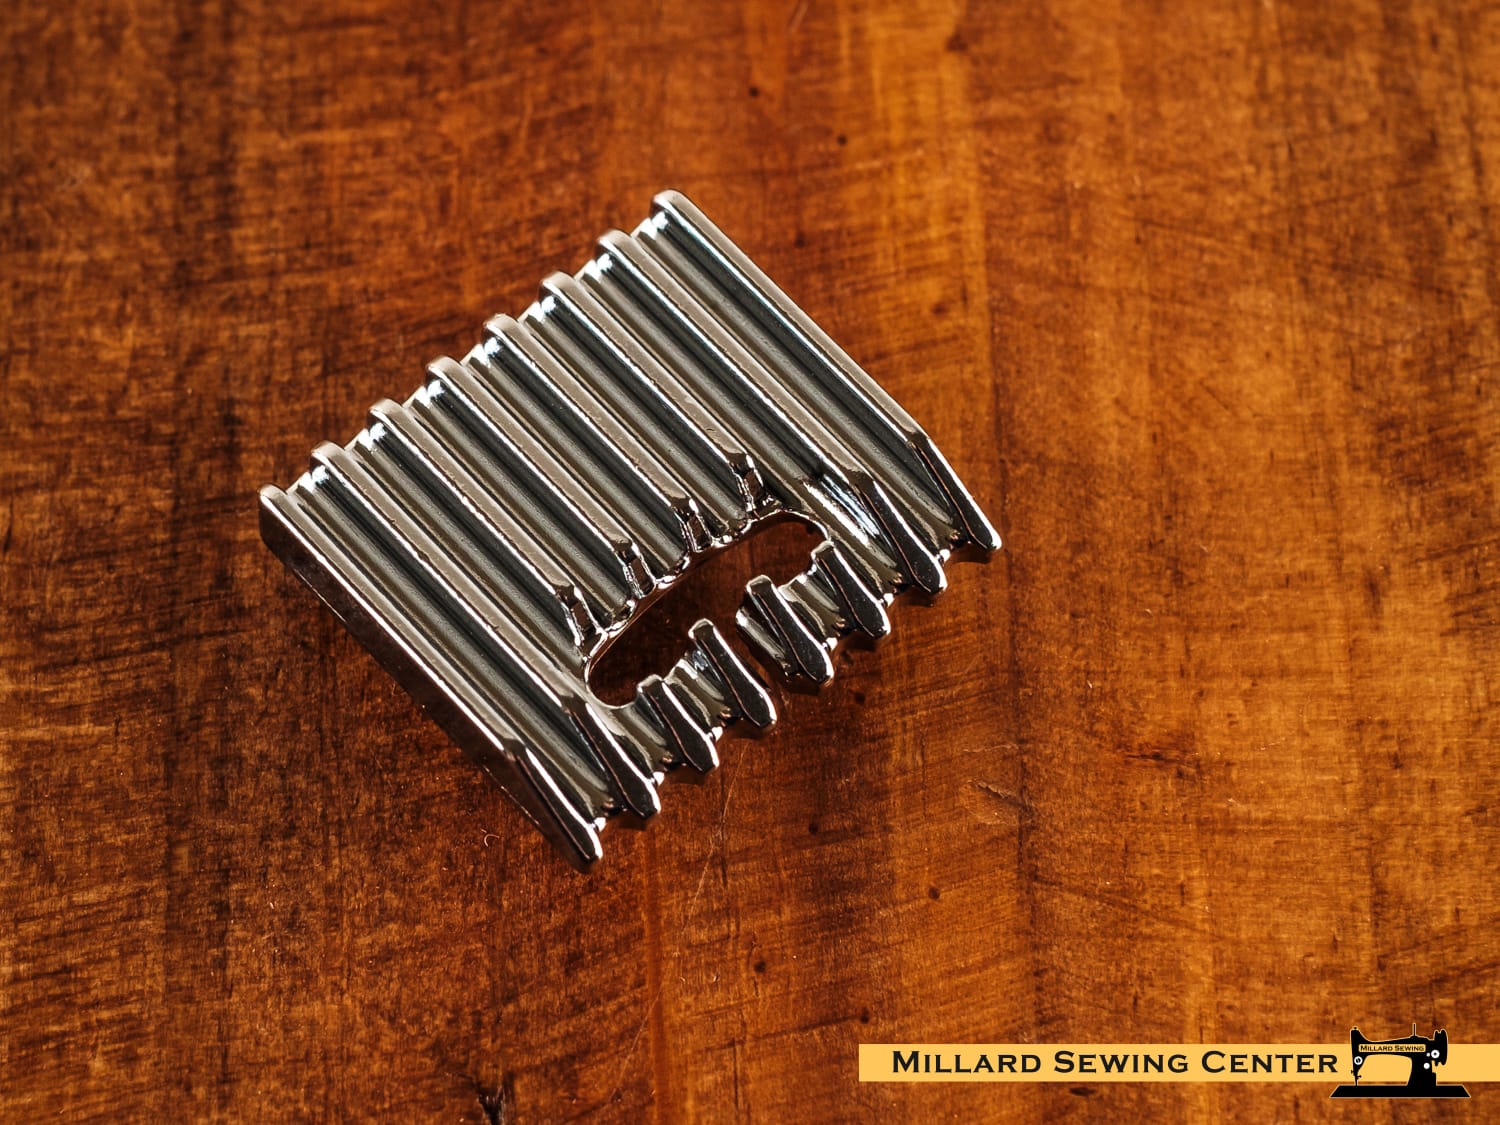
Twin needle pintucks are often a lovely focal point in both modern and heirloom style projects. It is essential that the pintucks are perfect, evenly spaced and parallel rows. This foot guarantees a perfect result for narrow and/or wide pintucks.
Machine Settings:
- Stitch: Straight stitch (Center needle position)
- Thread tension: 7 – 9 (Tighter than normal)
- Stitch length: 1.8 – 2
- Stitch width: 0
- Needle: Twin Needle
Tutorial:
For light to medium weight fabrics. First, place a length of cording under the fabric and sew over it. To sew the next pintuck, guide the previously sewn pintuck into a groove on the bottom of the foot while stretching the cloth in front and back. Suitable cords range between 1.5 -2.5mm in diameter depending on the foot depth
Shop These Feet
Piping Foot
Description:
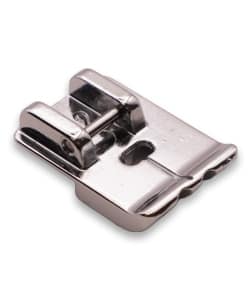
This piping foot is used for making or attaching piping. The two grooves on the underside guide the piping and hold it firmly in place during sewing.
Machine Settings:
- Stitch: Straight stitch (Center needle position)
- Thread tension: Automatic or 3 – 5
- Stitch length: 1 – 3
- Stitch width: 0
Tutorial:
- Raise the needle and piping foot, then place the corded piping tape on the right side of the cloth under the foot.
- Make sure that the edge of the tape matches the edge of the cloth.
- Lower the foot so that the corded part of the tape fits the left groove on the bottom of the foot. Sew the tape.
Shop These Feet
Quarter Inch Foot
Description:
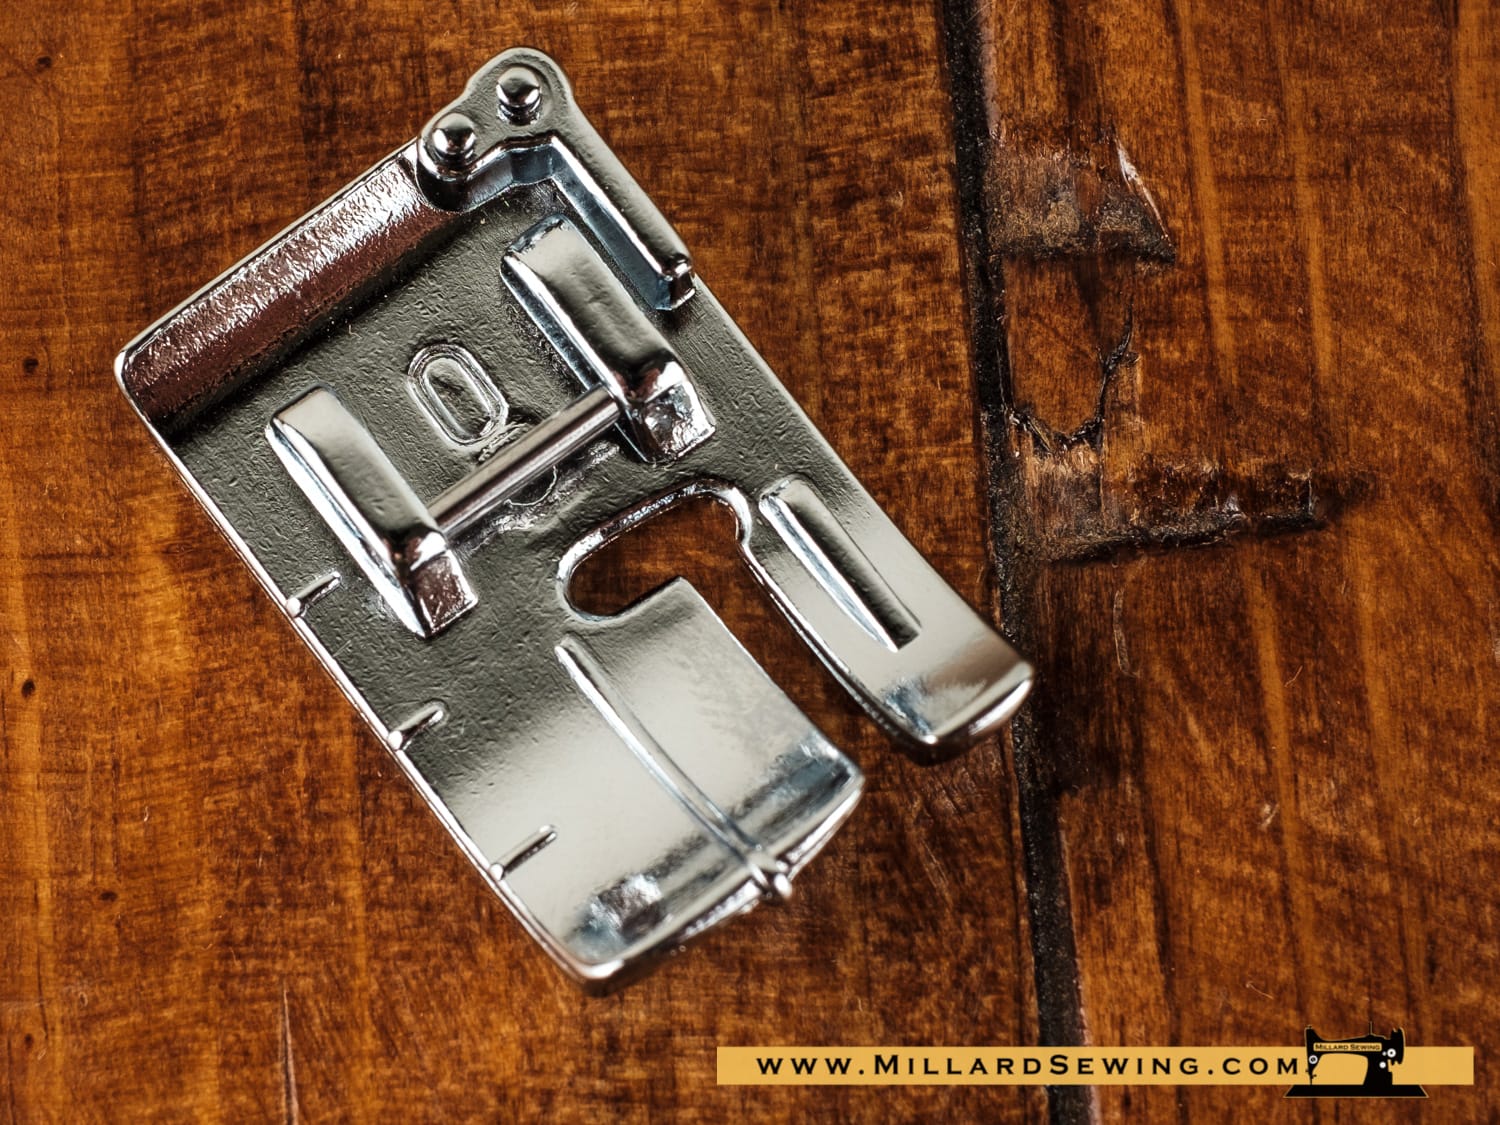
Designed to help sew accurate 1/4 inch seams. Sewn from the centered needle position, the edge of the foot provides a perfect 1/4’’ seam guide for all kinds of uses with a significant time saving. The flange guide on the foot keeps your fabric perfectly straight.
Machine Settings:
- Stitch pattern: Straight stitch (Center needle
position) - Thread tension: “Auto” or 3 – 5
- Stitch length: 1.5 – 2.0*
Tutorial:
Achieve perfect 1/4” seam allowance along the edge of the foot. A great tool for quilt piecing.
Shop These Feet
Quilting Foot
DRAFT SECTION: Needs image, final wording review, and future video/demo link.
NEEDS IMAGE
Add product photo, demo image, or video thumbnail here.
Placeholder added so draft sections are easy to find.
Description:
A broad category of feet used for quilt piecing, quilting, and quilt finishing. This may include free motion, open toe, guide, ruler, ditch, and other quilting-focused feet depending on the machine and project.
Machine Settings:
- Stitch : Straight stitch, quilting stitch, or decorative stitch as needed
- Thread tension : Auto or 3 – 5
- Stitch length : 2 – 3 for piecing, or as desired for quilting
- Feed dog : Up for guided stitching, down for free motion work
Tutorial:
Choose the quilting foot based on the task: piecing, stitching in the ditch, free motion quilting, ruler work, or guided parallel stitching. Always test on a quilt sandwich using the same fabric, batting, needle, and thread planned for the project.
Shop These Feet
Quilting Guide Bars
Description:
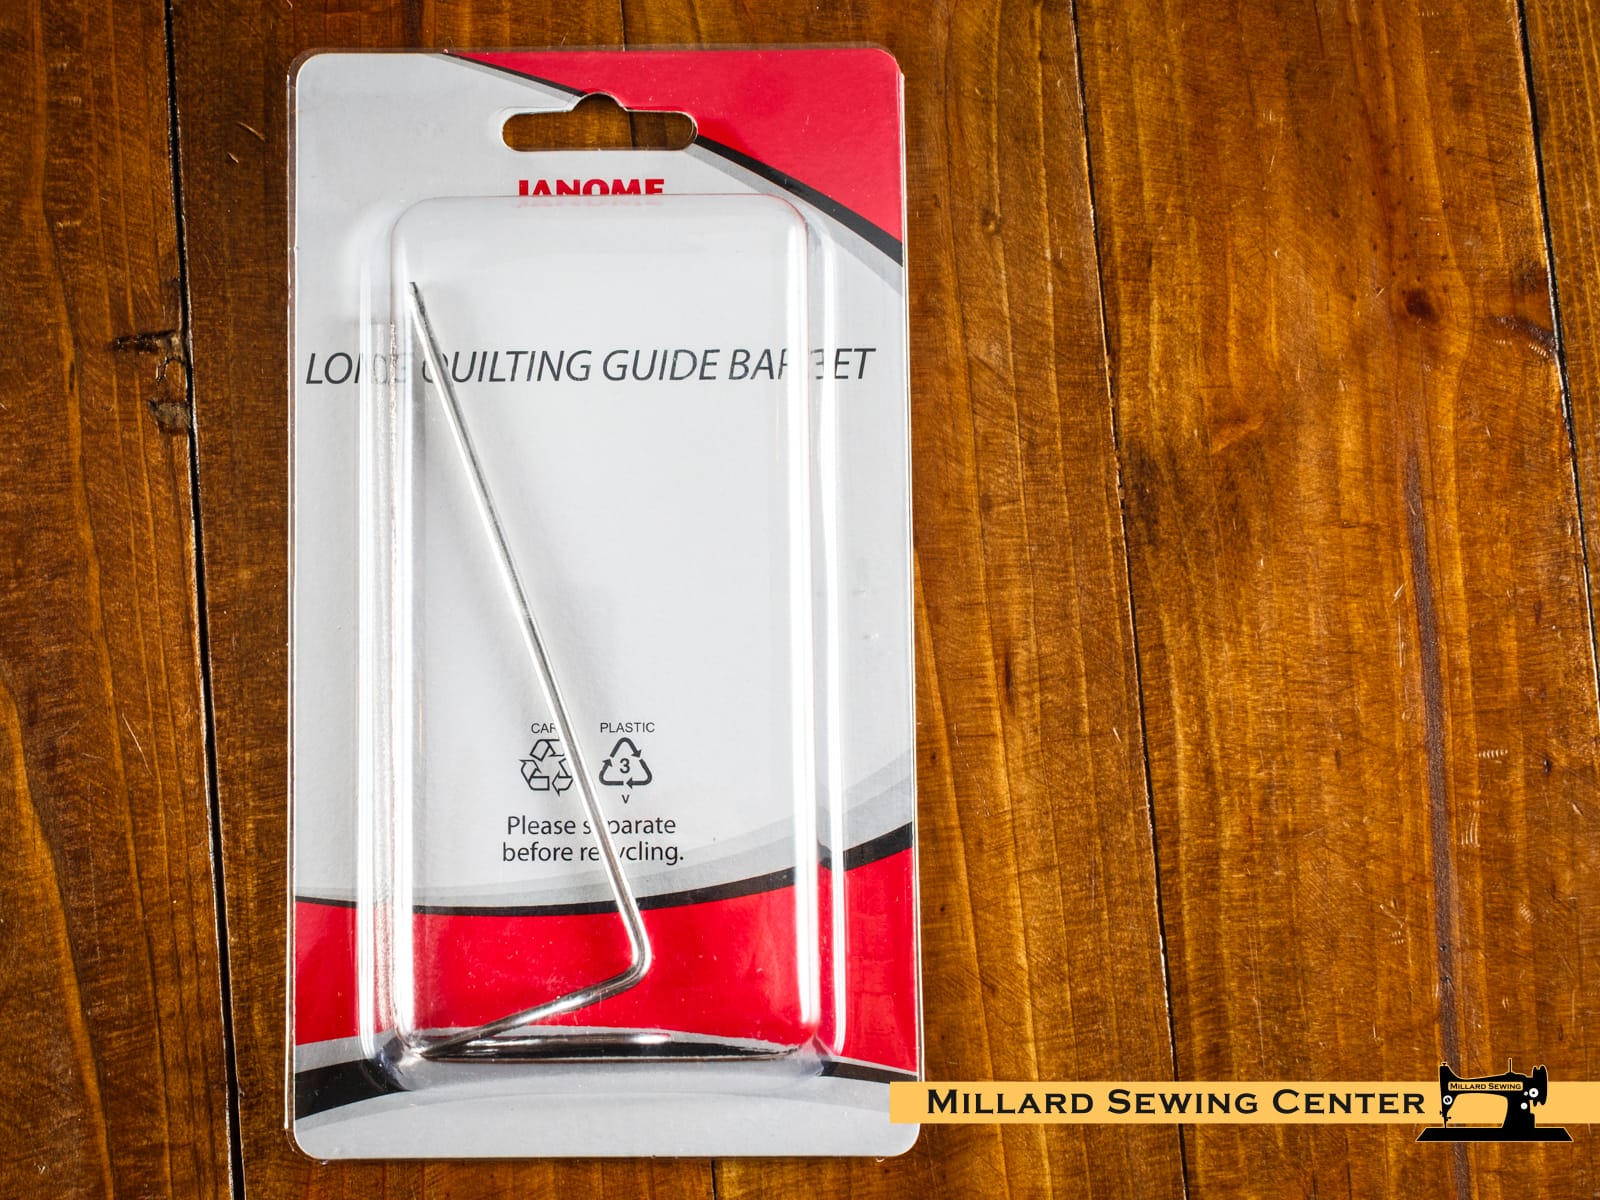
Guides can be attached to the left or right of the needle to create parallel stitching rows approximately two times wider than rows made with the regular quilting guide. Just snap one guide into place at the back of the even feed foot and adjust the distance from the needle as required.
Machine Settings:
- Stitch: Straight stitch (Center needle position)
- Thread tension: Automatic or 3 – 5
- Stitch length: 1 – 3
- Stitch width: 0
Tutorial:
- Attach beside the needle
- The long quilting guide bar will help keep the stitching line straight.
- Sew while guiding the quilting guide bar over the previous row of stitching.
Shop These Feet
Rolled Hem Foot
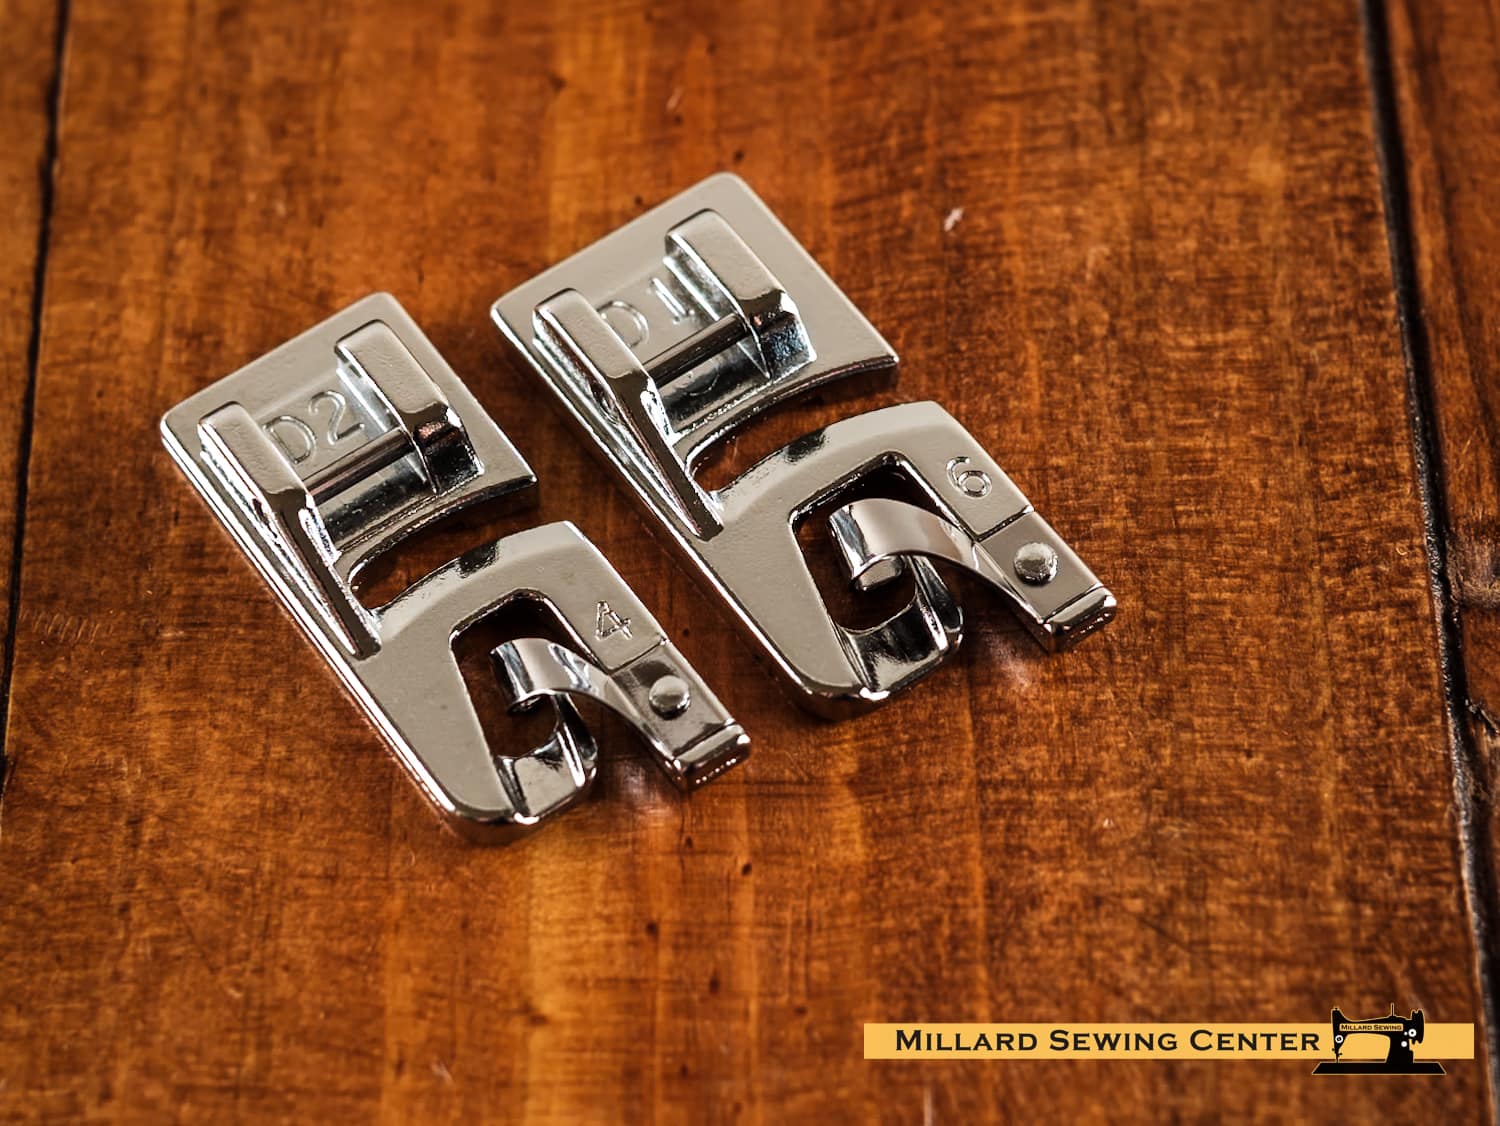
Description:
These feet are ideal for sewing narrow and discreet rolled hems. The spiral located at the front of the foot, makes it possible to fold twice the edge of the fabric before sewing the hem.
These feet are recommended for fine, lightweight and transparent fabrics.
The kit pictured includes two feet to make 4 mm and 6 mm wide rolled hems.
Machine Settings:
- Stitch : Straight stitch / Center needle position
- Thread tension :“Auto” or 3 – 5
- Stitch length : 1 – 2.5
- Stitch width : 0
Tutorial:
Place the fabric, aligning the hem edge with the guide on the foot. Lower the foot and sew several stitches while pulling both threads to the back. Stop the machine with the needle in the
fabric and raise the presser foot. Insert the folded portion of the fabric into the curl of the foot. Lower the foot and sew while lifting up the fabric edge to keep it feeding smoothly and evenly.
Shop These Feet
Roller Foot
Description:
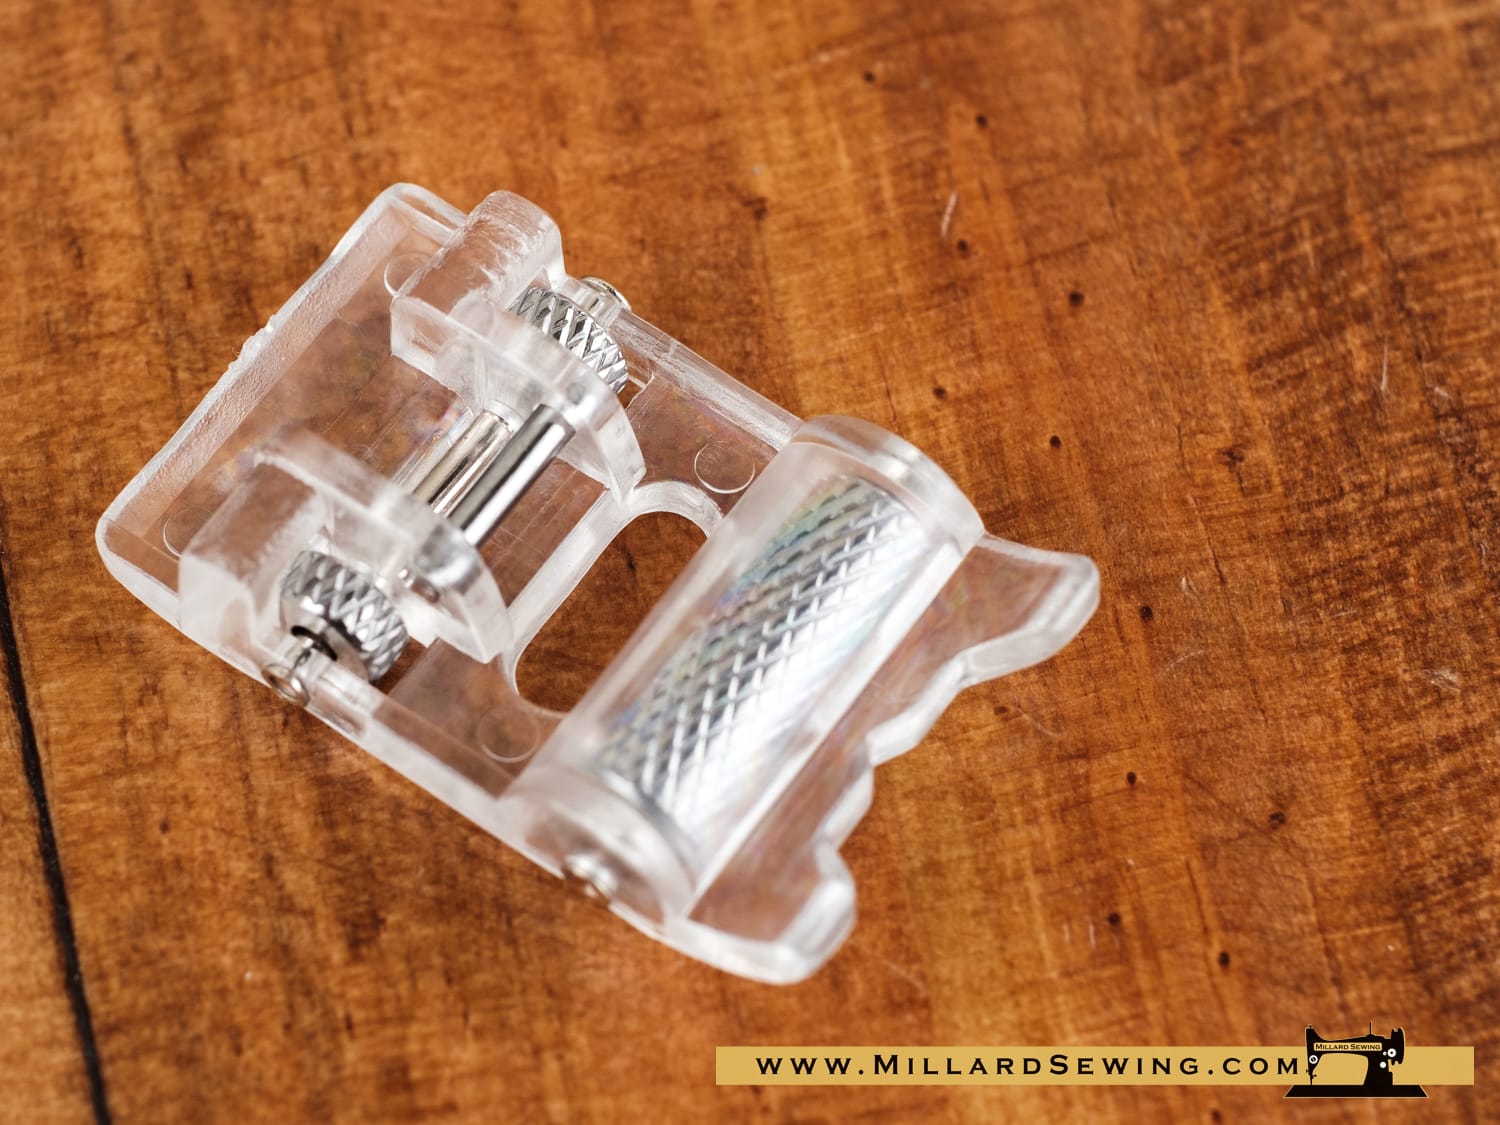
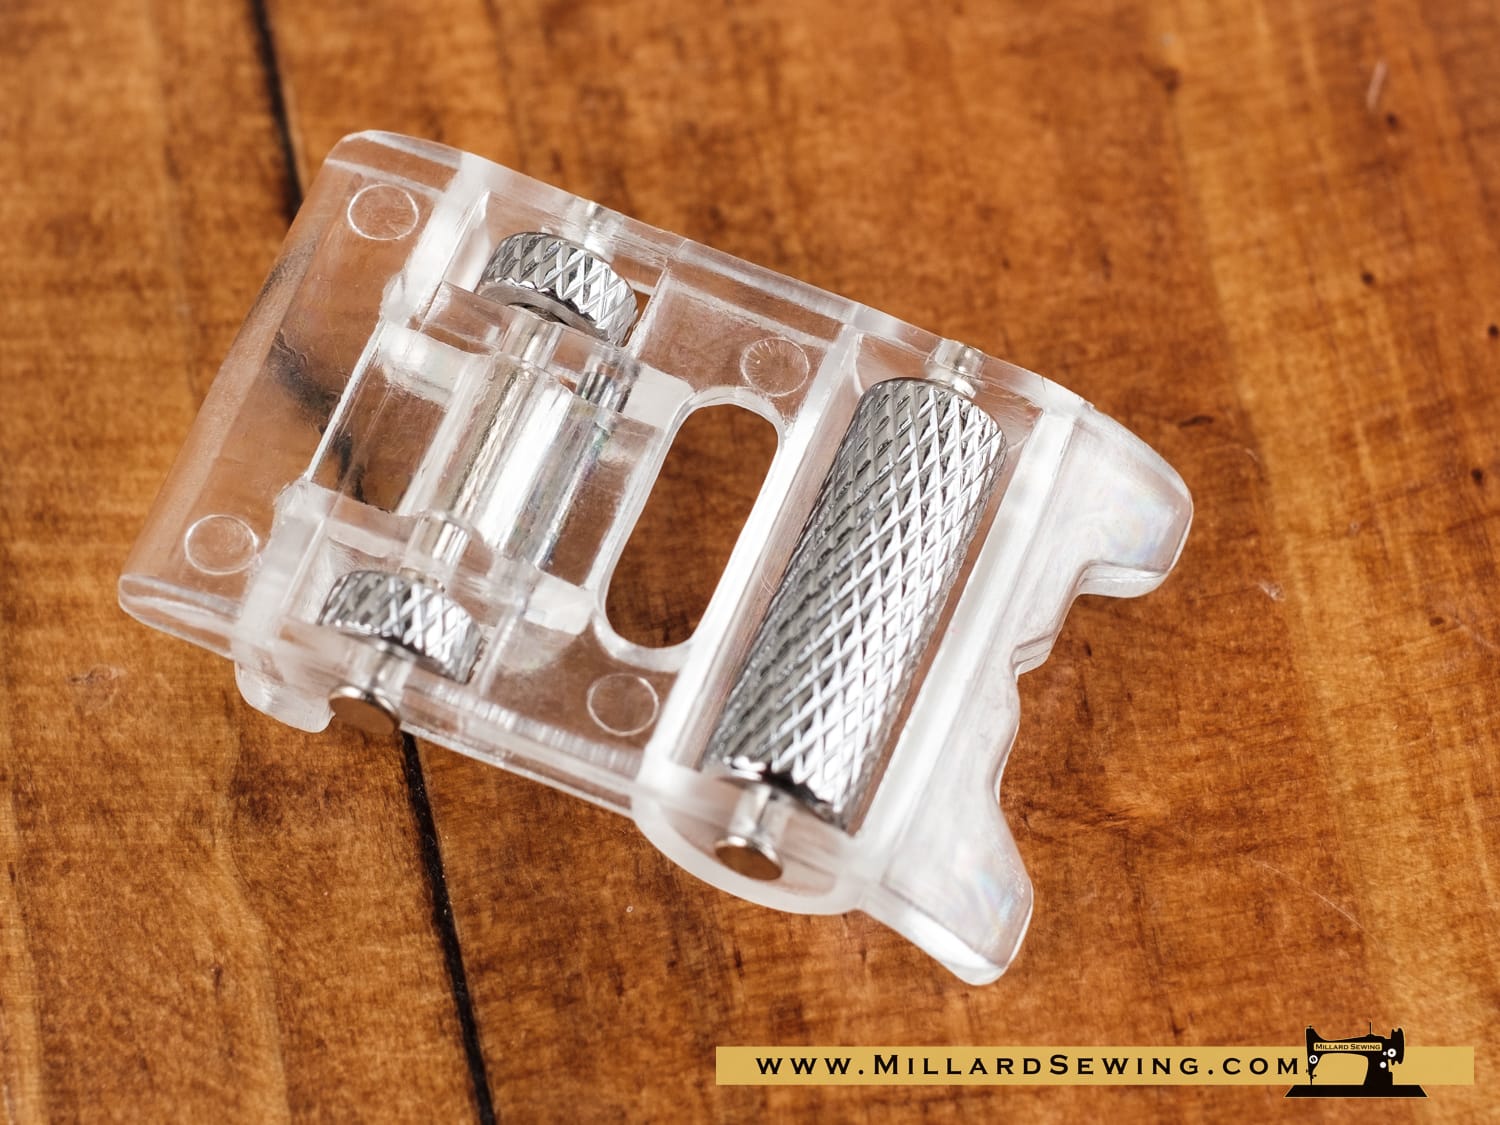
Materials like leather or suede and some synthetic fabrics are sometimes difficult to work with.The textured roller on this foot ensures a very good grip on the sewn materials and less friction between the foot and the feed dog.
Machine Settings:
- Stitch : Straight stitch & Decorative satin stitches
- Thread tension :“Auto” or 3 – 5
- Stitch length : 0.5 – 4
- Stitch width : Any
Tutorial:
This foot is effective for preventing fabric (stretchy materials like jersey and knitted fabrics hard to feed materials like leather or vinyl) from slipping or puckering , because the presser foot rotates to feed the upper layer together with the lower layer without slippage, so the upper layer and the lower layer are fed simultaneously.
Shop These Feet
Roller Foot, Industrial Type
Description:
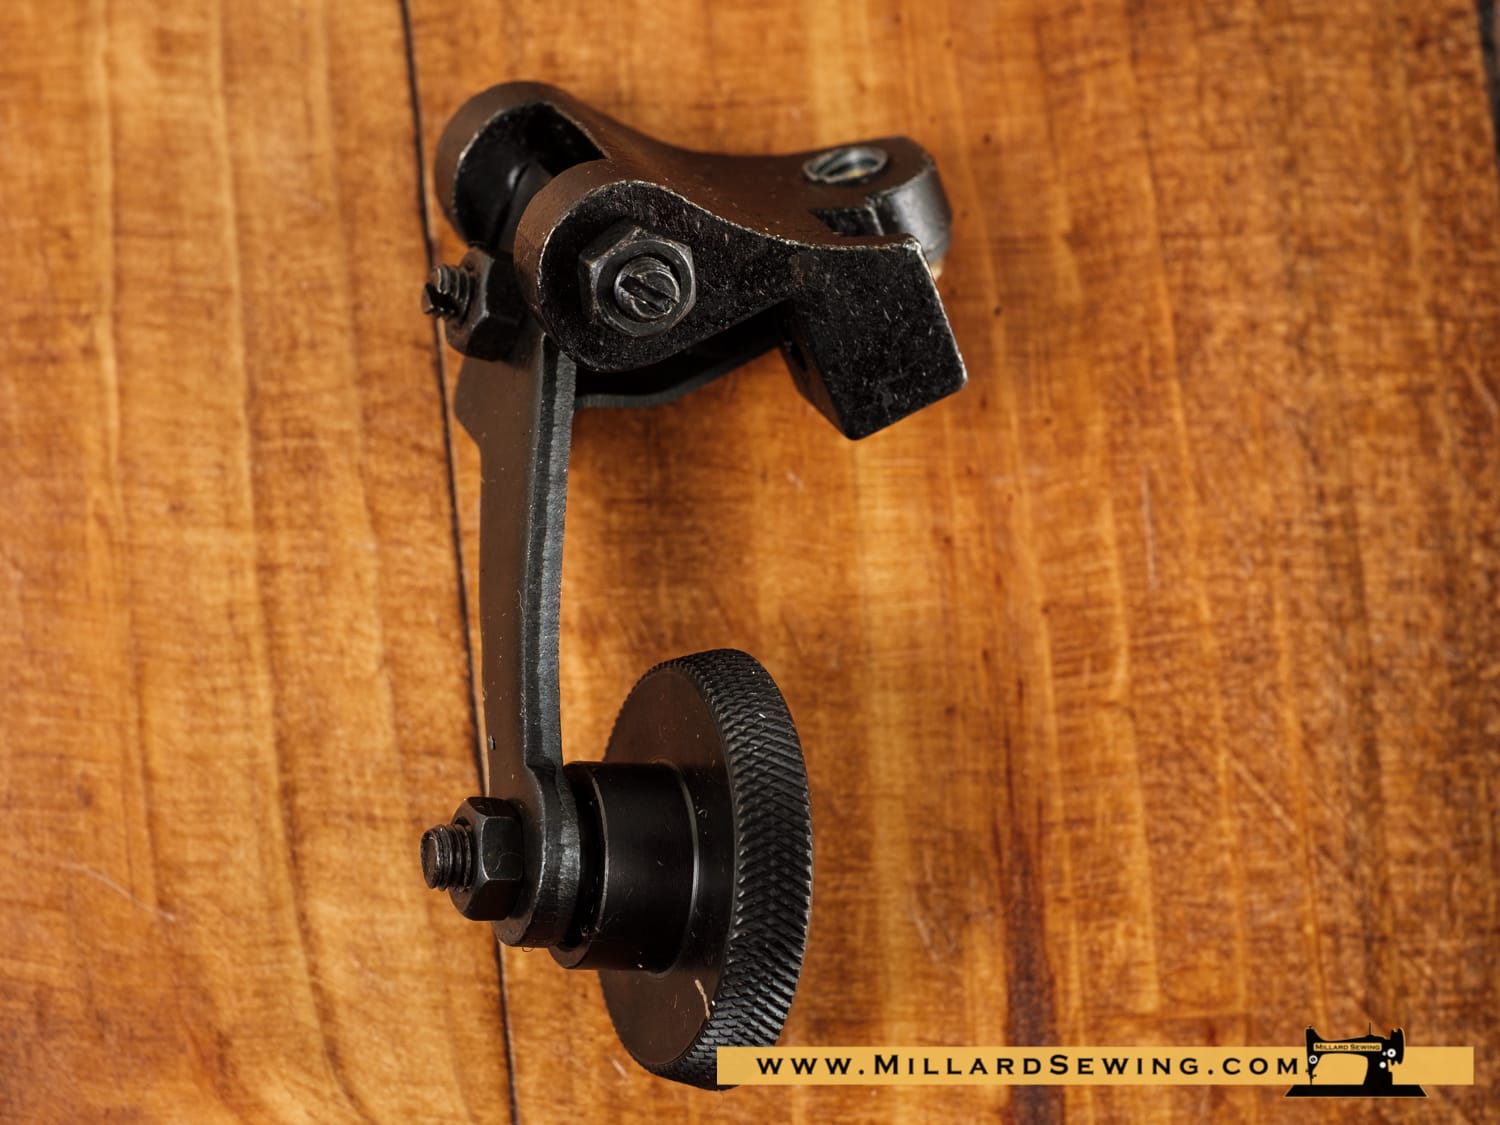
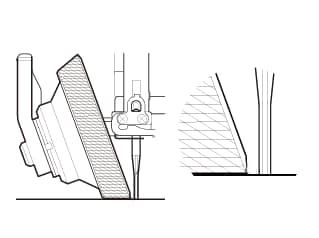
Use this foot for sewing curves, top stitching and piping with a large pipe. This foot gives you a better view and allows you to manipulate the fabric easily and accurately.
Machine Settings:
- Stitch : Straight Stitch
- Thread tension :“Auto” or 3 – 5
- Stitch length : 0.5 – 4
- Stitch width : Adjusted Close To The Roller.
Tutorial:
This foot is effective for preventing fabric (stretchy materials like jersey and knitted fabrics hard to feed materials like leather or vinyl) from slipping or puckering , because the presser foot rotates to feed the upper layer together with the lower layer without slippage, so the upper layer and the lower layer are fed simultaneously.
Shop These Feet
Ruffler Foot
Description:
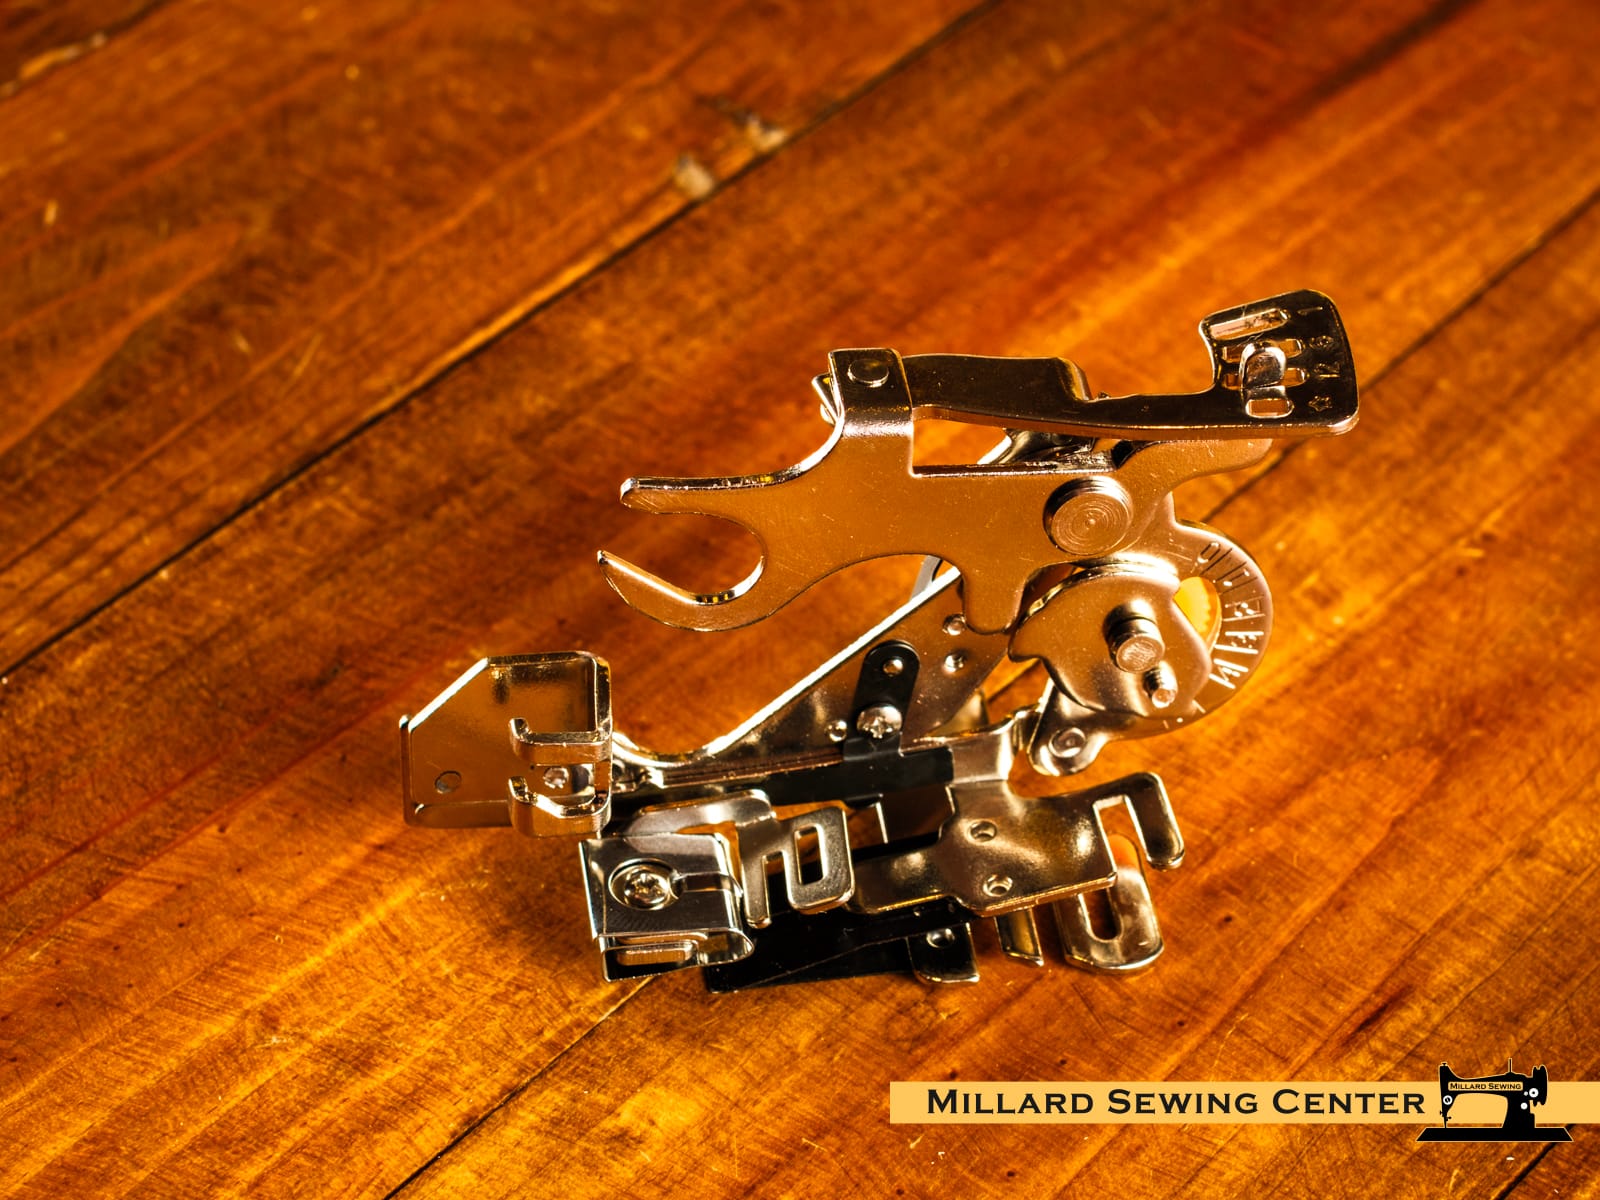
This device makes ruffling and pleating unbelievably easy! It also saves a lot of time, as no preparation is required. With just one single adjustment, you can set the desired size and number of pleats.
Shop These Feet
Ruler Foot
Description:
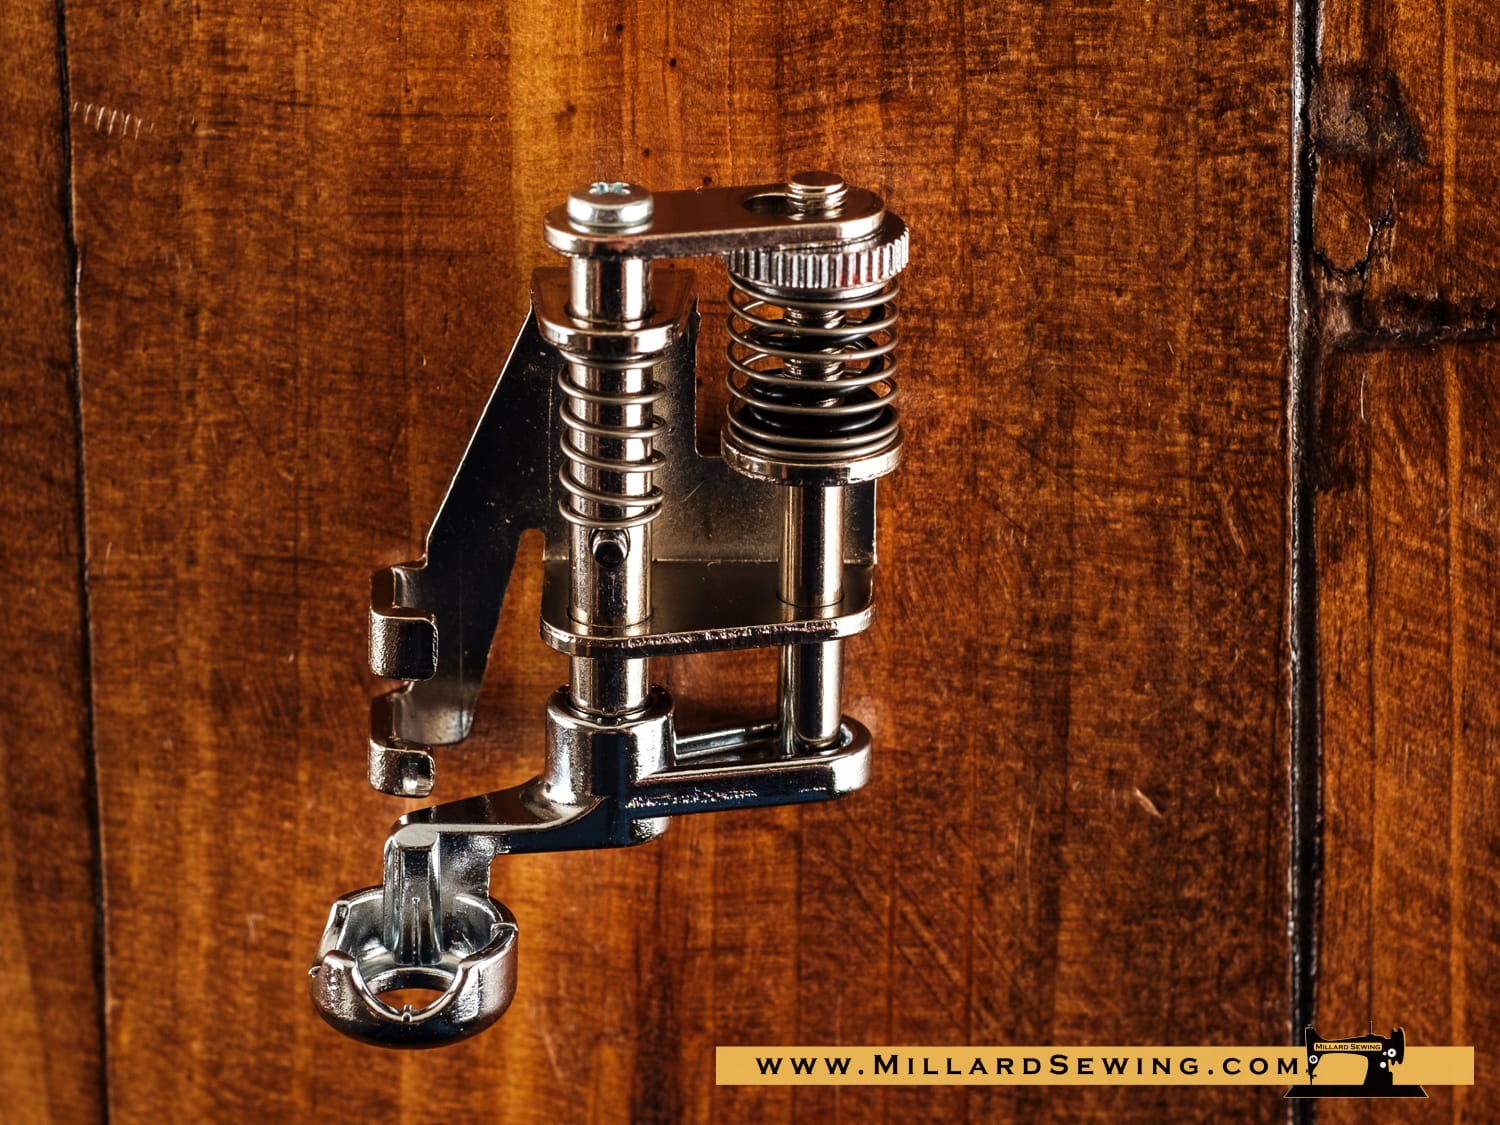
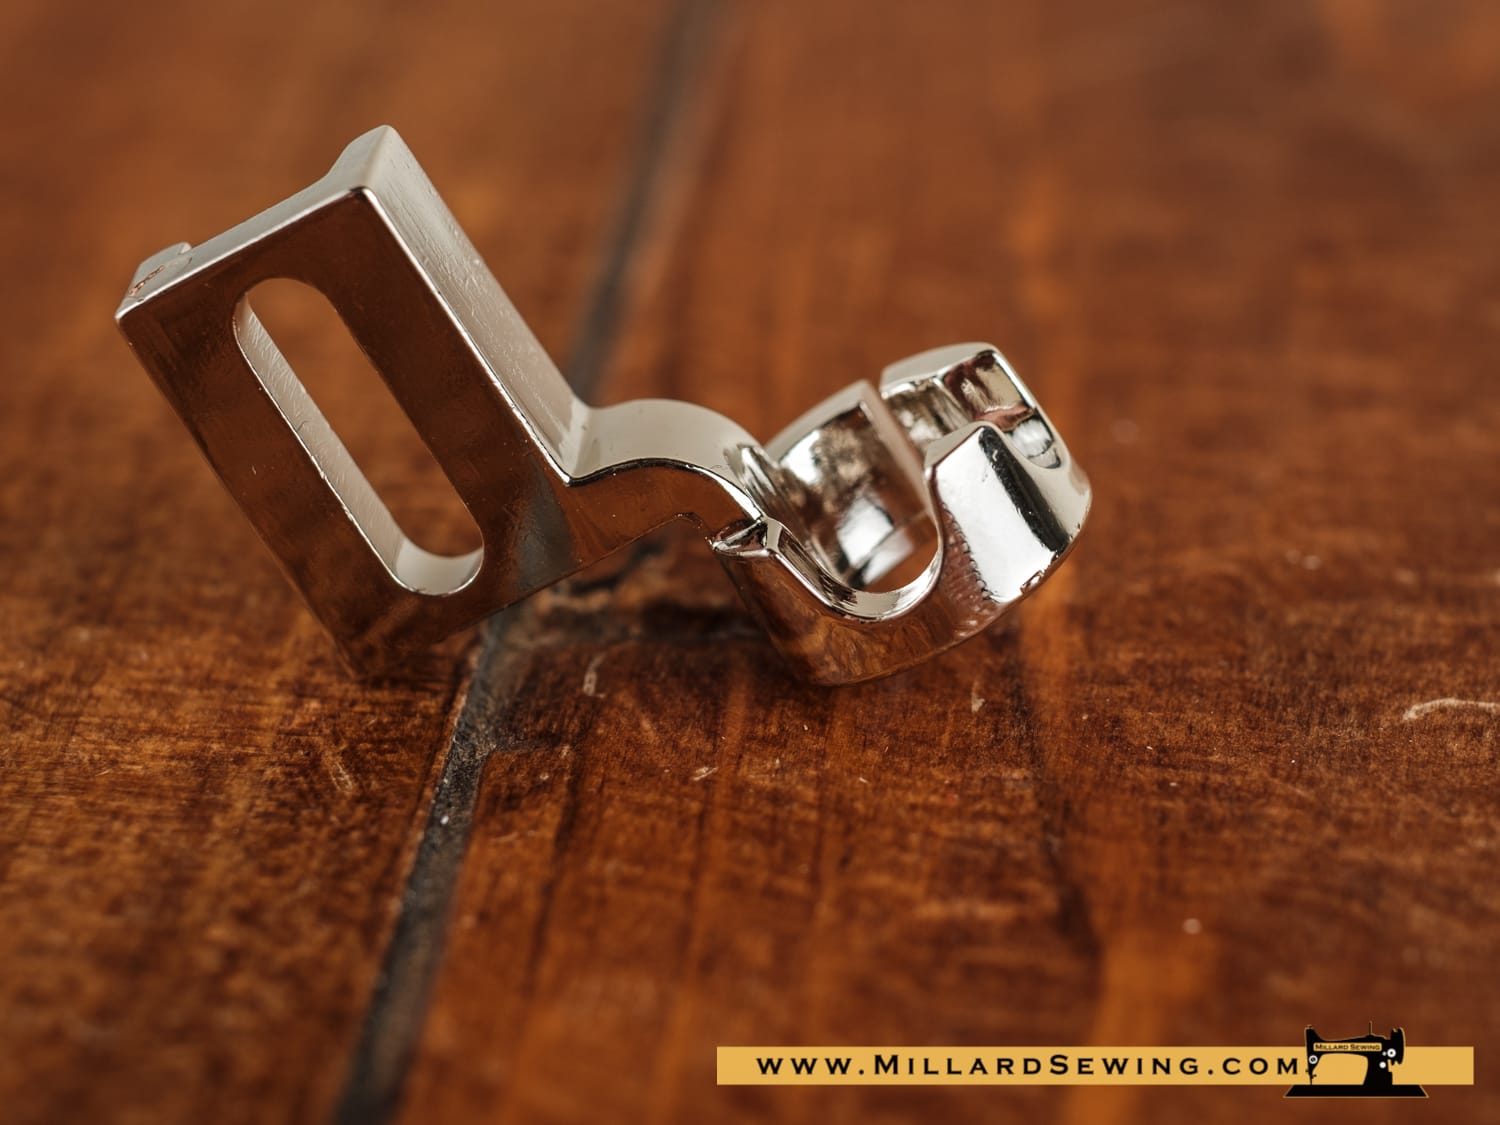
The ruler foot was specifically designed to use with quilting rulers for ruler work. The key point of the foot is the round cup which moves smoothly alongside the quilting ruler without allowing the ruler to slide over or under the foot.The needle drops in the center of the ruler to create the quilting line.
Machine Settings:
- Stitch : Straight Stitch Center Needle
- Thread tension : “Auto” or 3-5
- Stitch length : Controlled by fabric speed.
- Stitch width : 0
- Feed dog : Down or use a darning plate.
- Straight stitch needle plate is
recommended for better results (when available).
Tutorial:
This foot has a 1/2 inch outer diameter so that the needle drops 1/4 inch from the ruler edge.
Caution:
- Lock the machine, or turn the power switch off when attaching and detaching the foot or the attachments.
Attaching the 1/4 inch ruler foot :
- Remove the foot holder (shank) and attach the 1/4 inch ruler foot. (Slide type do not fully tighten in this step.)
- Make sure that the needle enters the center of the hole in the foot.
- Place the ruler/template on the quilt layers.
- Lower the presser bar. Adjust the height of the foot by turning the round nut or sliding the foot up/down until the bottom of the foot barely touches the top of the quilt layers. Tighten the foot in position (slide type only).
Note:
Use with proper thickness Ruler/Template. These vary by shank height and must be matched for safe and good results.
Use:
- Stitch while guiding the fabric and ruler /template together along the side of the foot.
- Move the machine 3 mm (1/8 inch) or less per stitch. Or as needed to achieve desired stitch length.
- Follow the instructions of your rulers/templates to achieve the desired design.
Shop These Feet
Satin Stitch Foot
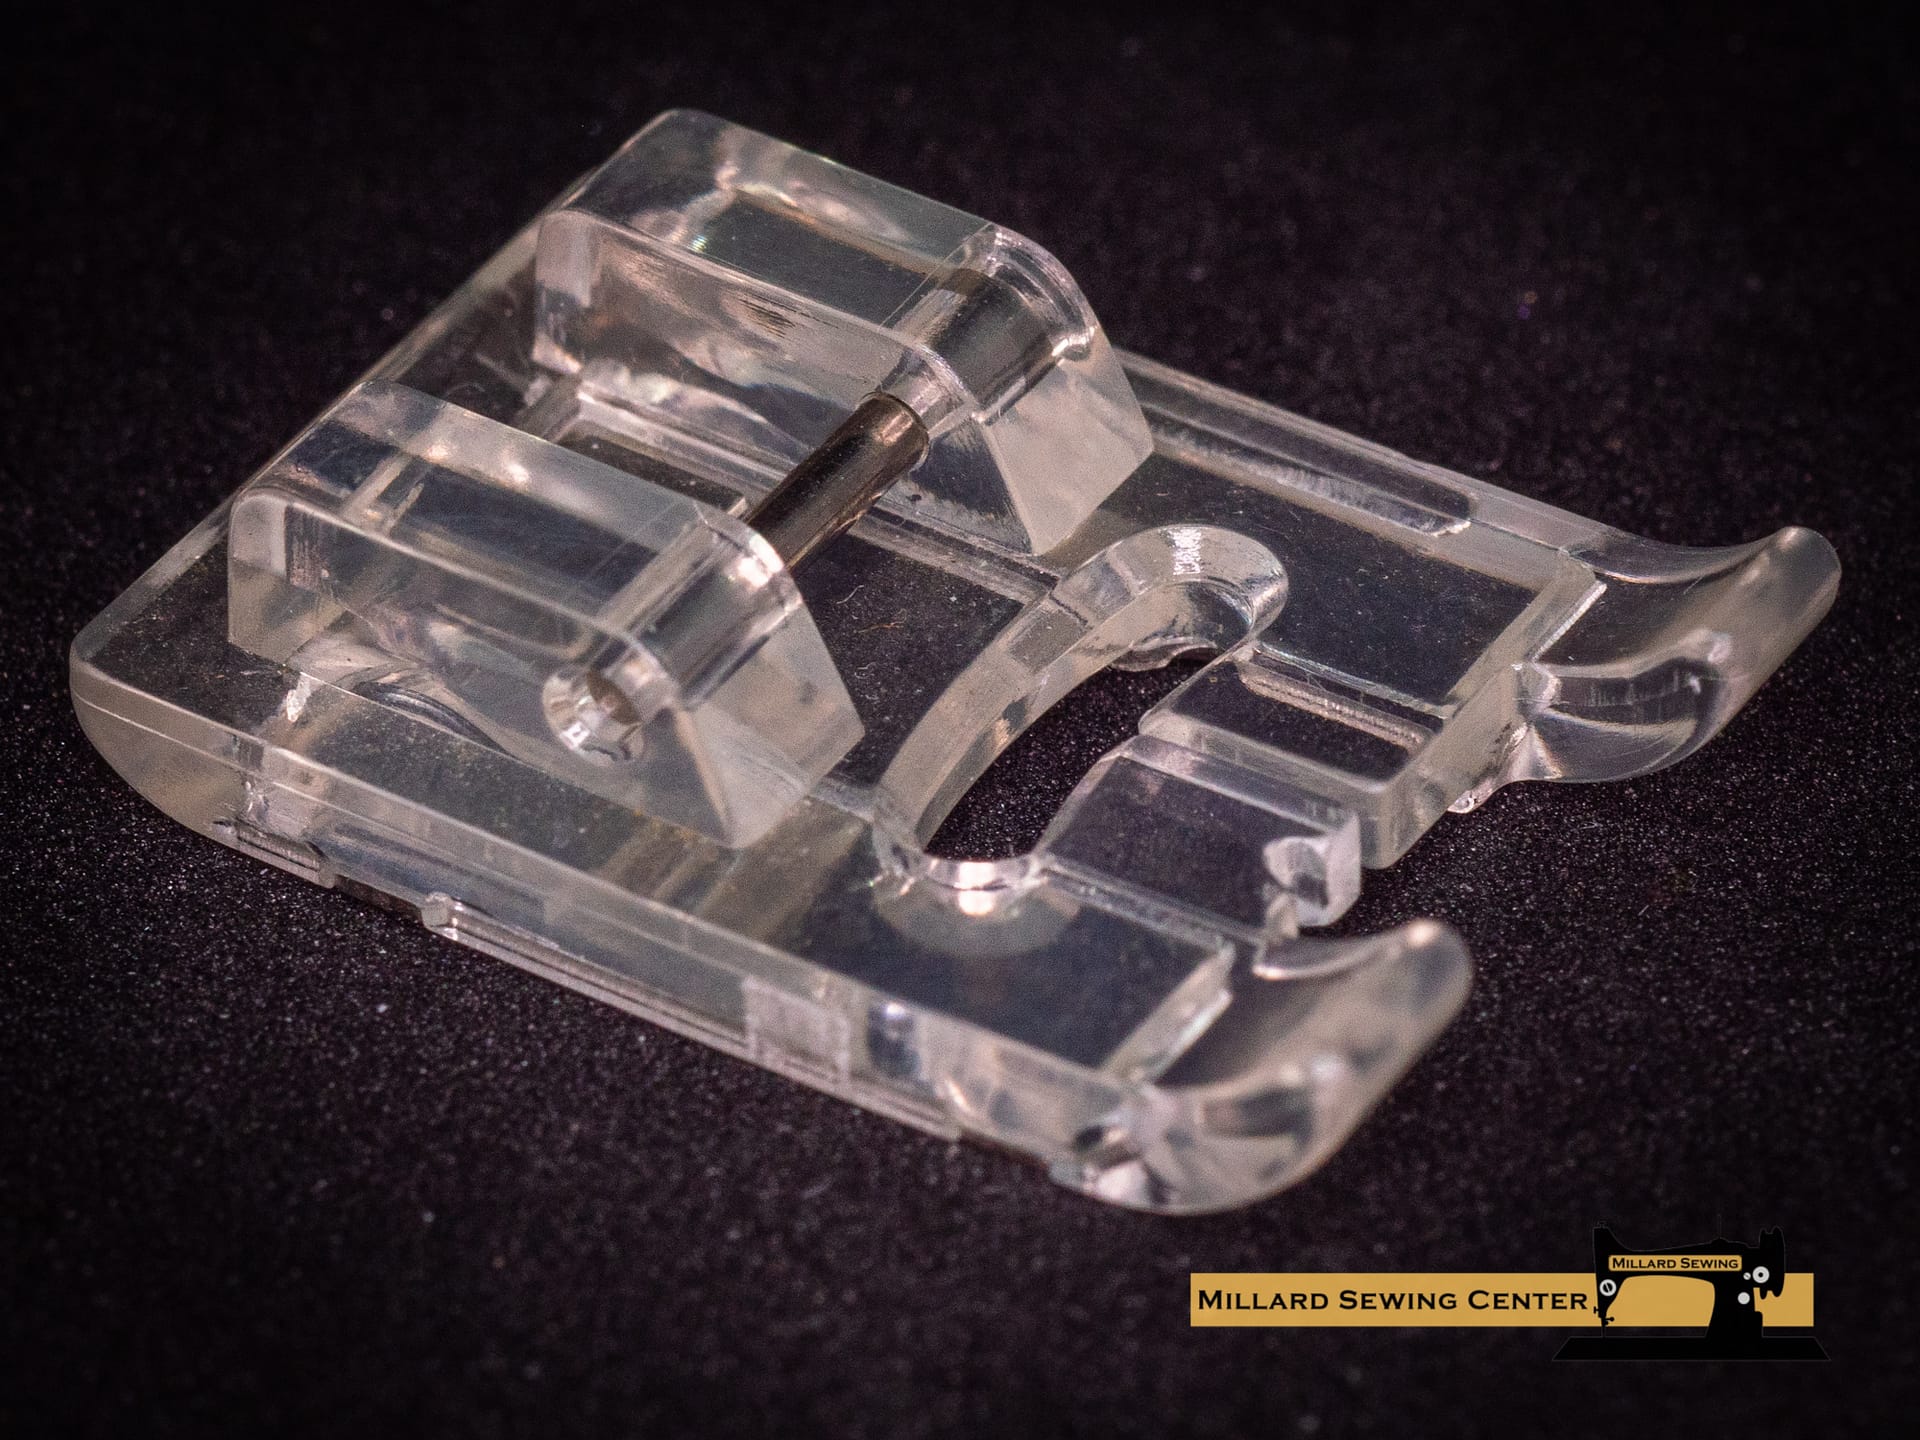
Description:
This foot is ideal for sewing satin or decorative stitches. The cut-out on the underside of the foot allows the advance of fabrics, even with dense stitching. This multi-function satin stitch foot also optimizes the sewing of overlock and super-stretch stitches.
Machine Settings:
- Stitch : Decorative or dense stitch
- Thread tension :“Auto” or 3 – 6
- Stitch length : 0.5 – 4
- Stitch width : 0-Max
Tutorial:
Use a washable marker to draw design lines on fabric right side. Place fabric and stabilizer under foot. Lower presser foot. Sew design. It can also be helpful to lighten the foot pressure, especially if your creation contains curves.
Shop These Feet
Straight Stitch Foot
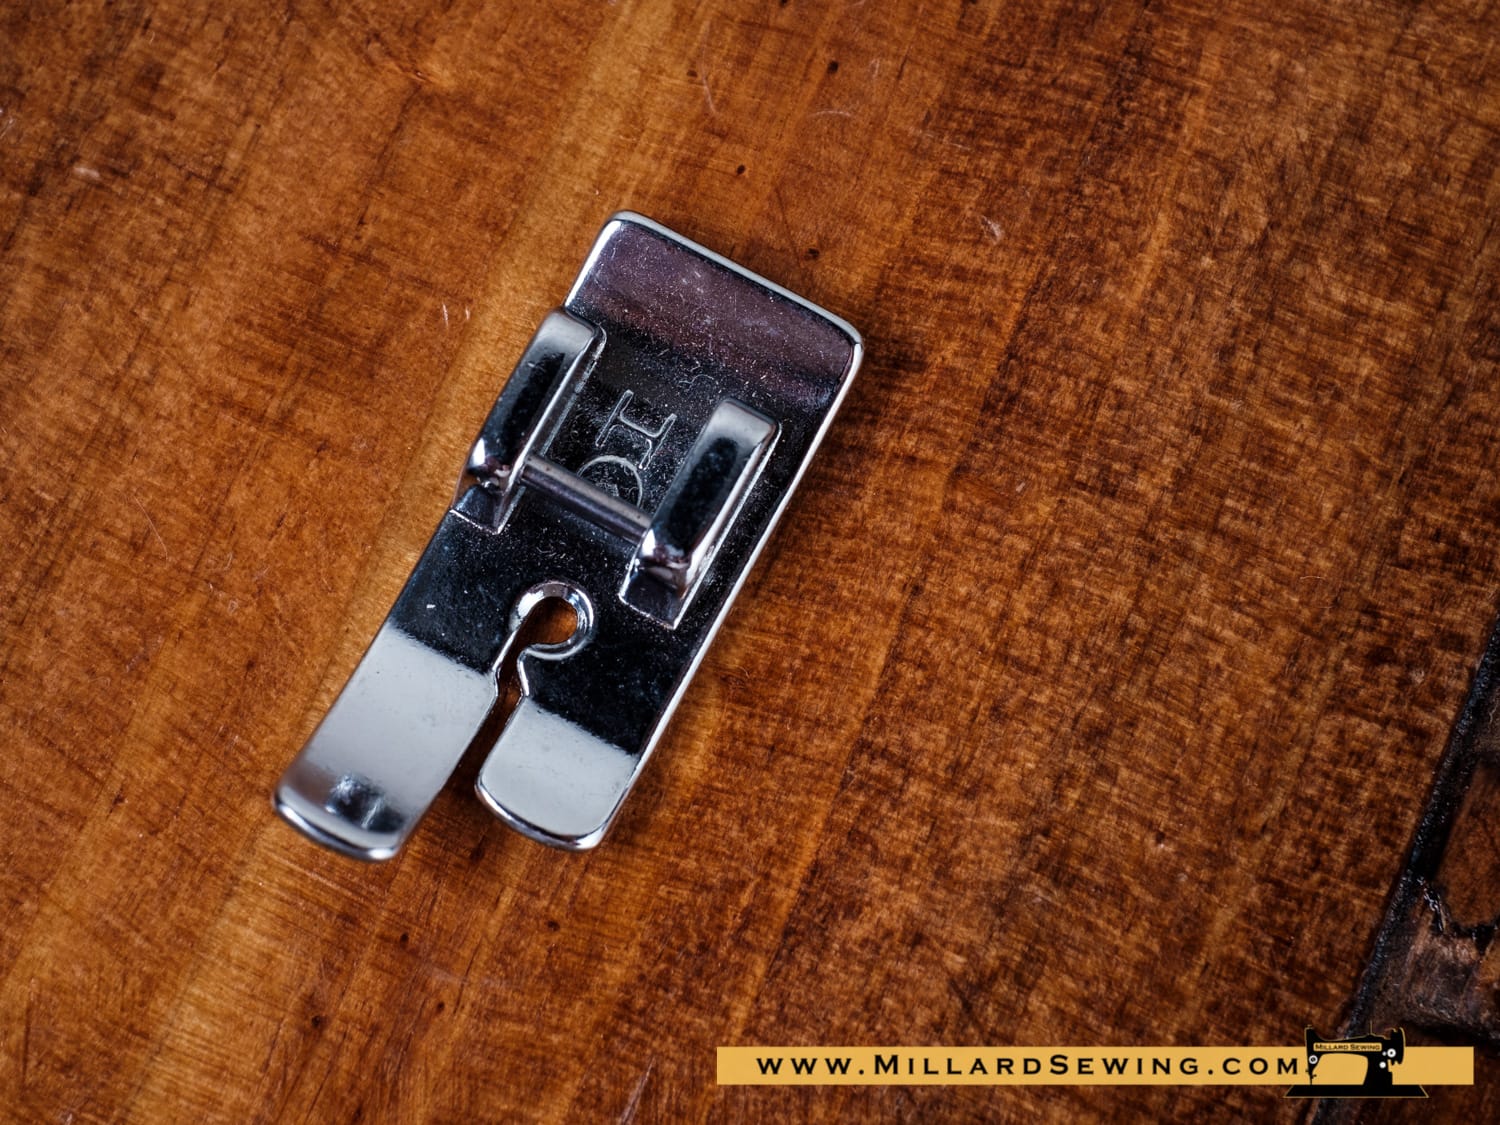
Description:
No more need to worry about skipped stitches or puckering on lightweight fabrics when sewing a straight stitch. With its totally flat underside and the single hole for the needle, this foot is specially designed for sewing straight stitches.
Machine Settings:
- Stitch : Straight stitch / Center needle position
- Thread tension :“Auto” or 3 – 6
- Stitch length : 1.5 – 4
- Stitch width : 0
Tutorial:
Gently guide the fabric along the seam guide line on the needle plate, letting the fabric feed naturally. Often used for delicate fabrics. Note: Select only the straight stitch with a central needle position. Use with Straight Stitch Needle Plate when available for best results.
Shop These Feet
Teflon (Non-Stick or Ultra Glide) Foot
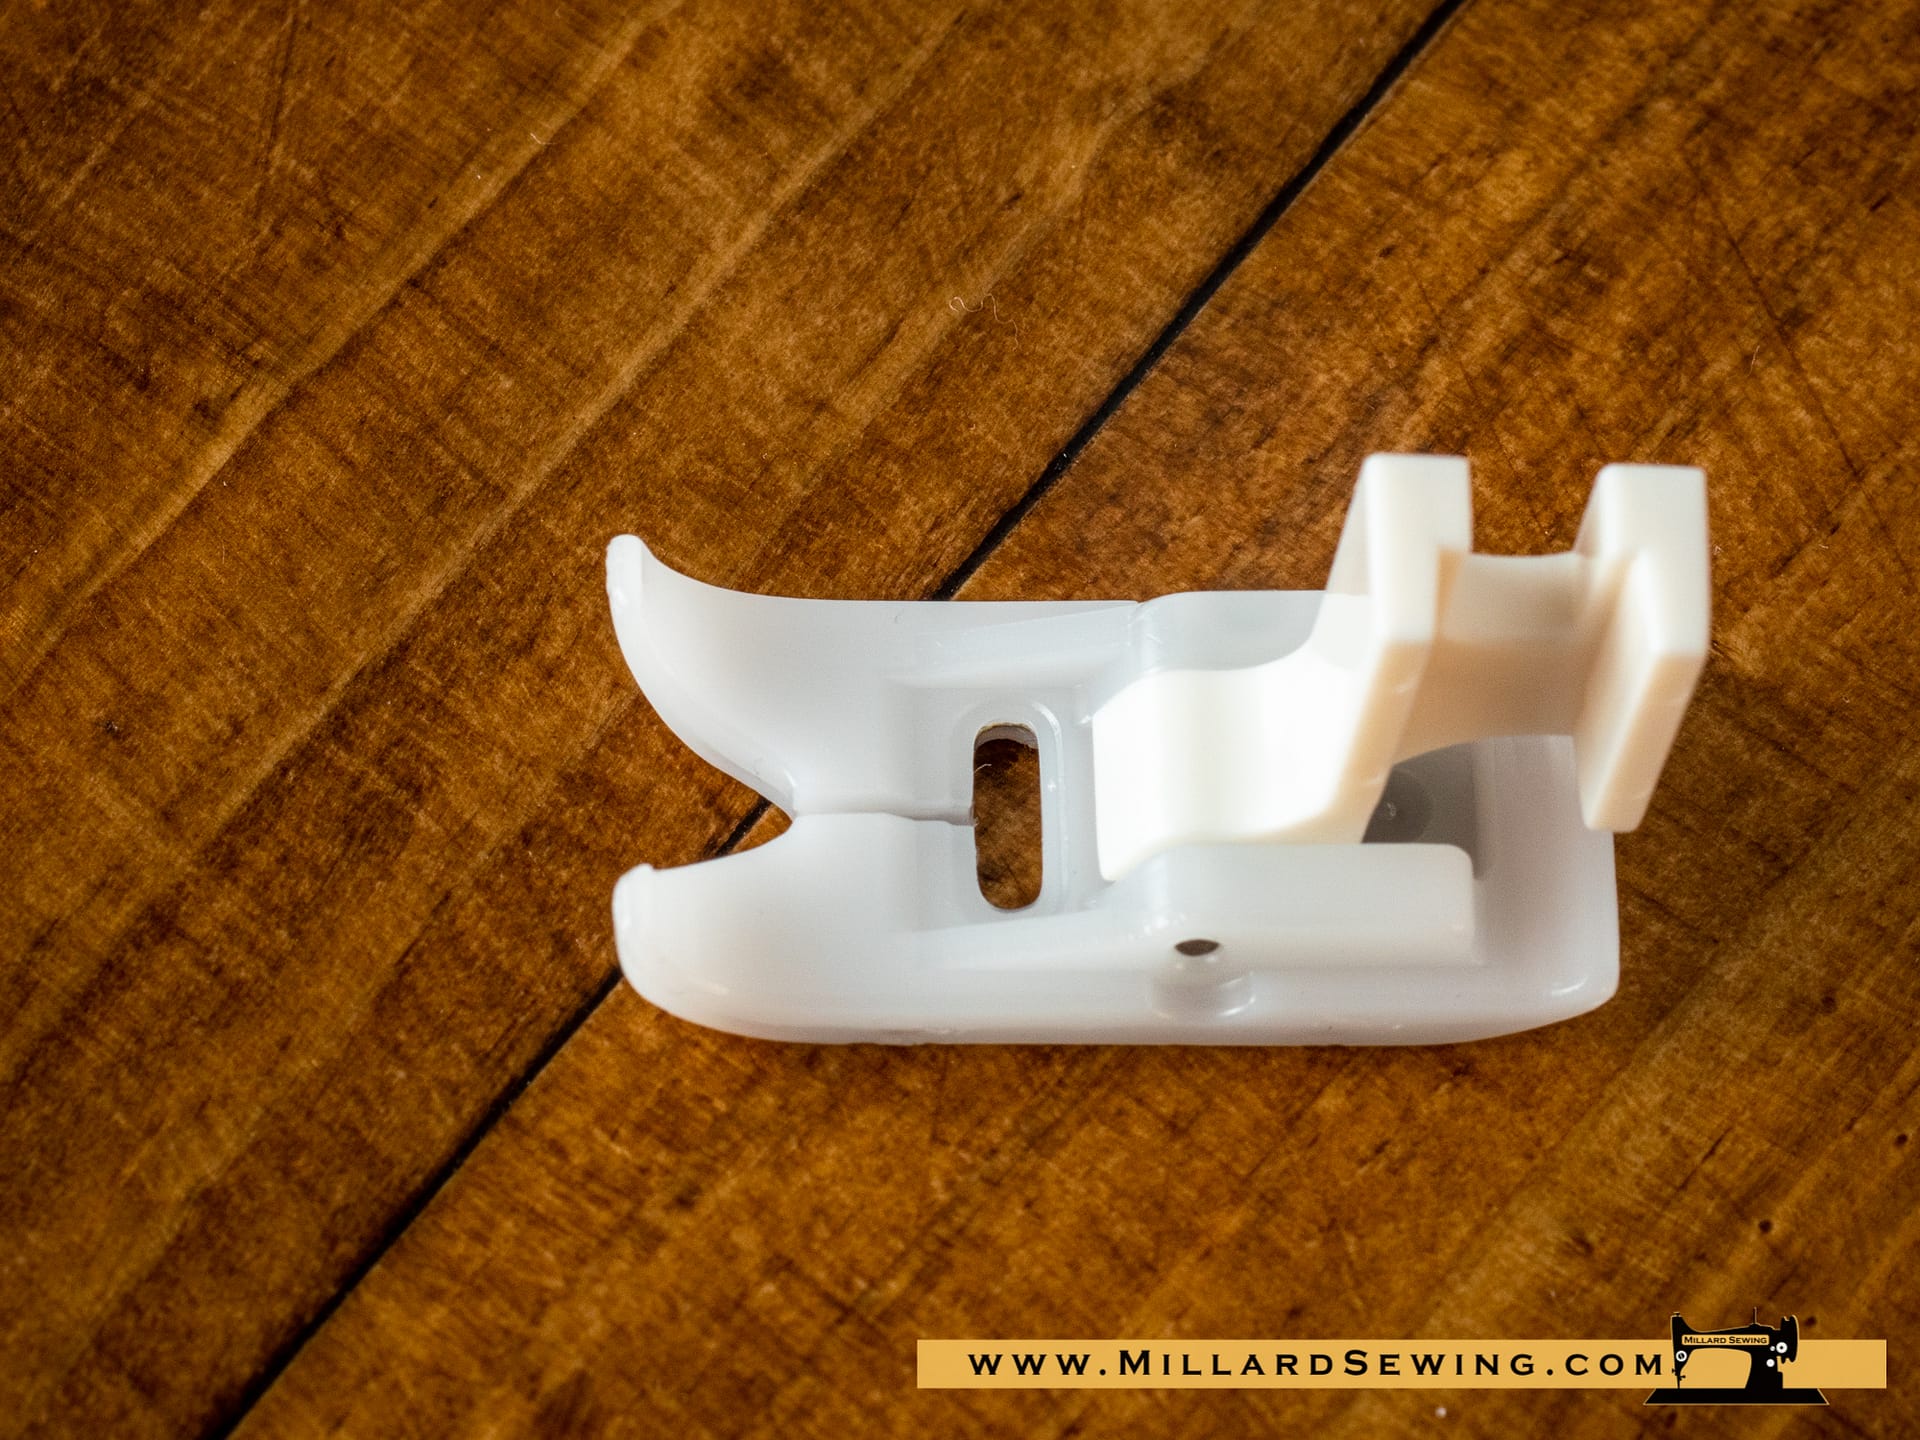
Description:
The no-stick coating of this foot facilitates the sewing of difficult materials like vinyl, suede or faux leather. With its special coating, the foot glides across the surface and prevents possible blockages or damage due to bad feed. The foot is also ideal for directional sewing.
Machine Settings:
- Stitch pattern: any
Tutorial:
Use this foot in the same way as the standard zigzag foot
Shop These Feet
Walking (Even Feed) Foot
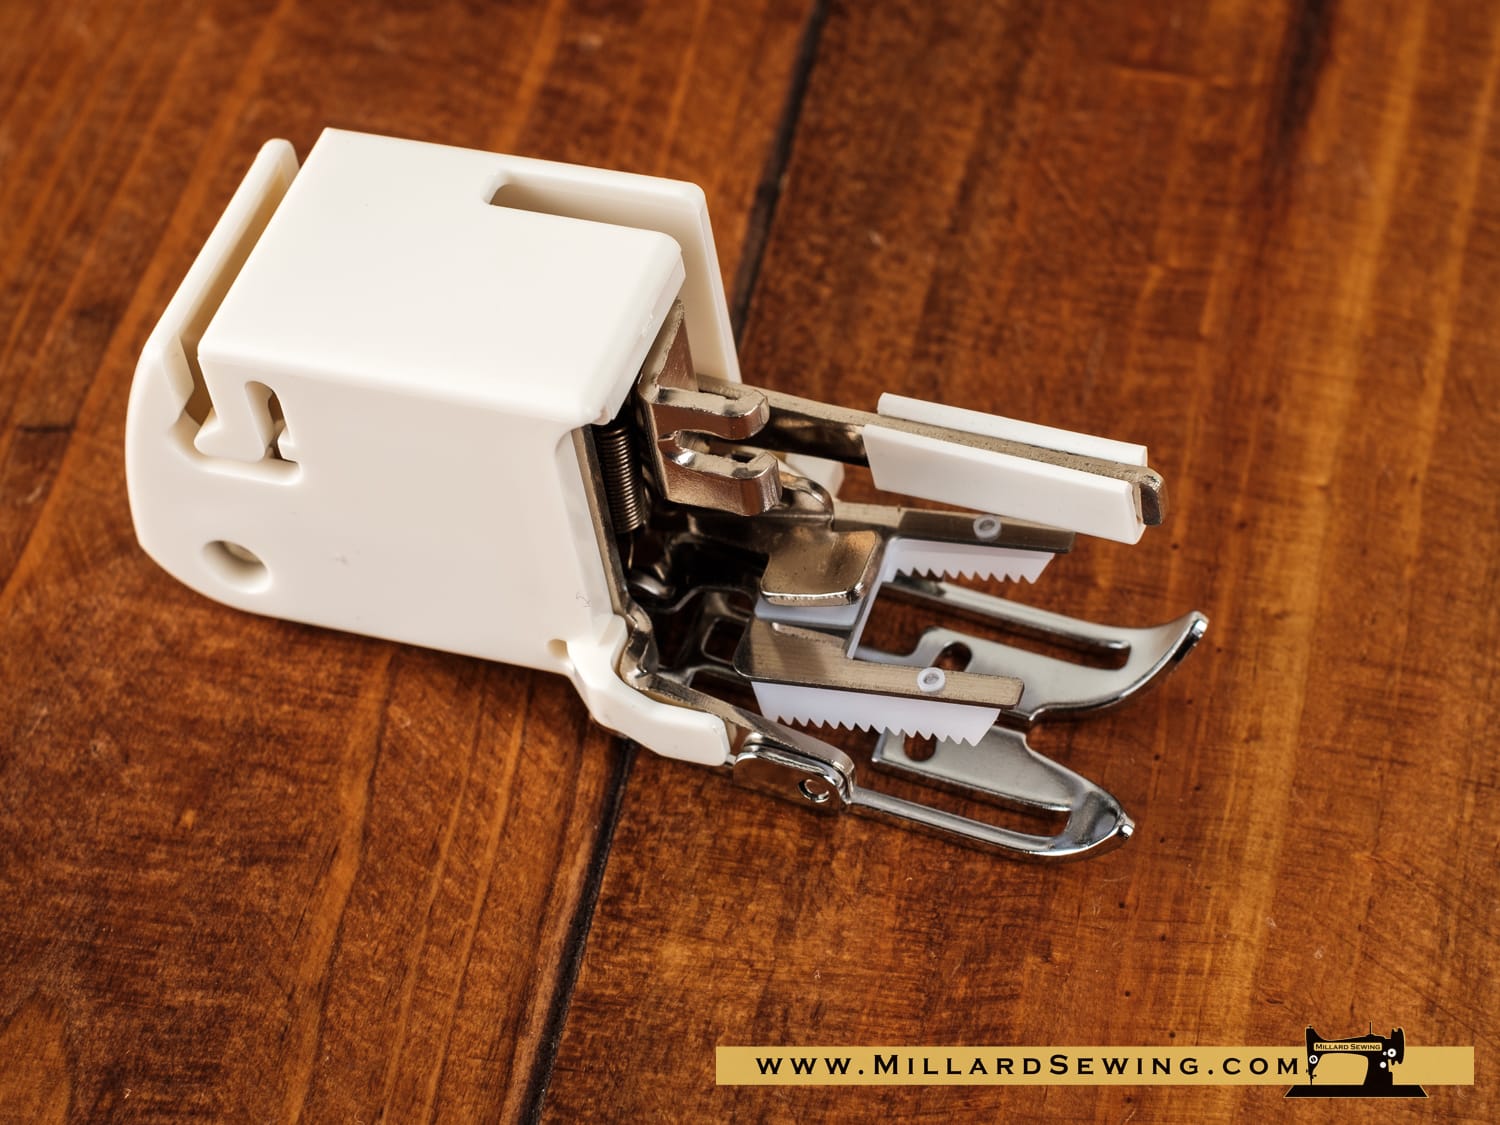
Description:
Great for keeping quilt layers from shifting when sewing and keeping stripes and checks matched. Fabrics lie between an upper and lower feed dog to move them simultaneously and prevent them from slipping. Some types of this foot have a special open toe that provides a clear view of the zone around the needle stitching.
Machine Settings:
- Stitch: Utility stitches
- Thread tension: 1 – 5
- Stitch length: 0.5 – 4
- Stitch width: 0 – Maximum
Tutorial:
Attach the walking foot to the presser bar with the lever over the needle clamp. With this foot, fabric can be sewn without
shifting or puckering since the fabric is gripped and fed by both upper and lower feed dogs. It works well with materials like knit, vinyl or leather
Shop These Feet
Zigzag Foot
Description:
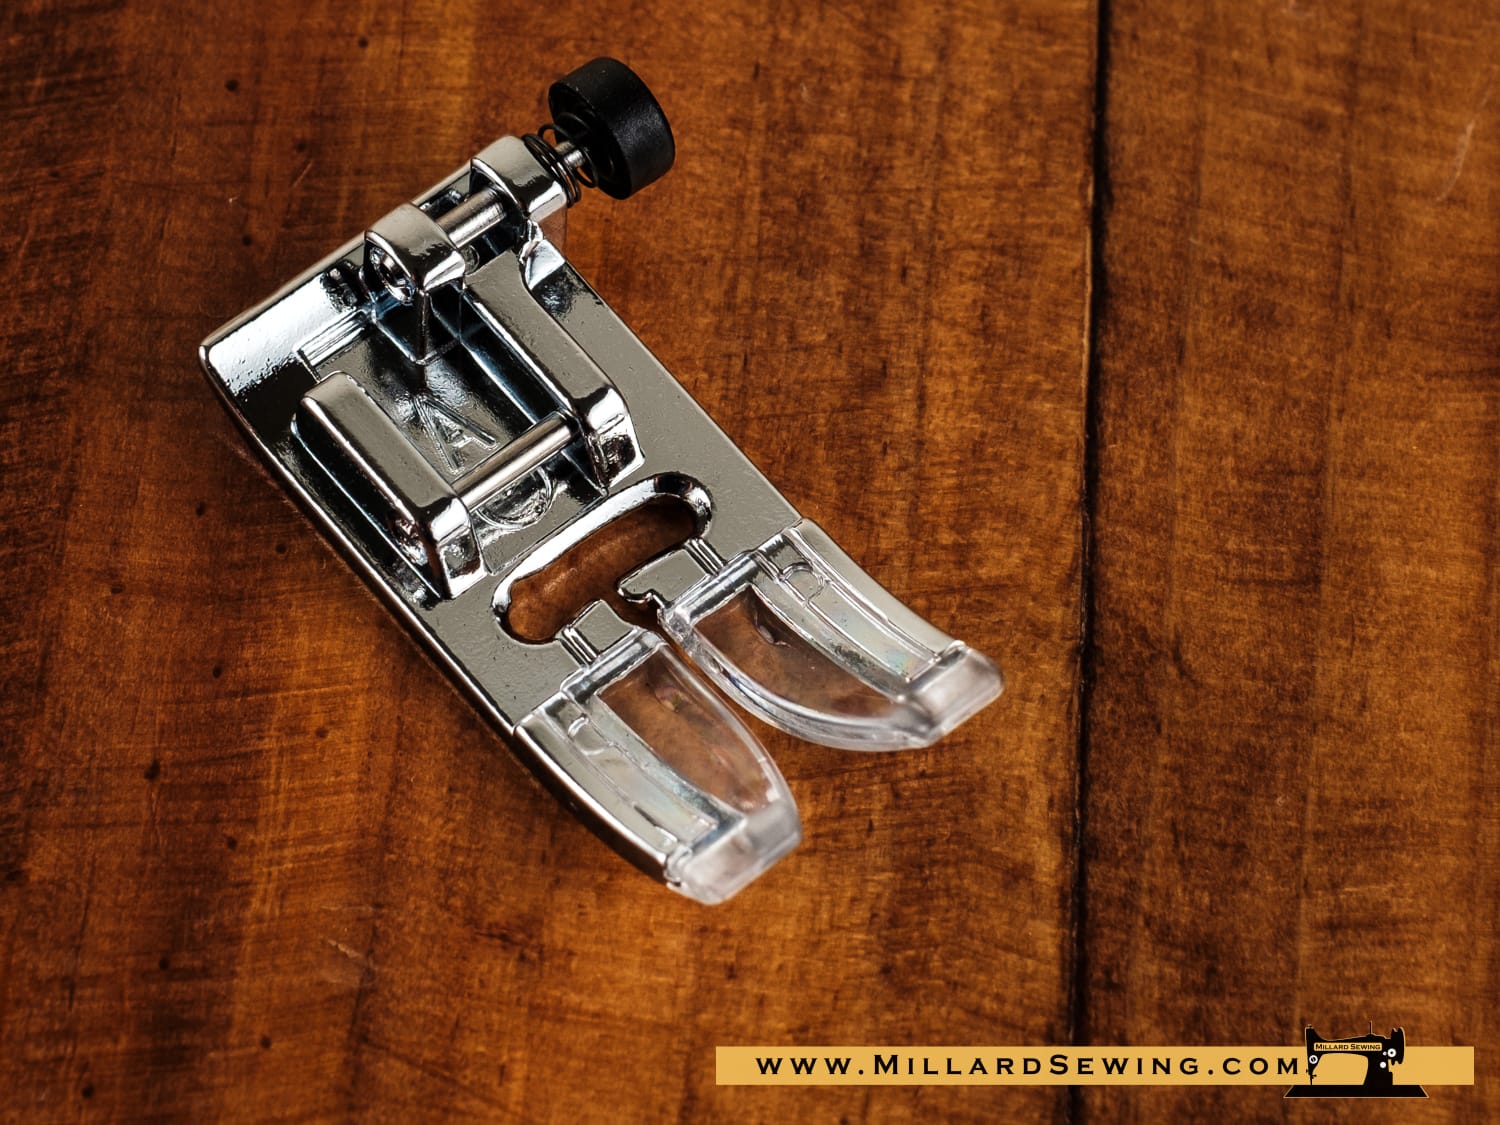
The Zig Zag Foot is also sometimes known as a “general purpose” foot. This is most likely the foot that was on your machine when you bought it. The hole in the center of this foot is wide enough for your needle to move side to side up to the widest zig zag that your machine will sew.
Machine Settings:
- Stitch : Zig Zag / Decorative
- Thread tension :“Auto” or 3 – 5
- Stitch length : 1 – 2.5
- Stitch width : 0-Max
Tutorial:
- Using a seam guide or the lines on your needle plate, line up the edge of the fabric.
- Lower Presser Foot
- Select a zig zag or decorative stitch and sew.
Shop These Feet
Zipper Foot, Adjustable
Description:
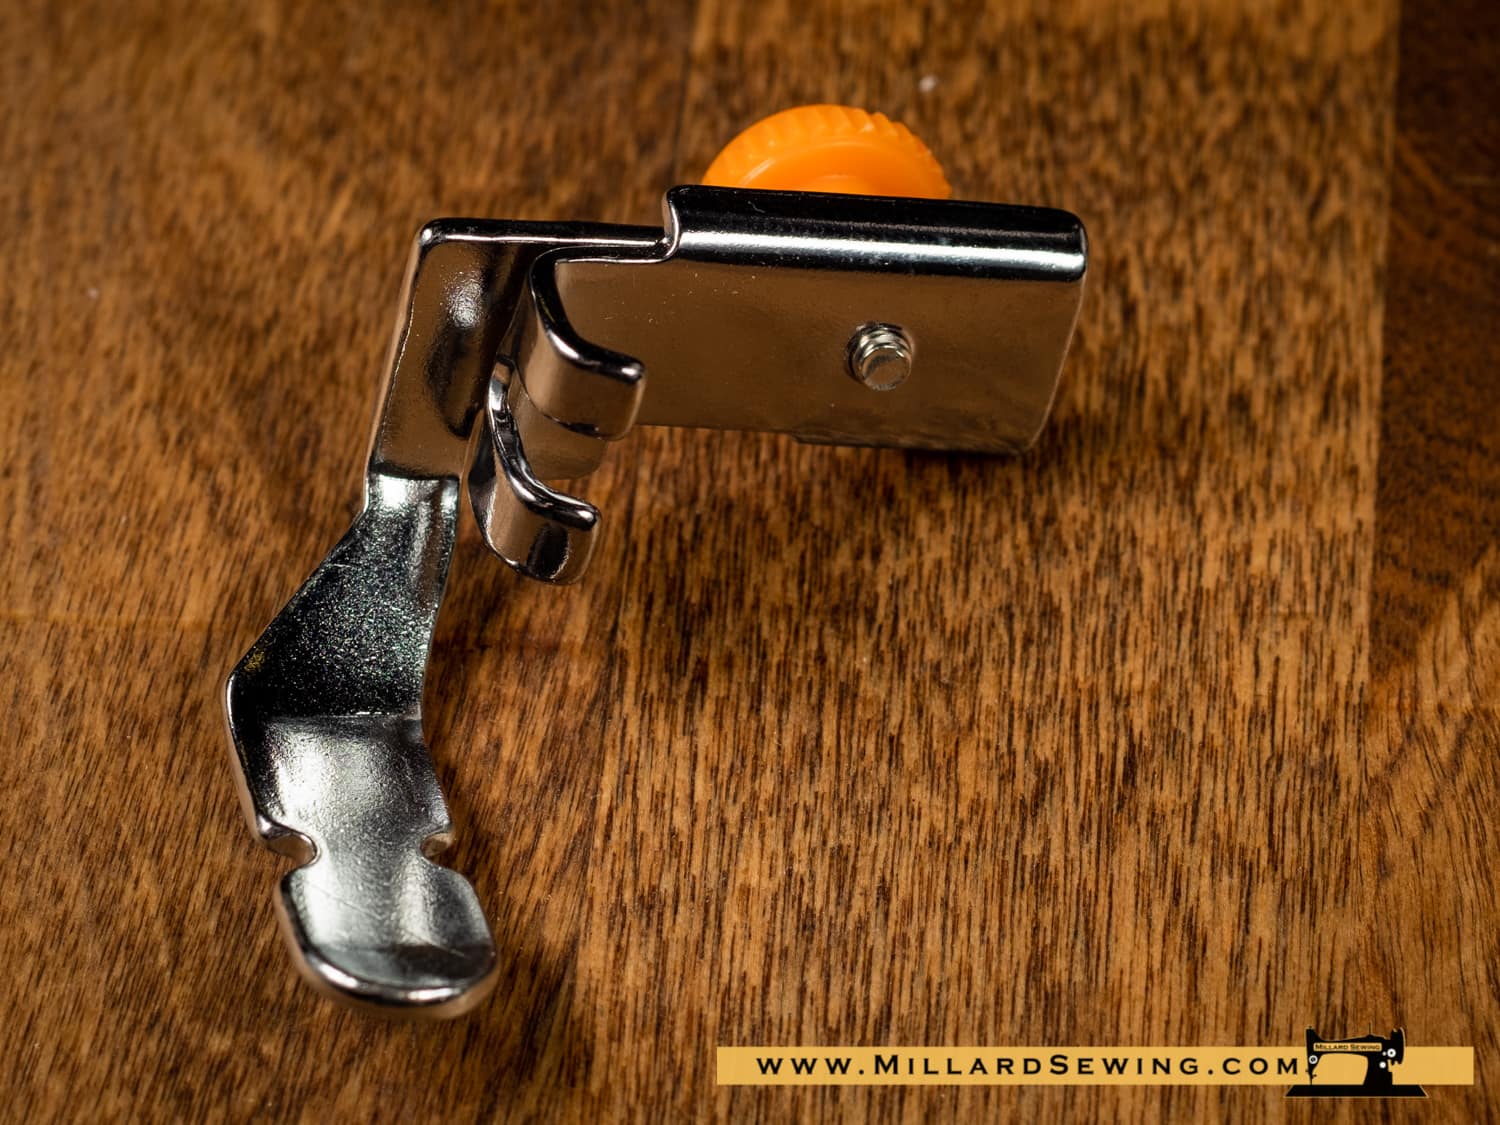
Use this style foot with straight stitch only machines. You can adjust the foot side to side to align it very close to the zipper when the needle is in a fixed position. It is also very useful for sewing very close to thick piping used in interior decoration.
Machine Settings:
- Stitch : Straight stitch
- Thread tension :Add Information
- Stitch length : Add Information
- Stitch width :Add Information
Tutorial:
- Attach the adjustable zipper foot on the presser bar.
- Slide the zipper foot to adjust its position and tighten the thumb screw on the zipper foot.
- To sew the left side of the zipper, set the zipper foot on the left side of the needle.
- Lower the zipper foot at the end of the zipper so that the needle pierces the fabric next to the fold and zipper tape.
Shop These Feet
Zipper Foot, Invisible
Description:
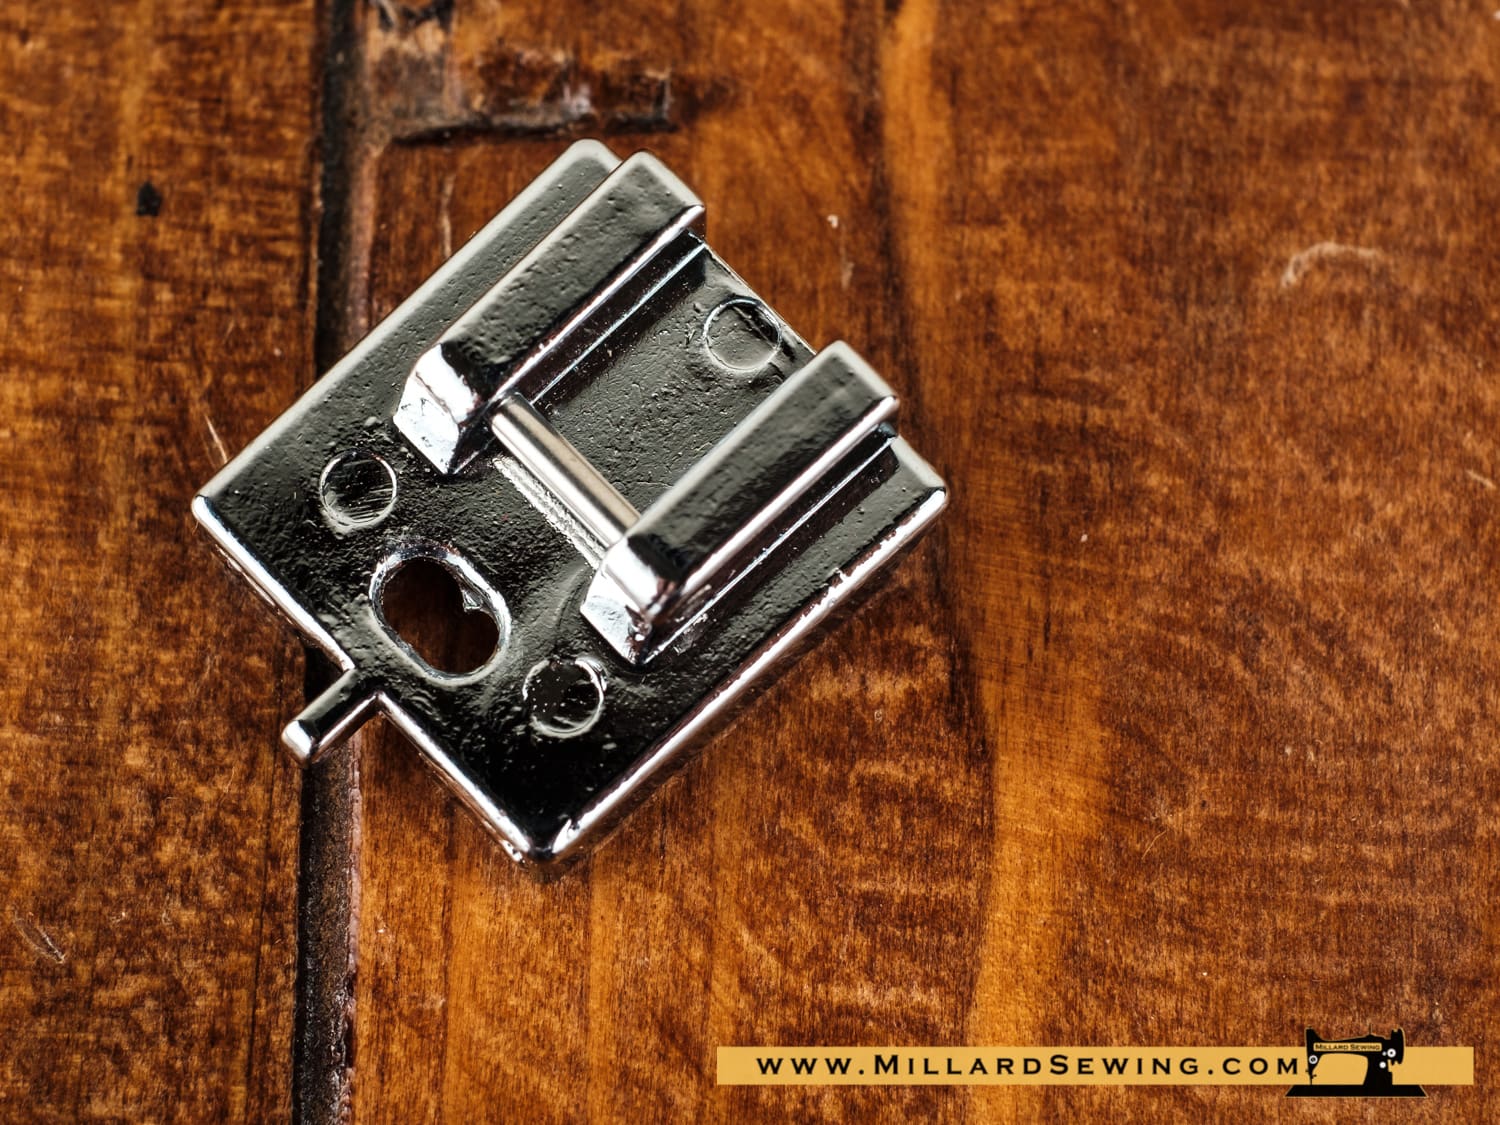
Invisible zippers are widely used in garments, both on lightweight fabrics and thicker woolens. The application of zippers using this technique requires sewing very close to the zipper teeth. The furrow under the foot unrolls the zipper and allows its application without difficulty.
Machine Settings:
- Stitch : Straight stitch
- Thread tension :“Auto” or 4-5
- Stitch length : 0.5-4
- Stitch width : Adjust for Needle Position
- Foot pressure: 3 – 5
Tutorial:
- Baste along the zipper opening. Prepare a concealed zipper 2 cm longer than the actual opening size.
- Baste the zipper tape to the garment before machine stitching.
- Pull out the center basting threads and open the concealed zipper. Sew the right and left sides of the zipper to the ends of the zipper opening.
Shop These Feet
Zipper Foot, Narrow
Description:
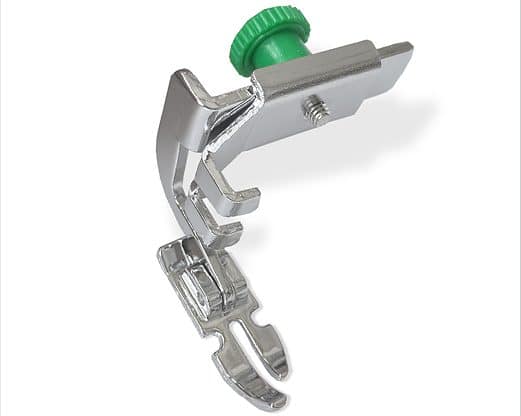
This foot does not ride on top of the zipper cursor, regardless of how the zipper is placed: exposed, centered or lapped. You can pin either to the right or the left of the foot. It is also very useful for sewing very close to thick piping used in interior decoration.
Machine Settings:
- Stitch : Straight stitch, center needle position
- Thread tension :“Auto” or 3-6
- Stitch length : 2-2.5
- Stitch width :0
Tutorial:
- Attach the adjustable zipper foot on the presser bar.
- Slide the zipper foot to adjust its position and tighten the thumb screw on the zipper foot.
- To sew the left side of the zipper, set the zipper foot on the left side of the needle.
- Lower the zipper foot at the end of the zipper so that the needle pierces the fabric next to the fold and zipper tape.
Shop These Feet
Zipper Foot, Standard
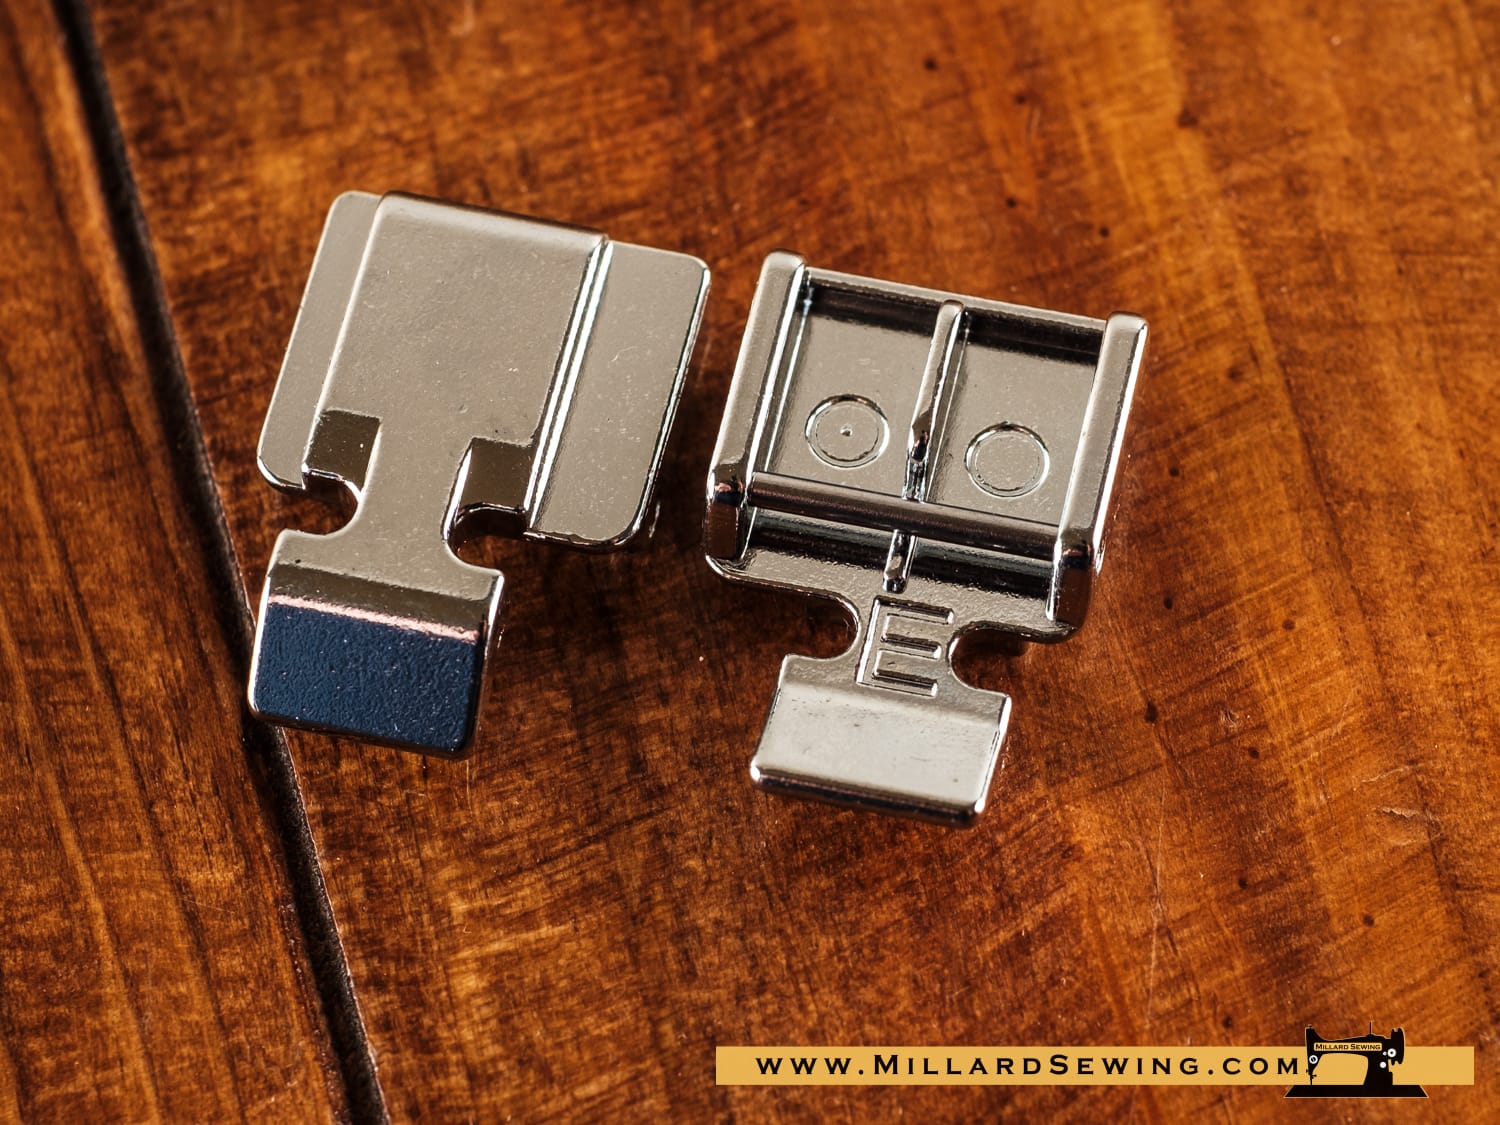
Description:
Using this foot with its side openings, you can sew very close to the zipper. You need simply to adjust the needle position and place the foot correctly to prevent the foot riding on top of the zipper cursor. It is also very useful for sewing very close to thick piping used in interior decoration.
Machine Settings:
- Stitch : Straight stitch
- Thread tension :“Auto” or 1-4
- Stitch length : 1 – 2.5
- Stitch width : Adjust for proper Needle Position
Tutorial:
- To sew the left side of the zipper, set the zipper foot on the left side of the needle.
- Lower the zipper foot at the end of the zipper so that the needle pierces the fabric next to the fold and zipper tape.