I’ve always wanted to learn how to quilt, and today I finally got my feet wet and started on my first quilting project, a table runner for my Singer Art Deco cabinet. I have never quilted anything before, I have cut fabric and pieced them together to help out on other projects, but never have done my own quilting piece. I’m pretty selective about how I want my pattern and fabric to go together.
Not knowing what I really wanted to do, I did a Google search of quilt patterns that would work well with the fabric I already had pictured in my head. I had my eye on the fat quarters Chambray Dots Bundle by Tilda since we brought them into the store. For the backing, I will be using the Dove White by Tilda. This fabric was just too cute of a print, a lot of colors to make this piece pop! In my search, I stumbled across a pattern that would compliment my fabric, it was called Easy Bricks. Now that I have my pattern and fabric picked out, we can get started on the project.
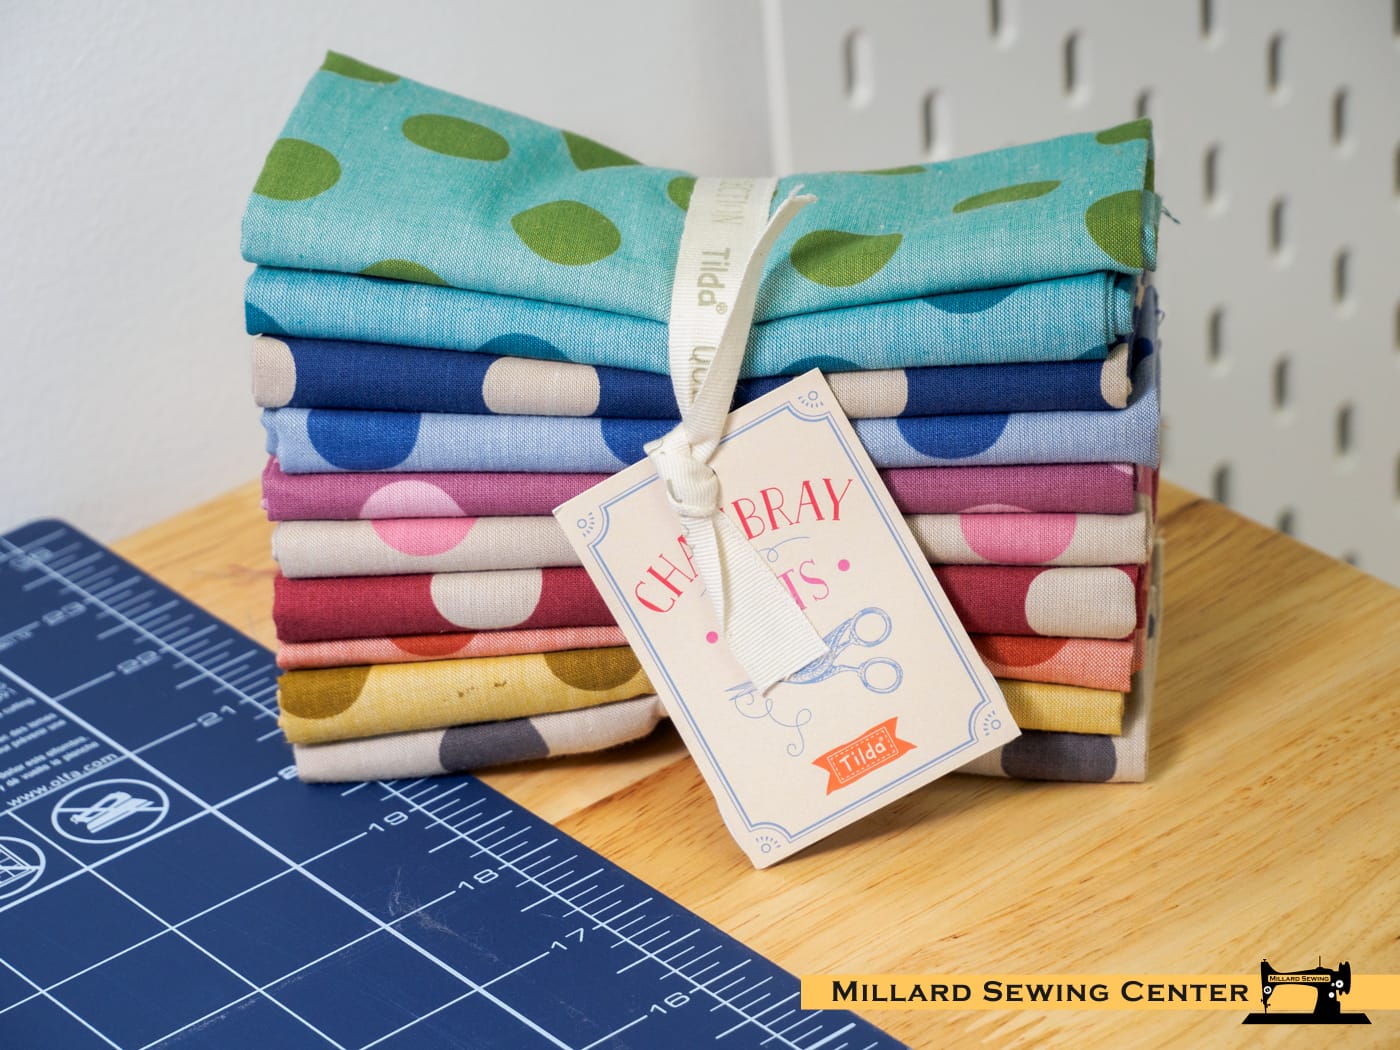

Now that we have the pattern picked out, I was able to figure out the size my blocks needed to be. The Dove White fabric will be used for my 2-1/2″ x 2-1/2″ blocks, allowing a 1/4″ seam allowance on each side. For my “Brick” blocks, I will be using the Chambray Dots by Tilda. The brick blocks are measured at 2-1/2″ x 4-1/2″ with a 1/4″ seam allowance as well. So I will end up with 2″x2″ cream blocks and 2″x4″ chambray dot brick blocks.
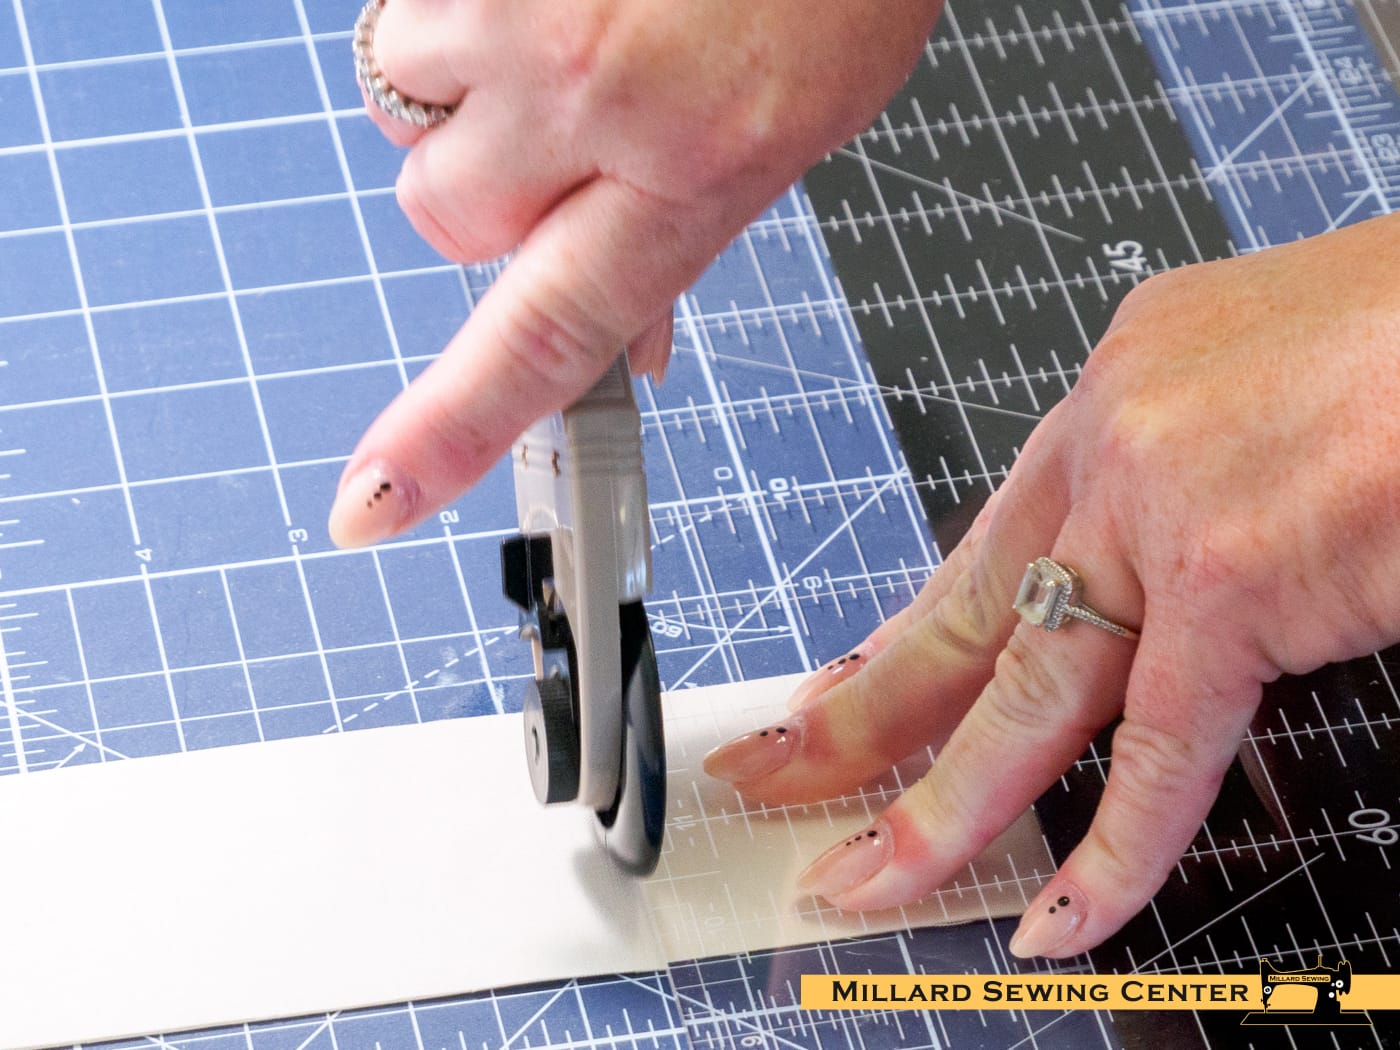
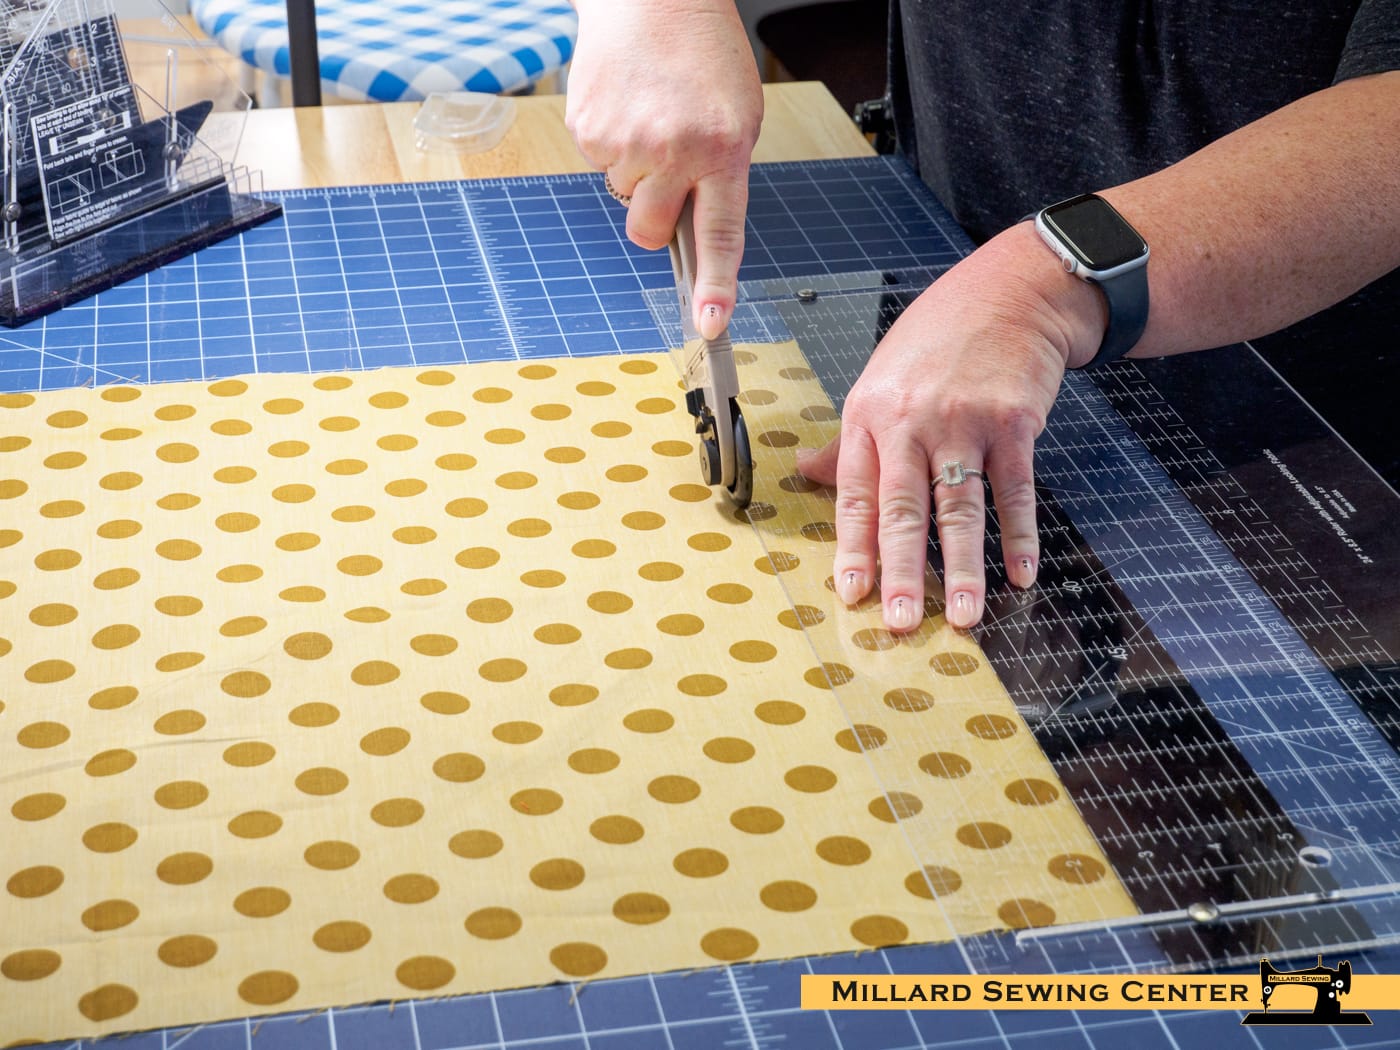
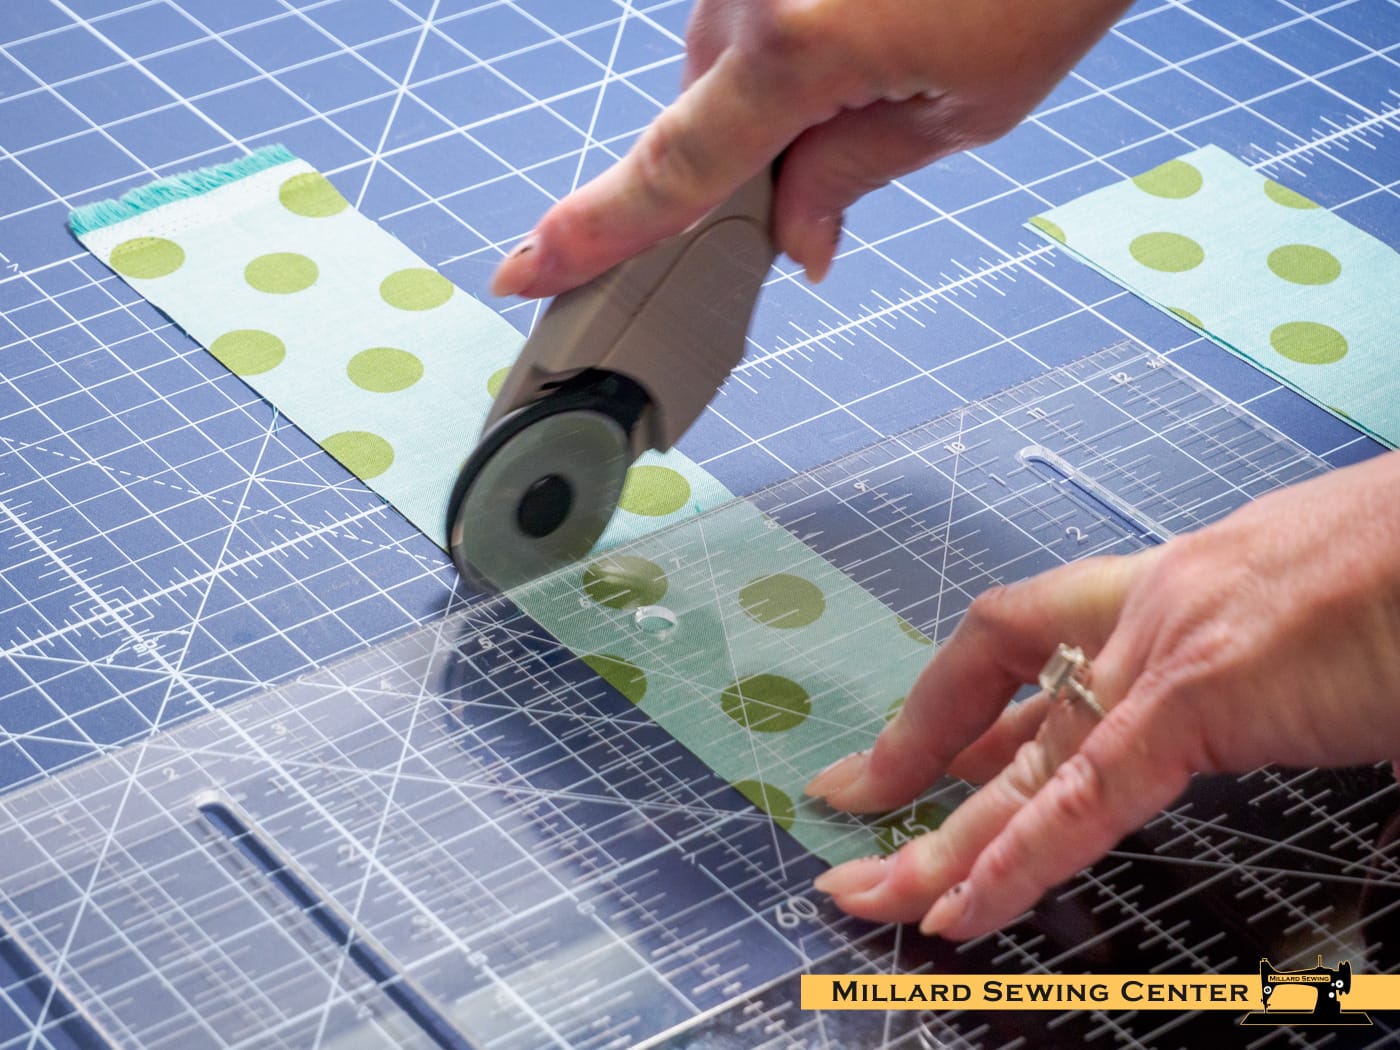
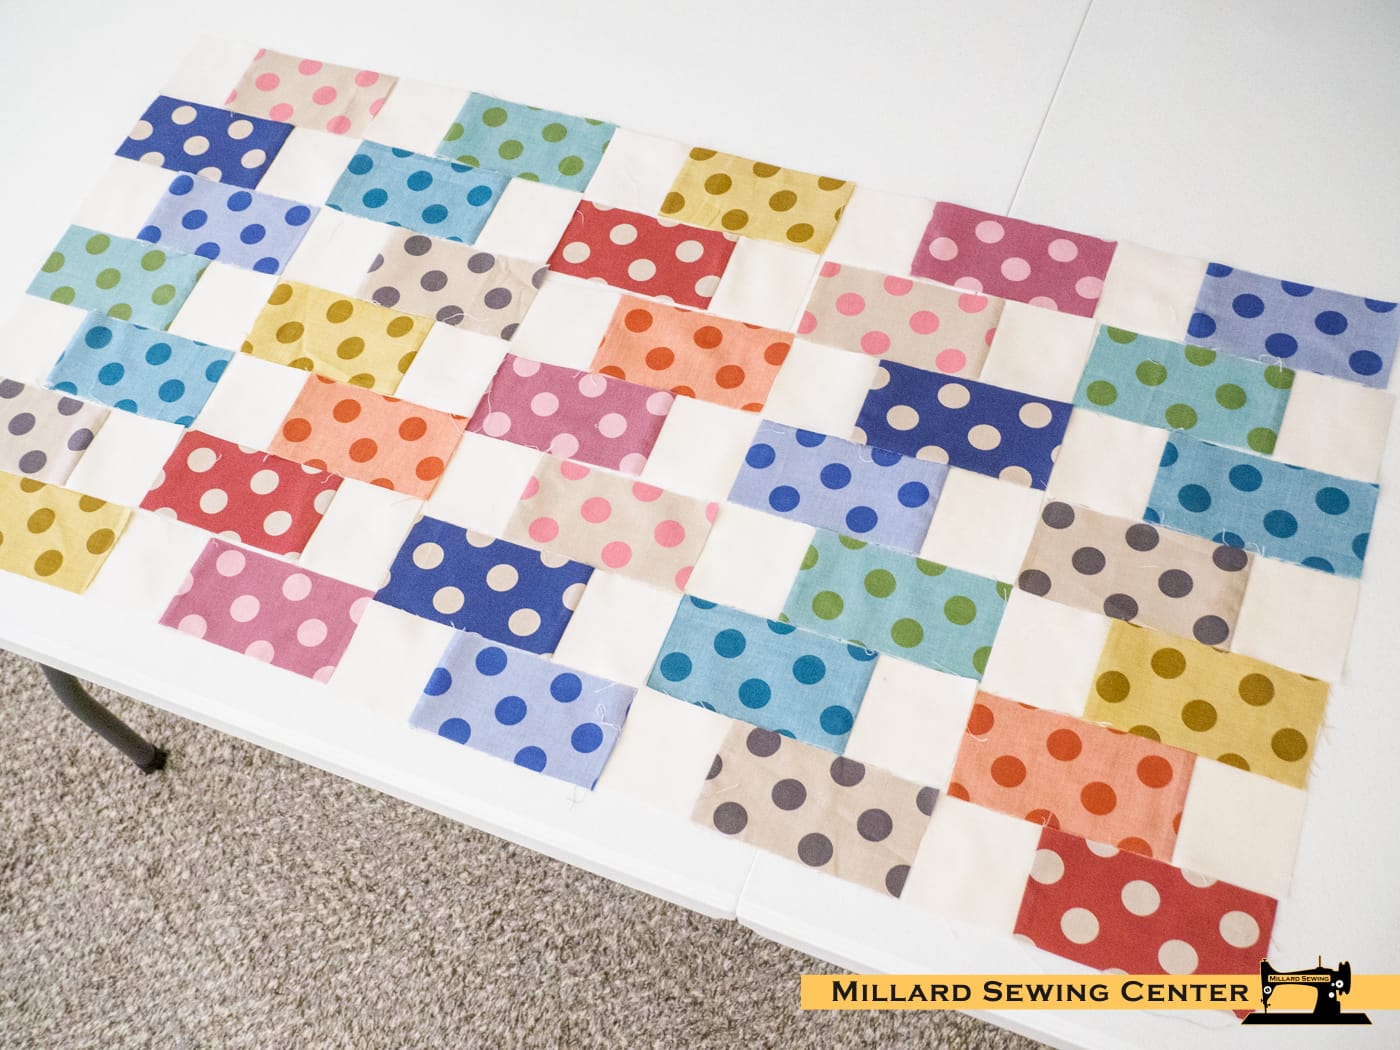
I knew based off my pattern, I needed 30 – 2″x2″ squares. Then I needed to cut 8 – 2-1/2″ x 15″ stripes, one off each fat quarter. Each stripe measured about 15-1/2″ so I was able to get 3 brick pieces out of each stripe. My cabinet top measured at 16″x30″. I knew there needed to be at least 7 rows, 5 chambray dot blocks, with 5 cream blocks.

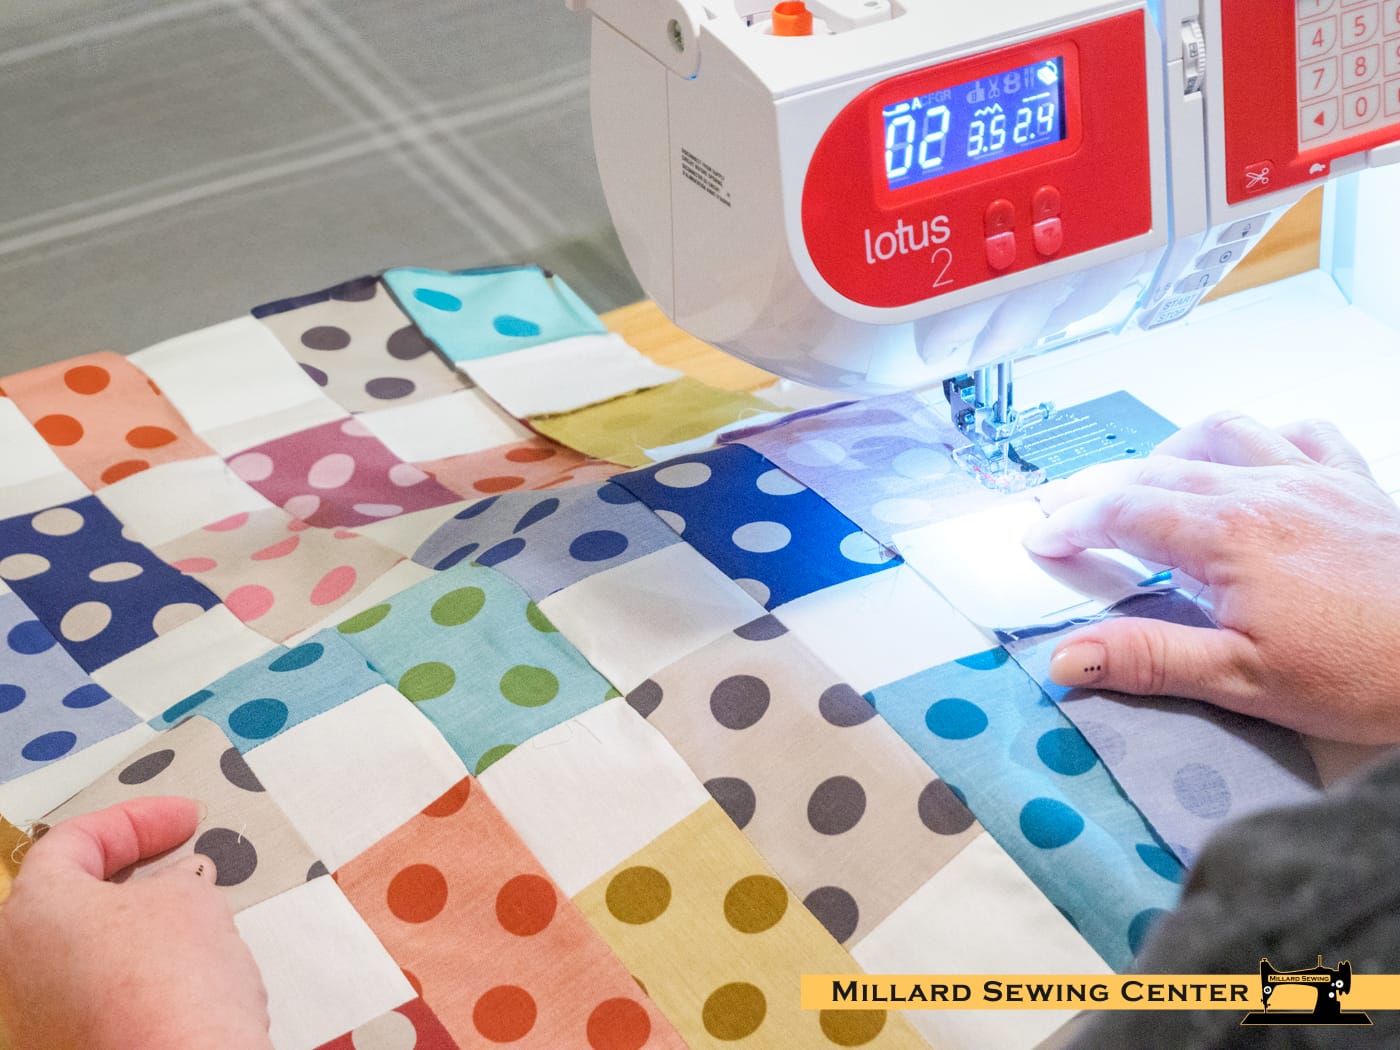
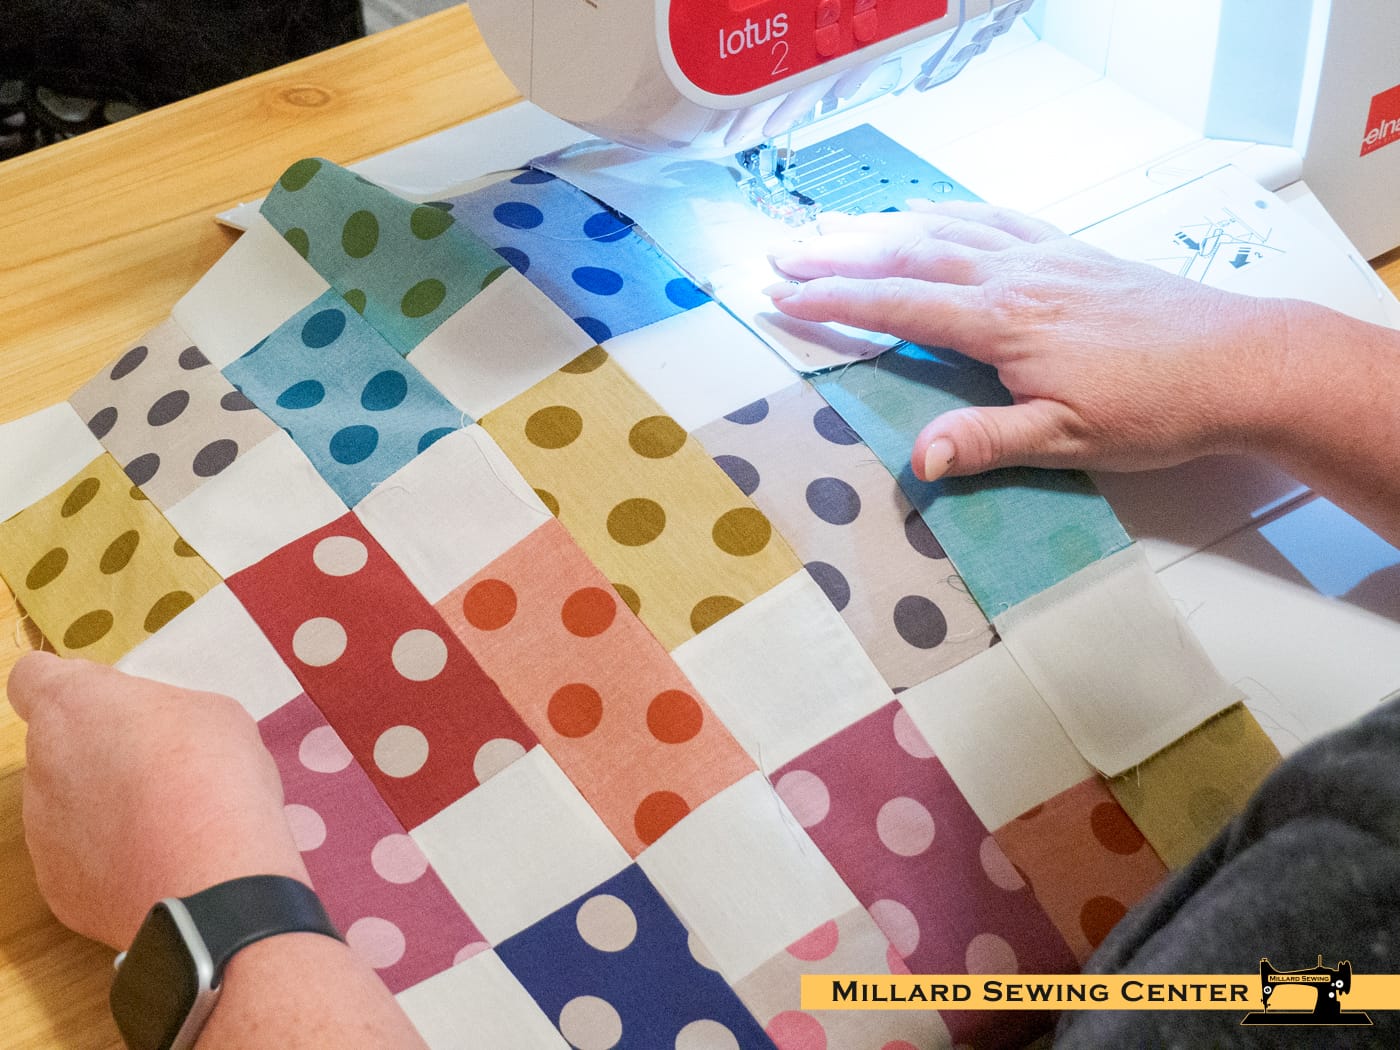
I first did a mock up to make sure this was going to work before moving forward. It all looked good and I had it all laid out so I knew what needed to be sewn together for each row. Now that all the blocks were pressed and laid out, we were ready to start piecing them together! I started with one cream block and sewed it to my chambray dot block. Then took the next block in line and kept adding to my row until each row was done based off my measurements.
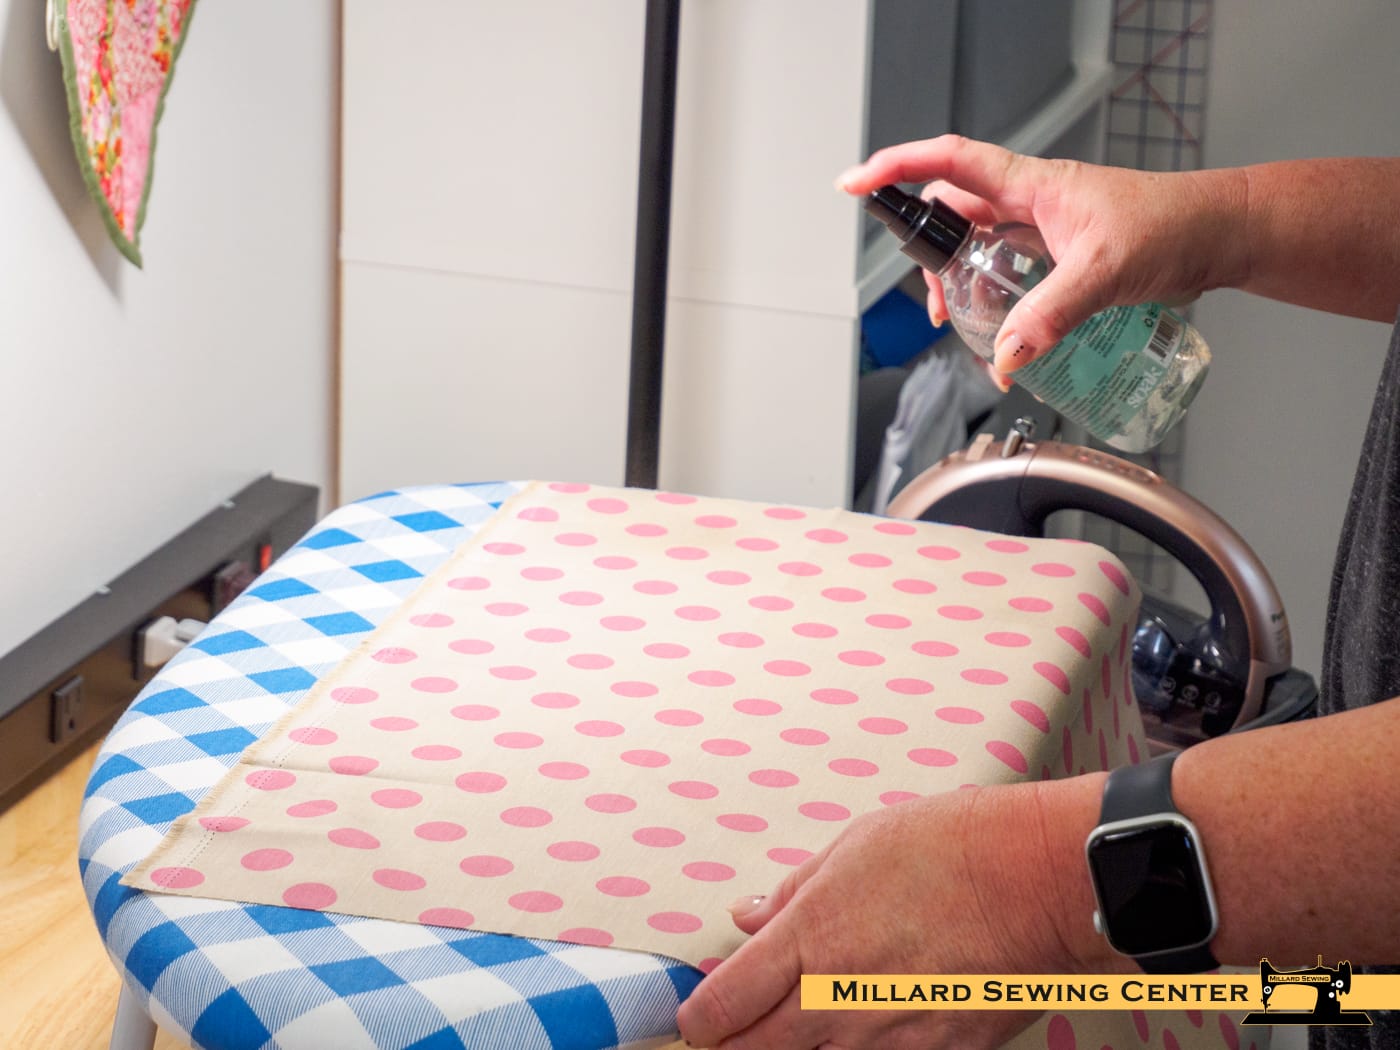
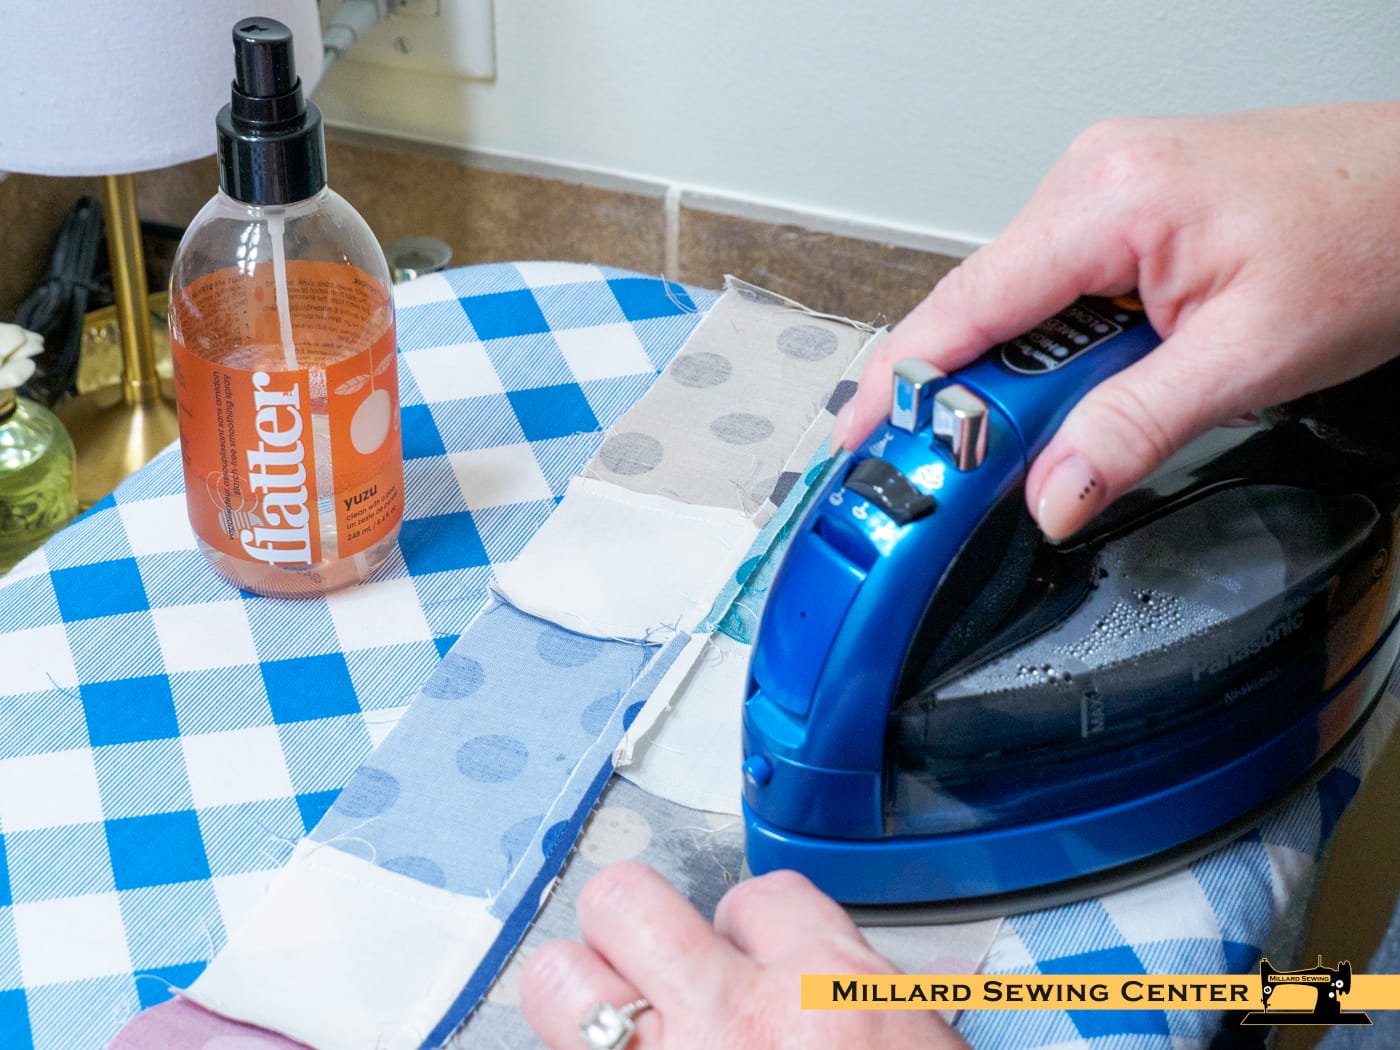
Now that all my rows were complete, I was able to start sewing my rows to one another. After sewing each row together, I would run back to the iron and press each piece so all the seams laid flat, then continue on. To help lay the pieces down as I was pressing them, I used Flatter by Soak, it truly made a huge difference to get the fabric to lay flat and it smells amazing.
Now the top is done, but we’re only 1/3 of the way done. Hoping to get back to this project next week to get it finished up. I need to now pick my batting I want to use, leaning towards the Bamboo batting. I have an idea in mind of what quilt design I’m going to use on the longarm that will compliment my polka dots! To be continued…
Discover more from Millard Sewing Center
Subscribe to get the latest posts sent to your email.
Such cute fabric in yr table runner! Doesn’t look like a beginner project. I’d like to suggest flannel as a batting, if you use it on your table, there is less bulk.
Thanks! I chose the pattern because it said it was a beginner project, it was actually pretty easy considering I had no prior experience to making a quilt. I will definitely look into flannel as the batting, I did not think of that. Thanks for the suggestion!